How to Test Car Battery Health With a Multimeter
Ever had a car crank slow on a cold morning, even though everything looked fine the night before? Knowing how to test car battery health with multimeter readings turns that guesswork into a five-minute diagnosis. You don't need a shop, a lift, or anything more than a $20 meter and a plan.
Here's the catch most guides skip: a multimeter measures voltage, and voltage only tells part of the story. Per SAE J537 testing standards, true battery health shows up under load, not at rest. So this guide walks you through a full decision tree: resting voltage, cranking voltage, and charging voltage.
Let's start with the short version.
Quick Answer
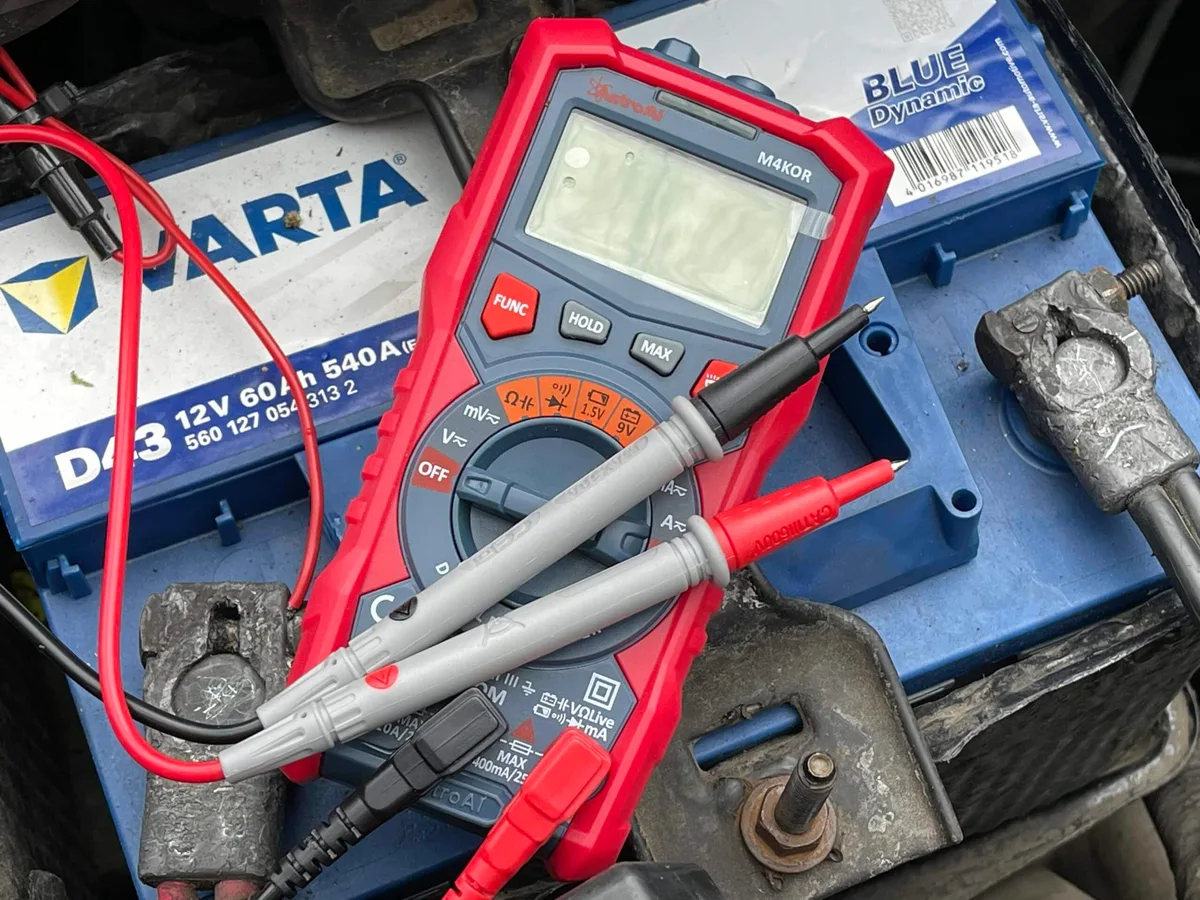
Test car battery health with a multimeter set to 20V DC. Touch the red probe to the positive post, black to negative. A healthy rested battery reads 12.6 volts or higher.
Below 12.0 volts means the battery is discharged or failing. Voltage must stay above 9.6 volts while cranking.
Why Your Battery Can Read "Fine" and Still Leave You Stranded
A multimeter measures state of charge, not capacity. Those are two different things, and mixing them up is the single biggest reason people replace good batteries or trust bad ones.
State of charge tells you how full the tank is right now. Capacity tells you how big the tank still is. A five-year-old battery with sulfated plates can read a perfect 12.6 volts at rest and still collapse the moment the starter demands 200 amps.
If you want the deeper background on how batteries store energy, the short version is that lead plates degrade over time, and voltage alone won't show it.
That's why this workflow uses three separate measurements. Each one answers a different question:
- Resting voltage: Is the battery charged?
- Cranking voltage: Can it deliver power under load?
- Running voltage: Is the alternator recharging it properly?
Run all three and you'll know whether you need a charger, a new battery, or an alternator repair. As of 2026, a replacement battery runs $150 to $250 at most parts stores, so getting this diagnosis right pays for the meter many times over.
Setting Up Your Multimeter the Right Way (and the Dial Mistake That Ruins Everything)
Set the dial to DC volts before the probes ever touch the battery. On the dial, DC volts is the V with a solid line over a dashed line. If you've ever wondered what that marking means, it's simply direct current voltage, which is what every car battery produces.
Here's the exact setup:
- Plug the black lead into the COM jack.
- Plug the red lead into the jack marked VΩ. Not the 10A jack.
- Turn the dial to DC voltage. On a manual-ranging meter, pick the 20V range.
- On an auto-ranging meter, just select V with the DC symbol and let it do the rest.
The classic mistake is landing on AC volts, which sits right next to DC on many dials and gives you nonsense readings. The expensive mistake is testing voltage with the red lead still in the amps jack. That creates a dead short across the battery, and at best you'll be reading up on why the fuse blew afterward.
At worst, you'll melt a lead.
If your meter's dial looks like hieroglyphics, spend two minutes with a guide to every icon on the dial before you start. Any cheap meter in the $15 to $40 range has more than enough accuracy for battery work. You don't need a $300 Fluke for this.
Step 1: Kill the Surface Charge or Your Reading Is Worthless
Surface charge is a temporary voltage boost that sits on the battery plates after driving or charging. It can push a mediocre battery up to 12.8 volts or more, and it fools people constantly. Test right after a drive and you're not measuring the battery.
You're measuring the leftovers.
Here's the decision point:
- If the car has sat overnight (or at least 4 hours), you're good. Test now.
- If you just drove or charged it, turn the headlights on for 30 to 60 seconds. Turn them off, wait two minutes, then test.
- If you just jump-started it, stop. Any reading right now is meaningless. Drive for 20 to 30 minutes, let it sit, then test.
The overnight rest is the gold standard because the plates fully stabilize. The headlight trick is the shortcut, and it's accurate enough for a real diagnosis. Skipping this step entirely is how a dying battery passes a voltage test on Tuesday and strands you on Friday.
One more prep item: make sure the ignition is off, the keys are out of the car, and every accessory is off. Even a dome light pulls the reading down slightly.
Step 2: The Resting Voltage Test, Your First Decision Point
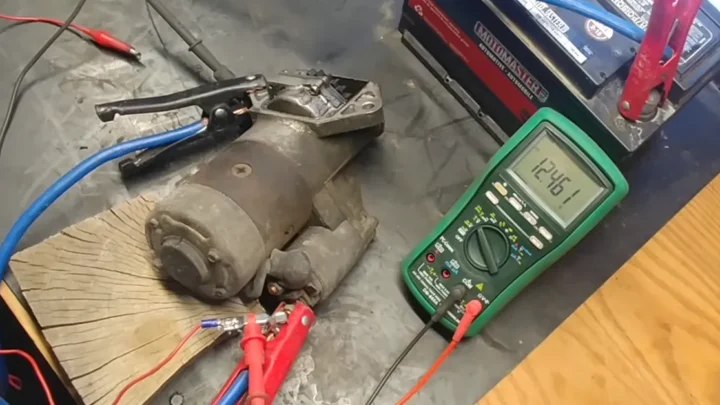
Touch the red probe to the positive post and the black probe to the negative post. Press firmly against the metal posts themselves, not the cable clamps. Probing the clamps can hide a bad connection, and you want the battery's true voltage.
Hold for a few seconds and let the display settle. If you're not sure how to interpret what you see on screen, our primer on making sense of the display covers digits, ranges, and decimal points.
Reading the Results: The 12.6V-to-10.5V Voltage Chart
A fully charged 12V battery doesn't read 12.0 volts. It reads about 12.6 or higher. Each 0.2 volts below that represents roughly a 25% drop in state of charge, based on state-of-charge tables published by Battery Council International.
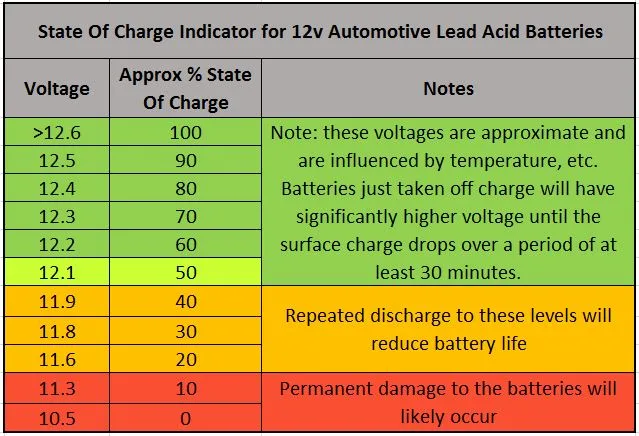
| Resting Voltage | State of Charge | Your Next Move |
|---|---|---|
| 12.6V or higher | 100% | Battery is charged. Go to the cranking test. |
| 12.4V | ~75% | Charge it fully, then retest. |
| 12.2V | ~50% | Charge it fully, then retest. |
| 12.0V | ~25% | Deeply discharged. Charge and watch closely. |
| Below 11.9V | Effectively dead | Charge overnight. If it won't hold 12.4V+, replace it. |
| ~10.5V | Shorted cell | Replace the battery. No charger fixes this. |
Two branches matter most here. If you read 12.6 volts, don't celebrate yet. That only confirms charge, so move straight to the cranking test.
If you read 10.5 volts after a full rest, one of the six internal cells has shorted, and the battery is done regardless of age.
AGM and Stop-Start Batteries Read Differently
AGM batteries run slightly higher resting voltages, typically 12.7 to 12.8 volts when fully charged. If your car has stop-start and you're not sure how sealed mat batteries differ, check the battery label before judging the number. An AGM reading 12.5 volts is more discharged than a flooded battery at the same reading.
Stop-start cars in the US, UK, and EU often carry AGM or the enhanced flooded type instead of standard flooded batteries. The test procedure is identical for all three. Only the interpretation shifts by about 0.1 to 0.2 volts, so know which chemistry you're probing before you condemn it.
Step 3: The Cranking Test, Where Weak Batteries Actually Get Caught
This is the test that exposes what resting voltage hides. Cranking forces the battery to deliver hundreds of amps at once, and a battery with degraded plates can't hold its voltage under that strain. Aggregate shop data backs this up: plenty of batteries that pass a resting test fail here.
You'll need a helper for this one, or a meter with a Min/Max button. Here's the procedure:
- Keep the probes on the battery posts, same as before.
- If your meter has Min/Max, press it now. It'll capture the lowest dip automatically.
- Have your helper crank the engine for a few seconds while you watch the display.
- Note the lowest number the voltage hits during cranking.
Now run the branch logic. If the voltage stayed above 9.6 volts at roughly 70°F, the battery passed. It can deliver real current under load.
If it dipped below 9.6 volts, the battery is weak even if it read a beautiful 12.6 at rest. That gap between resting and cranking performance is exactly how batteries with shrinking cold cranking amp ratings sneak past casual voltage checks.
Two edge cases worth knowing. If the voltage crashes below 7 volts and the starter barely turns, you're looking at either a nearly dead battery or a starter drawing excessive current. And if the car starts instantly, the dip may only last a half second, which is why the Min/Max function earns its keep.
Don't lean over the battery during cranking. Watch the meter from the side.
Step 4: Engine Running, Is It the Battery or the Alternator?
A battery that keeps dying might not be the problem at all. If the alternator isn't recharging it, even a brand-new battery drains within days. This test settles it in thirty seconds.
Start the engine and let it idle. Keep the probes on the battery posts and read the display:
| Running Voltage | What It Means | Your Next Move |
|---|---|---|
| 13.5-14.8V | Charging system is healthy | Alternator is fine. Focus on the battery. |
| 12.4-13.4V | Weak or no charging | Test again at 2,000 RPM. Still low? Alternator or belt issue. |
| Above 15V | Overcharging | Faulty voltage regulator. Fix it fast, it cooks batteries. |
One modern wrinkle: many cars built in the last decade use smart charging systems that deliberately drop voltage at idle to save fuel. If you see 12.8 to 13.2 volts at idle on a newer car, turn on the headlights and rear defroster. A healthy smart system will respond by raising output.
A dead alternator won't.
Here's the if/then that saves people real money. If your battery keeps going flat but the running voltage sits in that 13.5-14.8V window, the alternator is doing its job. The battery itself, or a parasitic drain, is your culprit.
If running voltage is low even at higher RPM, replacing the battery would've been a $200 mistake. The alternator was starving it the whole time.
The Recharge-and-Retest Loop: How to Rule Out a Simple Discharge
Never condemn a battery from a single low reading. A battery at 12.2 volts might be dying, or it might just be drained from short trips and cold weather. The recharge-and-retest loop is how you tell the difference.
The loop works like this:
- Charge the battery fully with a proper charger, not just a long drive. A smart maintainer works overnight.
- Disconnect the charger and let the battery rest 4 or more hours. Overnight is better.
- Measure resting voltage again.
- Repeat the cranking test from Step 3.
Then branch on the result. If it now reads 12.6 volts or higher and holds above 9.6 during cranking, the battery was simply discharged. Look at your driving pattern.
Lots of five-minute trips never give the alternator time to refill what starting consumed.
If it charges up but sags back to 12.2 or lower within a day or two with no load attached, the battery is self-discharging internally. That's sulfation or plate damage, and it's a replacement, not a rescue. If it won't climb past roughly 12.4 volts even straight off the charger, same verdict.
Age matters in this judgment call. Most batteries last 3 to 5 years, and heat shortens that considerably. If your battery is four years old and failing the retest loop, don't chase miracle fixes.
Our breakdown of typical replacement timelines shows why batteries past that window rarely recover meaningful capacity.
Battery Drains Overnight? Running a Parasitic Draw Test
If a healthy, fully charged battery keeps dying after the car sits, something is drinking current while the car sleeps. That's a parasitic draw, and your multimeter can catch it. Fair warning: this test is more involved than the voltage checks.
The concept is simple. You put the meter in series with the negative battery cable so all sleeping current flows through it. The setup:
- Turn everything off, remove the key, and let the car sit with doors closed.
- Disconnect the negative battery cable.
- Move the red lead to the high-amp jack, the one built for measuring current directly, and set the dial to amps.
- Connect one probe to the negative cable and the other to the negative post.
- Wait 30 to 45 minutes. Modern cars need time for modules to go to sleep.
A normal reading on most modern vehicles is under 50 milliamps once everything sleeps. Somewhere in the 25 to 85 mA range shows up depending on the car, and older vehicles with fewer computers often sit below 30 mA. If you're seeing 200 mA or more, you've got a drain worth hunting.
To find the culprit, pull fuses one at a time while watching the meter. When the reading drops, you've found the circuit. Common offenders include aftermarket stereos, glovebox lights, trunk lights, and stuck door-lock modules.
One caution: never crank the engine or switch to voltage mode while the meter is wired in series. That's a guaranteed blown meter fuse, and possibly worse.
The Full Decision Tree: Match Your Readings to Your Next Move
Here's the entire workflow condensed into one reference. Start at the top and follow your readings down.
| Your Reading | Condition | Verdict |
|---|---|---|
| 12.6V+ rested, stays above 9.6V cranking | Charged and strong | Battery is healthy. You're done. |
| 12.6V+ rested, drops below 9.6V cranking | Charged but weak | Battery is losing capacity. Plan replacement. |
| 12.0-12.4V rested | Discharged, cause unknown | Run the recharge-and-retest loop. |
| Recovers after charging, holds voltage | Was just drained | Check driving habits, then test for drains. |
| Recovers, then sags within days | Internal self-discharge | Replace the battery. |
| Won't charge past ~12.4V | Sulfated or worn out | Replace the battery. |
| ~10.5V rested | Shorted cell | Replace immediately. Charging won't help. |
| Running voltage below 13.5V at RPM | Charging failure | Alternator or belt, not the battery. |
| Running voltage above 15V | Overcharging | Replace the voltage regulator or alternator. |
| Healthy battery, dies overnight | Parasitic draw | Run the draw test and pull fuses to isolate. |
Print this, snap a photo of it, whatever works. The pattern to internalize is simple. Resting voltage sorts charged from discharged.

Similar Posts