Why Did My Multimeter Fuse Blow? Common Causes
So your meter went quiet on the amps setting, and now you're asking why did my multimeter fuse blow. Nine times out of ten, it wasn't a faulty meter. It was the leads, the dial setting, or the current you pushed through it.
The fuse did exactly its job. It broke before you got hurt.
Every quality meter is built to the IEC 61010 safety standard, and its fuses carry real weight. A typical milliamp-range fuse is rated around 315 to 500mA, while the high-current jack runs a 10A or 11A ceramic fuse. Push past that limit and the element inside vaporizes in a flash.
Here's what actually causes it, and how to stop it happening again.
Quick Answer
Your multimeter fuse blew because current exceeded its rating. The usual cause is leaving the leads in the amp jack. Then you touched a live voltage source.
That creates a dead short straight through the meter. The fuse sacrifices itself to stop a dangerous arc.
What a Multimeter Fuse Actually Does (and Why It Sacrifices Itself)
A multimeter fuse is a thin wire element that sits in the current-measuring path. When you measure amps, all that current flows through the meter's internal shunt resistor. The fuse guards that path.
If too much current tries to pass, the wire melts and opens the circuit.
Think of it as a deliberate weak link. The meter maker would rather you replace a cheap fuse than replace the whole tool or, worse, get burned. That's the whole point of the design.
Here's why it matters so much. At a wall outlet or a car battery, the available fault current can be huge, sometimes thousands of amps. If you accidentally short that through your meter, the fuse has to break the circuit cleanly and contain the energy.
A good ceramic fuse does that. A cheap glass one can shatter or arc.
Two ratings do the heavy lifting:
- Current rating: how many amps the fuse allows before it blows (like 315mA or 11A).
- Breaking capacity: the maximum fault current the fuse can safely interrupt (often 10kA or higher).
Miss either one and the fuse can't protect you the way it should. As of 2026, reputable brands still spec sand-filled ceramic fuses for exactly this reason.
The Number One Cause: Leads Left in the Amp Jack While Measuring Voltage
The single most common reason your fuse blew is a lead in the wrong jack. You measured current earlier, left the red probe in the 10A or mA jack, then went to check a voltage. The moment you touched both probes across a live source, you created a dead short.

Here's the mechanics. The current jacks connect through a very low resistance shunt, close to a straight wire. Voltage measurement expects high resistance.
So when the meter is wired for amps but placed across a battery or outlet, current pours through with almost nothing to limit it. The fuse blows instantly.
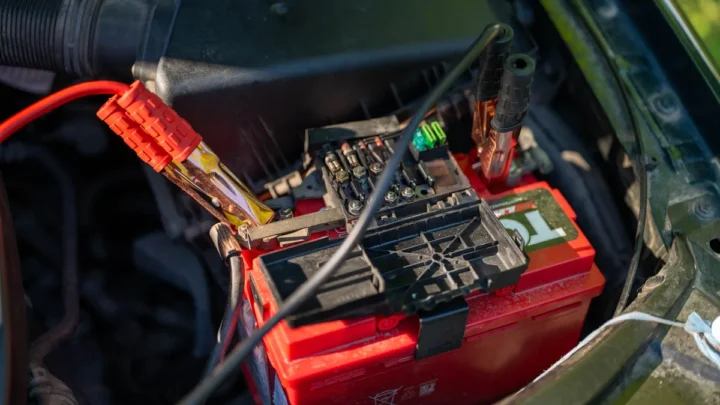
You'll see this constantly in automotive work. Someone runs a parasitic draw check, leaves the lead in the amp jack, then probes the battery posts to read voltage. Bang, blown fuse.
The fix is a habit, not a part.
- Always return the red lead to the VΩ jack after measuring current.
- Confirm both the jack and the dial before every probe touch.
- Treat the amp jacks as live only when you're in series with a broken circuit.
If you switch between amps and volts a lot, that jack discipline saves you a drawer full of fuses.
The Other Usual Suspects: Amp Mode, Overcurrent, and Wrong Ranges
If your leads were in the right place, the cause is usually one of these three. Each has a clear tell, so match your situation to the branch below.
Set to Amps but Connected Across a Live Source
This is the dial version of the jack mistake. The meter reads amps, but you clipped it across a voltage source instead of wiring it in series. Current measurement only works when the meter becomes part of the circuit, with the current flowing through it.
Place it in parallel with a battery and you've built a short. The fuse takes the hit.
The rule is simple. To measure current, break the circuit and put the meter in the gap. Never lay it across two live points on the amps setting.
Drawing More Current Than the Fuse Is Rated For
Sometimes you did everything right and still blew it. You just asked for more current than the fuse allows. Try to read 5A through the milliamp jack, rated near 400mA, and it blows on contact.
Motors, headlights, and inrush loads catch people out here. A load that idles at 200mA can spike well past an amp the instant it switches on. If you're unsure of the draw, start on the high-current 10A jack, then move down only once you know the number is small.
Probing Volts While Still in Continuity or Resistance Mode
This one usually spares the fuse but not always. Resistance and continuity modes send a small current out of the meter to test a component. Touch those probes to a live circuit and you can overload the input protection.
On some meters that stresses the same fuse or the protection circuit behind it.
The habit that prevents it is the same one that fixes the amp problem. Set the dial for what you're about to measure, then touch the probes. If you're brushing up on the basics, our guide on choosing the right dial position walks through it plainly.
Trace It Back: A Quick Decision Flow to Find Your Exact Cause
Work through this the way a tech would. Start with what you were doing at the exact moment it blew, then follow the branch.
| What you were doing | Most likely cause | The fix |
|---|---|---|
| Reading voltage right after reading amps | Lead left in the amp jack | Move red lead back to VΩ jack |
| Meter set to amps, clipped across a battery | Amps in parallel (dead short) | Wire the meter in series instead |
| Measuring amps on the mA jack, big load | Overcurrent for that fuse rating | Use the 10A jack first |
| Continuity or ohms on a live circuit | Input overload | De-energize before testing resistance |
| Fuse blows again on a fresh fuse | Technique error not yet fixed | Recheck jack, dial, and connection method |
Read it as if/then logic. If you were measuring voltage and the reading died, check your jacks first, because that's the top offender. If you were genuinely in series and it still blew, you exceeded the fuse rating, so step up to the high-current jack.
The point is to fix the cause, not just the symptom. A new fuse in a meter you're still using wrong will blow just as fast. When you're measuring live automotive current, the same care that keeps your readings accurate also keeps your fuse intact.
Manufacturers like Fluke publish the exact fuse specs and safety categories for each model, so match any replacement to that documentation before you power up again.
How to Confirm the Fuse Is Really Blown (Not a Dead Meter)
Before you crack open the case, make sure the fuse is the actual culprit. A blown fuse and a dead meter look identical from the outside. Two quick checks tell them apart in under a minute.
The Continuity Self-Test
A good fuse reads near zero ohms. A blown one reads open. If your meter still powers on, set it to resistance or continuity, then touch the two probes together.
You should hear a beep and see close to 0Ω.
Now open the meter and touch one probe to each end of the fuse. A healthy fuse beeps. Silence or an OL reading means the element is broken.
That confirms it, no guessing.
Reading OL or Zero on Current
If the meter powers up and reads voltage fine but shows nothing on amps, the current fuse is almost certainly gone. Voltage mode doesn't use that fuse, so a working voltage reading with a dead amps reading points straight at it. You'll typically see 0.00 or OL on the current setting with a real load connected.
That split behavior is the giveaway.
Inside the Fuse: Ratings, Sizes, and Why HRC Ceramic Beats Glass
Not all fuses are equal, and the wrong type can turn a small mistake into a burn. The safe choice is a High Rupturing Capacity (HRC) ceramic fuse, filled with sand to quench an arc. A clear glass fuse of the same amp rating can shatter or keep arcing under a heavy fault.

Here's what actually matters when you read a fuse's markings:
| Spec | What it means | Typical value |
|---|---|---|
| Current rating | Amps before it blows | 315mA to 11A |
| Voltage rating | Max safe voltage | 250V to 1000V |
| Breaking capacity | Fault current it can interrupt | 10kA and up |
| Speed | How fast it opens | Fast-blow (F) |
| Size | Physical body | 6.3×32mm or 10.3×38mm |
The two ratings people skip are breaking capacity and voltage. A 500mA glass fuse might match the current, but if it can only interrupt a few hundred amps, it won't contain a real short. That's the difference between a quiet swap and an arc flash in your hand.
Choosing the Right Replacement Fuse Without Guessing
Match the replacement to the exact spec printed on the old fuse or in the manual. Never eyeball it. A fuse that fits the holder can still be dangerously underrated.
Matching Current, Voltage, Speed, and Breaking Capacity
Line up all four numbers, not just the amps. Same current rating, same or higher voltage rating, fast-blow, and equal breaking capacity. If the old fuse says 440mA/1000V with a 10kA interrupt, your replacement must meet or beat every one of those.
A common trap is buying a 250V glass fuse because it shares the amp rating. It'll blow in normal use, but it can't protect you during a genuine fault. Skip it.
OEM vs. Generic and What You Actually Pay
Genuine manufacturer fuses cost more but come rated correctly for the meter's safety category. Generic ceramic fuses can work if the specs match exactly, though quality varies.
| Option | Rough cost | Best for |
|---|---|---|
| OEM branded fuse | $10 to $30 | CAT III/IV meters, live mains work |
| Quality generic ceramic | $1 to $5 | Bench and low-voltage use |
| Glass fuse | Under $1 | Not recommended for meters |
For anything you'll use near mains voltage or a car battery, spend the extra few dollars on the rated part. It's cheap insurance.
Step-by-Step: Replacing the Fuse and Testing Your Fix
Swapping the fuse takes about five minutes. Work on a de-energized meter, leads unplugged, and you're safe.
- Unplug both test leads and switch the meter off.
- Open the back case or battery door. Remove the screws.
- Note the fuse position and orientation before pulling it.
- Gently lift the blown fuse from its clips.
- Confirm the rating printed on it, then match your replacement.
- Seat the new fuse firmly in the clips.
- Close the case and reinstall the screws.
Now test the fix. Set the meter to amps, put it in series with a small known load like an LED and resistor, and check for a sensible reading. If numbers appear, you're back in business.
The same series method applies whether you're on the bench or reading current on a vehicle.
Why the New Fuse Blows Again Right Away
If a fresh fuse blows the second you use the meter, the cause was never the fuse. It's your setup. The fault that killed the first one is still there.
Run through the short list before you waste another fuse:

Similar Posts