How to Test a Car Battery After Charging: Easy Guide
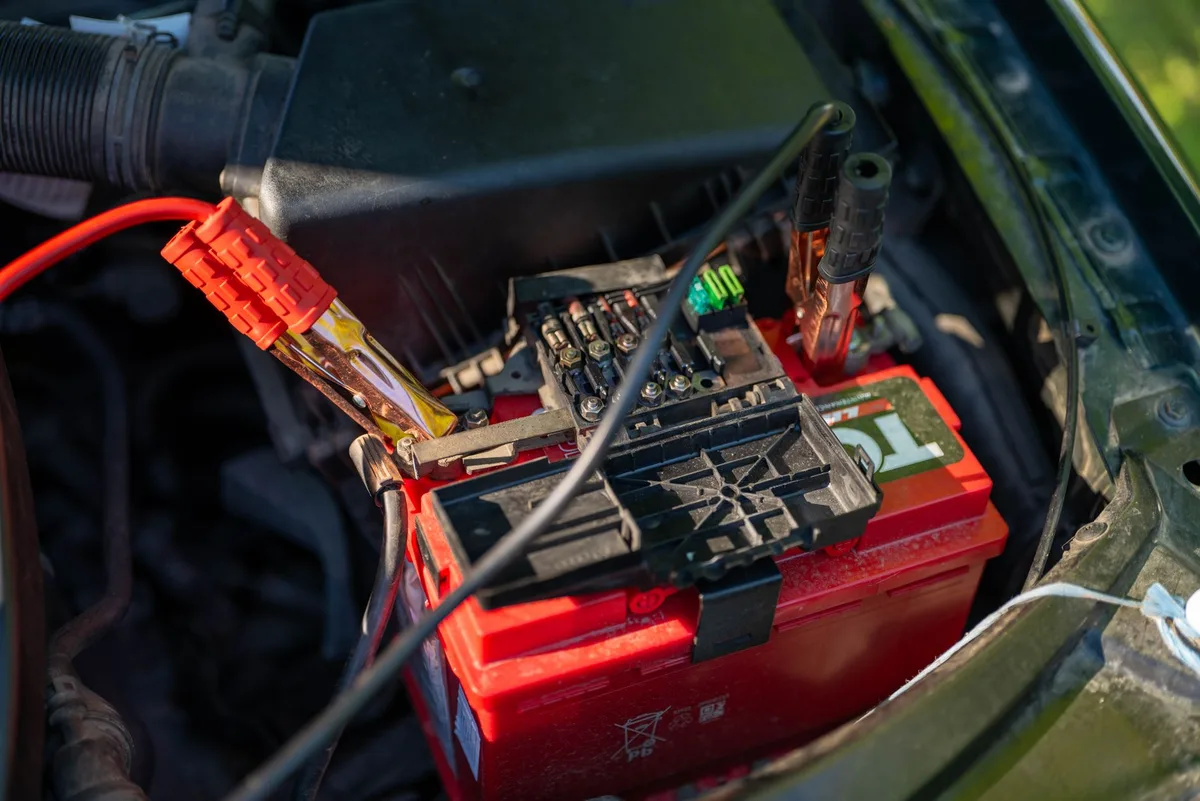
You charged the battery overnight, and now you want to know if it actually took the charge or if you're about to get stranded again. Learning how to test a car battery after charging is the only way to know for sure, and it takes about five minutes with the right tool. A charger's green light tells you the charging cycle finished.
It says nothing about whether the battery is genuinely healthy.
Here's the catch most people miss. A freshly charged battery holds a temporary "surface charge" that inflates the voltage reading. Per SAE J537 testing standards, true battery health is measured by how it performs under load, not by a resting number alone.
So we'll walk through both tests, step by step, and show you exactly what your numbers mean.
Quick Answer
Let the battery rest one to two hours after charging. Set a digital multimeter to 20V DC. Touch the red probe to the positive terminal and black to negative.
A healthy, fully charged 12V battery reads 12.6V to 12.8V. Then run a load test. If voltage stays above 9.6V while cranking, the battery is good.
Why a Battery Can Look Charged and Still Be Dead
A battery can show a perfect 12.7V and still fail the moment you turn the key. That gap between "looks charged" and "actually works" trips up nearly everyone.
Voltage measures state of charge, which is how full the battery is. It doesn't measure state of health, which is how much usable power the battery can still deliver. An old battery with a bad cell or heavy sulfation can fill up to a normal voltage.
It just can't hold that energy under real demand.
Think of it like a phone battery that reads 100% but dies in twenty minutes. The number lies because capacity has faded. That's why a resting voltage check is only step one.
The load test is what separates a good battery from a dying one.
What You'll Need Before You Test
You don't need a shop full of gear. A basic multimeter handles most of the job, and a load tester adds the final confirmation.
| Tool | What it does | Needed? |
|---|---|---|
| Digital multimeter | Reads resting and cranking voltage | Essential |
| Battery load tester | Applies a load to check real capacity | Recommended |
| Hydrometer or refractometer | Reads specific gravity (flooded batteries only) | Optional |
| Safety glasses and gloves | Protect against acid and gas | Essential |
| Baking soda and a wire brush | Clean corroded terminals first | Helpful |
Clean terminals matter more than folks think. Corrosion adds resistance and skews every reading you take. If you're rusty on meter basics, you can set the right meter dial position in under a minute.
The Surface Charge Trap (Read This First)
Surface charge is the single biggest reason people misread a battery. Right after charging, the plates hold extra voltage that isn't real, stored capacity. It fades on its own, but it'll fool you if you test too soon.
Skip this step and a tired battery can read 12.8V when its true resting voltage is closer to 12.3V. That's the difference between "great" and "start shopping."
How Long to Let the Battery Rest
Wait at least one to two hours after unplugging the charger. For the most accurate number, let it sit overnight, up to 12 hours. If the battery is your daily driver and you can't wait, use the headlight trick below to speed things up.
The Headlight Trick to Clear Surface Charge
Turn the headlights on for one to two minutes with the engine off. This bleeds off the surface charge fast. Switch the lights off, wait a couple of minutes, then take your reading.
Now the voltage reflects real state of charge instead of a temporary spike.
Reading Resting Voltage With a Multimeter
Once the surface charge is gone, the multimeter test is quick and reliable. A digital meter is more accurate than the analog kind for this, and it costs very little.

Setting the Meter and Connecting the Probes
Follow these steps in order:
- Turn off the engine and all accessories.
- Set the multimeter to 20V DC. This range covers a 12V battery cleanly.
- Touch the red (positive) probe to the positive terminal, marked with a plus.
- Touch the black (negative) probe to the negative terminal.
- Read the number on the display and hold the probes steady.
If the reading shows a minus sign, your probes are just reversed. Swap them and the number turns positive. For a fuller walkthrough, our step-by-step on checking voltage at the terminals covers every detail.
Beginners often find the full meter method helpful too.
The 12V Battery Voltage Chart
Match your reading to this chart. These figures assume a rested battery at around 70°F.
| Resting voltage | State of charge |
|---|---|
| 12.6V – 12.8V | 100% (fully charged) |
| 12.4V | 75% |
| 12.2V | 50% |
| 12.0V | 25% |
| 11.9V or below | Discharged / dead |
What Your Voltage Reading Actually Means
Your number now tells a story, and the branch you follow depends on it. Here's the simple logic.
If you read 12.6V or higher, the charge held and the battery is fully topped up. Move on to the load test to confirm health. If you read 12.4V, the battery is only at about 75%, so the charge didn't fully complete.
Recharge it and test again.
If you read 12.2V or lower after a full charge, that's a warning sign. A battery that won't climb past 12.2V despite hours on the charger is likely worn out or has a bad cell. And if it reads 10.5V or below, one cell has probably shorted, which usually means replacement.
One more thing worth checking: the reading should be stable. If the number drifts downward as you watch, the battery may be self-discharging from an internal fault. A steady voltage is a good sign.
A sinking one isn't.
Why Resting Voltage Isn't the Whole Story
A resting voltage test tells you how full the battery is, not how strong it is. Two batteries can both read 12.6V. One cranks your engine fine.
The other collapses under the first real demand.
The difference is capacity. As a battery ages, its plates sulfate and its usable capacity shrinks. Voltage can still climb to normal because there's less "tank" to fill.
That's exactly why a battery passes the multimeter check but fails the second you ask it to work.
State of Charge vs. State of Health
State of charge is how much energy is stored right now. State of health is how much the battery can still hold and deliver compared to when it was new.
Think of it this way. Charge is the fuel level. Health is the size of the tank.
A voltmeter reads the fuel. Only a load test reveals the tank has shrunk. If your battery keeps dying despite good voltage, faded health is usually the reason.
Load Testing: The Test That Really Counts
A load test applies a heavy draw and watches how the voltage holds. This is the test that catches a weak battery a voltmeter misses. If your battery reads full but you still doubt it, this is your answer.

The Half-CCA Load Test
A dedicated load tester applies a load equal to half the battery's Cold Cranking Amps rating for 10 to 15 seconds. Find the CCA number printed on the battery label. A 600 CCA battery gets tested at roughly 300 amps.
Watch the voltage during the test. Here's the pass line:
- Voltage stays above 9.6V at 70°F: the battery is healthy.
- Voltage sags below 9.6V: the battery is weak and likely needs replacing.
- Voltage crashes fast toward 0: a dead cell is the usual culprit.
Our deeper walkthrough on applying a load with your meter covers the readings in more detail.
The Cranking-Voltage Test You Can Do Solo
No load tester? You can use the starter itself as the load. Set your multimeter to 20V DC and clip it to the terminals.
Have someone crank the engine for a couple of seconds while you watch the display.
Voltage will dip as the starter pulls power. A healthy battery holds above 9.6V during the crank. If it plunges into the 7V or 8V range, the battery can't deliver cranking power.
This trick also works without any meter at all, and our guide on checking a battery by feel and function shows how.
Checking Specific Gravity on Flooded Batteries
Specific gravity measures the strength of the electrolyte, and it's the most direct health check for flooded lead-acid batteries. It only works on batteries with removable cell caps. Sealed AGM and EFB batteries can't be tested this way.

Draw electrolyte from each cell with a hydrometer and read the float. Here's what the numbers mean at full charge:
| Specific gravity | State of charge |
|---|---|
| 1.265 – 1.275 | 100% charged |
| 1.225 | 75% |
| 1.190 | 50% |
| 1.120 | Discharged |
The real tell is the spread between cells. If readings vary by more than 0.050 between the highest and lowest cell, that battery has a weak or failing cell. All cells should read close to each other.
A single low cell drags the whole battery down.
If you're testing a sealed unit instead, the approach is different. Our guide on checking a sealed AGM unit covers those.
Multimeter vs. Load Tester vs. Conductance Tester
Which tool should you trust? It depends on what you're trying to learn and how much you want to spend. Each one answers a different question.
| Tool | What it measures | Best for |
|---|---|---|
| Multimeter | Voltage (state of charge) | Quick daily checks, confirming a charge held |
| Load tester | Real capacity under load | Confirming battery health before a trip |
| Conductance tester | Internal resistance, estimated CCA | Fast, safe testing without a heavy draw |
A multimeter is the cheapest and best for anyone who just wants to confirm the charger did its job. A carbon pile load tester gives the most realistic result because it mimics starting the engine. It also gets hot and needs care.
A conductance (electronic) tester is what most auto parts counters use for their free checks. It's fast, safe, and gives an estimated CCA. For most home users, a multimeter plus the cranking test covers 90% of what you need.
Adjusting Your Readings for Temperature
Temperature changes voltage, and cold makes a battery look worse than it is. Every reading in this article assumes about 70°F. In winter, your numbers will shift, so don't panic over a slightly low reading in the cold.
As a rule of thumb, subtract roughly 0.01V per cell for every few degrees below 70°F. There are six cells, so the effect adds up across a freezing morning. A battery reading 12.4V at 30°F may be perfectly fine.
Cold also cuts available cranking power. A battery that delivers full CCA at 80°F may offer only 60% to 70% of that at 0°F. That's why a marginal battery starts fine in summer, then quits on the first hard frost.
If you can, let the battery warm to room temperature before a final judgment.
Common Testing Mistakes That Give False Results
Most bad readings come down to a handful of avoidable errors. Get these right and your numbers actually mean something.
- Testing too soon. Surface charge inflates the reading if you skip the rest period.
- Dirty or loose terminals. Corrosion adds resistance and drops the voltage you see.
- Trusting voltage alone. A full reading with no load test hides a weak battery.
- Ignoring temperature. A cold battery reads low even when it's healthy.
- Reversed probes without noticing. A minus sign means swap the leads, nothing more.
One more trap catches people off guard. A battery that tests fine but dies overnight usually has a parasitic drain, not a bad battery. If that's your situation, our guide on hunting down a phantom drain points you the right way.
Battery or Alternator? How to Tell the Difference
If your battery keeps dying after a good charge, the alternator may be the real problem. The fix is a two-part voltage check that takes a minute.
Start with the engine off and read resting voltage, which should sit near 12.6V. Now start the engine and read again. With the alternator working, you should see 13.7V to 14.7V at the terminals.
Here's the logic:
- Engine-off good, engine-on jumps to 13.7V+: charging system is fine.
- Engine-on stays near 12.6V or lower: the alternator isn't charging.
- Engine-on climbs above 15V: possible overcharging, which cooks a battery.
A charging fault will drain even a brand-new battery. If your running voltage looks off, our walkthrough on checking the charging output helps, and a failing diode shows up in the diode test method.
Safety Rules When Testing After a Charge
A charged battery vents hydrogen gas, and that gas is explosive. Treat every test with respect and you'll stay safe.
- Wear safety glasses and gloves. Battery acid burns skin and eyes.
- Work in a ventilated space. No sparks, no flames, no smoking nearby.
- Remove rings and metal watches before touching terminals.
- Never let a wrench bridge both terminals. That's a direct short.
- Keep the charger off and unplugged while you connect probes.
Old batteries need proper disposal, never the trash. Lead-acid units are recyclable, and most auto parts stores take them back. The [U.S.
Environmental Protection Agency](https://www.epa.gov) outlines why safe recycling matters for these batteries.
Your Decision Guide: Keep It, Recharge It, or Replace It
Here's the whole process boiled down to a single decision path. Rest the battery, read the voltage, then act on the number.
| Reading after full charge and rest | Verdict |
|---|---|
| 12.6V+ and passes load test | Keep it. Battery is healthy. |
| 12.6V+ but fails load test | Replace it. Capacity is gone. |
| 12.4V | Recharge fully, then retest. |
| 12.2V or lower | Likely worn out. Plan to replace. |
| 10.5V or below | Dead cell. Replace it. |
If the battery passes both tests but still dies, stop blaming the battery. Look at the alternator and parasitic drain next. Nine times out of ten, a healthy battery that won't stay charged points to a problem elsewhere in the system.
And if you're ever unsure, a free counter test at an auto parts store confirms your reading in minutes. Trust two matching results over one.
Frequently Asked Questions
How long should I wait to test after charging?
Wait at least one to two hours after unplugging the charger. This lets the surface charge dissipate so your reading reflects the true state of charge. For the most accurate result, let the battery rest overnight.
In a hurry, run the headlights for a minute to clear the surface charge fast.
What voltage is a fully charged car battery?
A fully charged 12V car battery reads 12.6V to 12.8V at rest, around 70°F. Anything at 12.4V sits near 75% charged. At 12.2V you're down to about 50%.
Below 12.0V, the battery is significantly discharged and needs recharging before you drive.
Can a battery show good voltage but still be bad?
Yes, and it happens often. Voltage shows state of charge, not health. An aged or sulfated battery fills to a normal voltage but can't hold capacity under load.
That's why a load test or cranking-voltage test is essential to confirm the battery is genuinely good.
Do I need a load tester, or is a multimeter enough?
A multimeter alone confirms the charge held, which covers most quick checks. For real health, add a load test. You can use the starter as the load and watch the voltage while cranking.
If it stays above 9.6V, the battery is strong enough to trust.
Why does my battery die overnight after charging fine?
A battery that charges well but dies overnight usually has a parasitic drain or a bad alternator, not a bad battery. Something is pulling power with the engine off, or the charging system isn't topping it up. Test for a parasitic draw and check charging voltage to find the real cause.
Should I test a cold battery in winter?
You can, but adjust your expectations. Cold lowers voltage readings and cuts cranking power, so a healthy battery may read slightly low. Let it warm toward room temperature before making a final call.
A reading of 12.4V on a freezing morning is often perfectly normal.

Similar Posts





















