How to Use a Multimeter On a Car Battery

Your car cranks slow, the dash lights flicker, and you're left guessing whether the battery is dying or already dead. Learning how to use a multimeter on a car battery takes that guesswork off the table. A multimeter is a small handheld tool that reads electrical voltage, and it tells you in seconds if your battery still has life in it.
No shop visit, no parts thrown at the problem.
Here's the part most people miss. A fully charged 12V car battery should rest at about 12.6 volts, per Battery Council International charge guidelines. Anything lower means the battery is partly discharged or failing.
As of 2026, a decent digital multimeter costs under $30, which makes this one of the cheapest diagnostic checks you can run. Let's start with why the reading beats guessing.
Quick Answer
To use a multimeter on a car battery, turn off the engine first. Set the dial to 20V DC. Touch the red probe to the positive terminal.
Touch the black probe to the negative terminal. Read the display. A healthy resting battery shows 12.6V or higher.
Why a Multimeter Reading Beats Guessing at a Dead Battery
A voltage reading gives you a real number instead of a hunch. When your car struggles to start, the cause is usually one of three things: a weak battery, a failing alternator, or a hidden power drain. Guessing wastes money.
People swap batteries that were fine, or charge a battery the alternator keeps killing.
A multimeter cuts through all of that. In our research across DIY auto forums and manufacturer guides, the voltage test is the most recommended first step for a no-start car. It's fast, it's cheap, and it points you straight at the problem.
Here's what a quick reading can tell you:
- 12.6V or higher (engine off): Battery is charged and healthy.
- 12.2V to 12.4V: Battery is partly discharged. Recharge and retest.
- Below 12.0V: Battery is deeply discharged or failing.
- 13.8V to 14.7V (engine running): Alternator is charging properly.
If you want the deeper diagnostic path, our walkthrough on reading battery voltage step by step builds on the basics below. The point for now is simple. One number saves you from throwing parts at the car.
What You Need Before You Start: Multimeter and Setup
You need very little gear for this test. Most of it probably sits in a toolbox already.
Here's the short list:
| Item | Why You Need It |
|---|---|
| Digital multimeter | Reads battery voltage to two decimals |
| Test leads (red and black) | Carry the signal from battery to meter |
| Safety glasses | Protects eyes from acid or sparks |
| Gloves | Guards hands near battery terminals |
| Clean rag | Wipes grease off dirty terminals |
A digital multimeter (DMM) is the easy pick here. It shows a clear number on screen, so there's no needle to squint at like on an old analog meter. Look for one with a CAT II or CAT III safety rating, which handles automotive voltage without stress.
Before you touch anything, prep the car:
- Turn off the engine, headlights, radio, and climate fan.
- Pop the hood and locate the battery.
- Wipe any dirt or corrosion off the two terminals.
- Let the battery rest a few minutes if the car just ran.
That rest step matters more than people think. A battery holds a "surface charge" right after driving, which reads artificially high. Letting it sit clears that false number.
For the cleanest result, test after the car has sat for a few hours or overnight.
Multimeter Settings for a 12V Car Battery (Dial to 20V DC)
Set the dial to 20V DC. That's the whole answer, and getting it wrong is the most common beginner mistake.
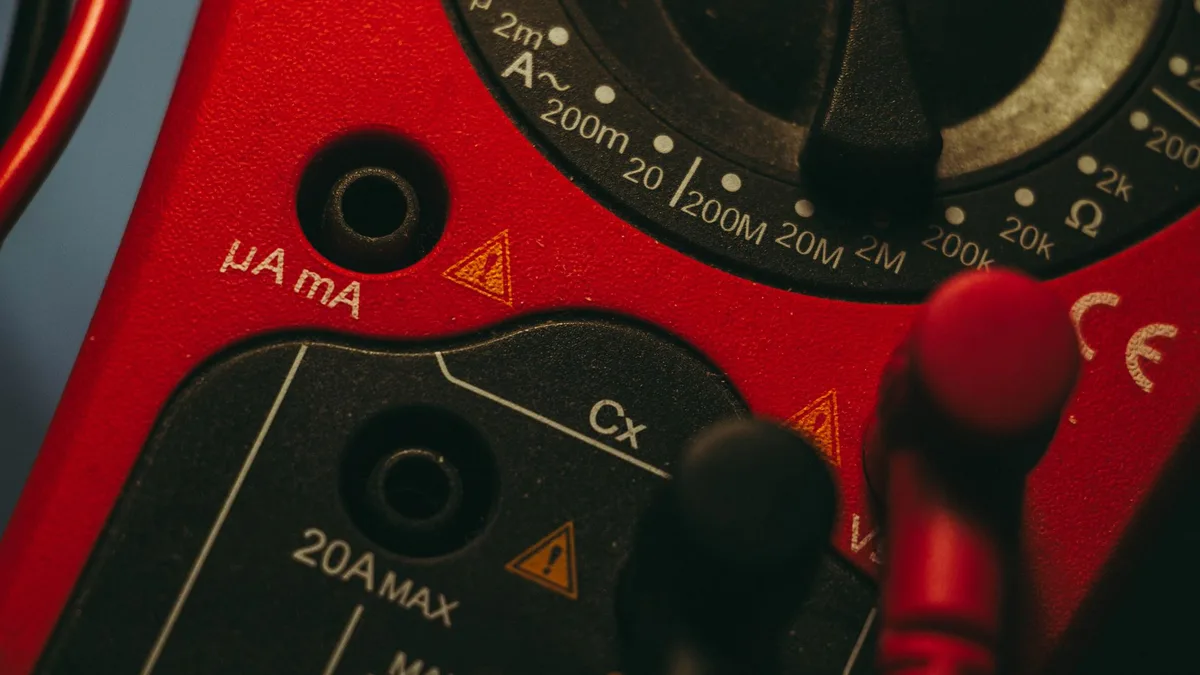
A car battery puts out direct current, or DC. Your multimeter also has an AC setting for household-style power, and that's not what you want here. Look for the V symbol with a straight line and a dashed line above it (V⎓).
That's DC voltage. The wavy line (V~) is AC. Skip it.
Now the range. A 12V battery reads a little above 12 volts, so you need a range that goes higher:
- Manual-ranging meter: Turn the dial to 20V in the DC section. This covers anything up to 20 volts.
- Auto-ranging meter: Just select DC voltage. The meter picks the range for you.
Don't set the dial to the 2V range. That range tops out below your battery's voltage, so the screen shows an error or a "1" on the left. If you see that, you're in the wrong range.
Plug the leads in correctly too:
- Black lead into the COM port.
- Red lead into the VΩmA port (often labeled with V and the ohm symbol).
Leave the 10A port alone. That's for measuring current, not voltage, and it's not part of this test.
Where to Place the Red and Black Probes
Red probe to positive, black probe to negative. Match the colors to the terminals and you're set.
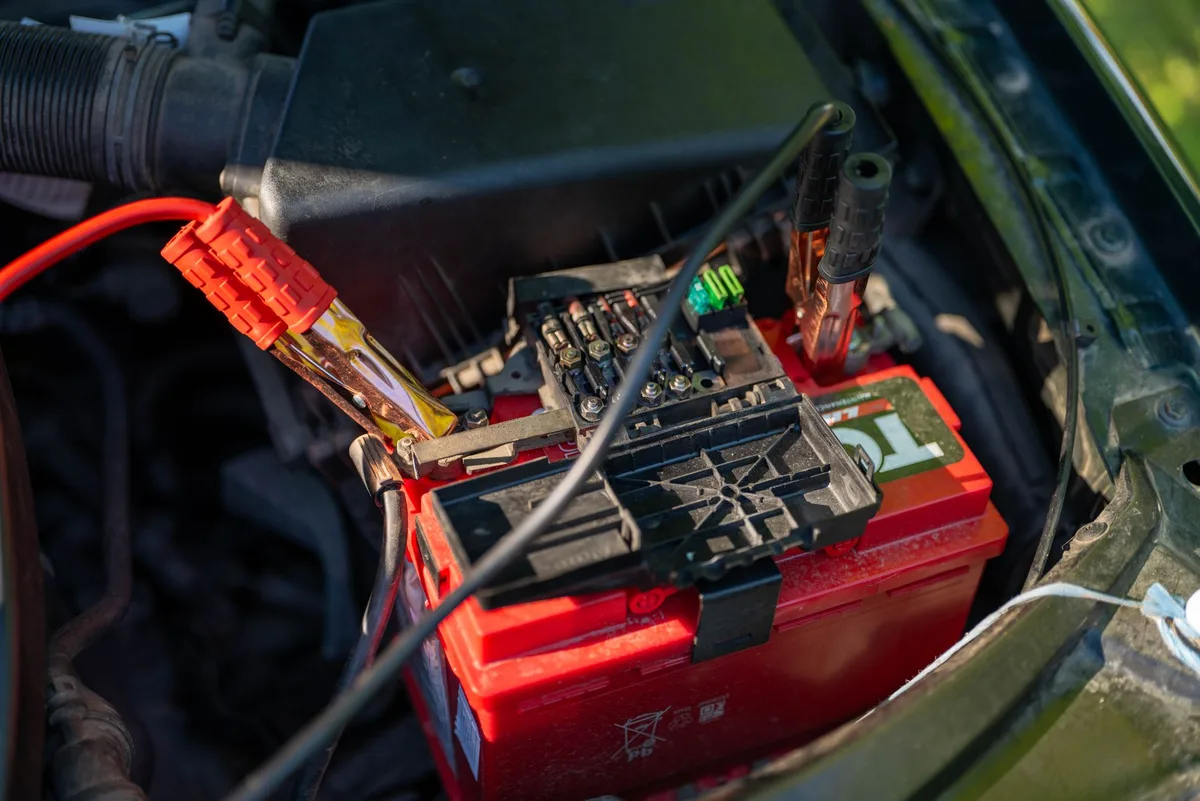
Your car battery has two terminals. The positive one is marked with a + sign, often has a red cover, and is usually the slightly larger post. The negative one is marked with a − sign and often wears a black cover.
Take a second to confirm which is which before you touch anything.
Here's the placement, step by step:
- Touch the red probe tip firmly to the positive (+) terminal.
- Touch the black probe tip firmly to the negative (−) terminal.
- Press until you get solid metal-to-metal contact.
- Hold steady and read the number on screen.
Press through any light grime to reach clean metal. A weak reading is often just a bad probe contact, not a bad battery. If your meter came with alligator clips, they clamp on and free up both hands, which helps during the cranking test later.
One reassuring note. If you accidentally reverse the probes, red on negative and black on positive, nothing breaks. A digital multimeter simply shows a minus sign in front of the same number.
So a reading of "−12.6" means your probes are backwards, but your battery is fine. Just swap them for a clean positive reading.
Step-by-Step: Testing Your Car Battery Voltage
There are three separate tests, and each one checks a different part of the system. Run them in order and you'll know exactly where the fault sits. A single resting number is a great start, but the full picture comes from all three.
If you'd rather see the whole flow in one place, this complete testing routine covers the same ground with extra detail.
Resting Voltage Test (Engine Off)
This checks the battery's state of charge. Engine off, everything off, probes on the terminals.
- Set the dial to 20V DC.
- Red probe to positive, black to negative.
- Read the number.
A resting battery should show 12.6V to 12.8V for a full charge. Around 12.4V means roughly 75% charged. Drop to 12.2V and you're near half.
Below 12.0V, the battery is deeply discharged and may need charging or replacing.
Cranking Test (While You Start the Engine)
This checks whether the battery can deliver power under load. You'll need a helper, or clip the leads on so they stay put.
- Keep the probes on both terminals.
- Have someone start the engine.
- Watch the number drop as the starter pulls power.
The voltage will dip during cranking, and that's normal. What you're looking for is how far it falls. A healthy battery holds above roughly 9.6V while cranking.
If it plunges well below that, the battery is weak even if its resting number looked fine. That gap between a good resting reading and a poor cranking reading is exactly why a full load-style check matters.
Charging Test (Engine Running, Checking the Alternator)
This checks the alternator, not the battery. Once the engine runs, the alternator should push charge back in.
- Leave the probes on the terminals.
- Let the engine idle.
- Read the voltage.
With the engine running, you want to see 13.8V to 14.7V. That range confirms the alternator is charging the battery properly. If the number sits at battery level (around 12.6V or lower) with the engine on, the alternator likely isn't doing its job.
Rev the engine gently and the reading should stay steady inside that range. For current-based checks that go beyond voltage, the method for reading amps at the terminals picks up where this leaves off. You can also confirm expected charging ranges against your vehicle owner's manual or the [U.S.
Department of Energy vehicle resources](https://www.energy.gov) for battery basics.
What the Numbers Mean: 12V Battery Voltage Chart
Voltage maps directly to state of charge, so one number tells you how full the battery is. Keep this chart handy when you read your resting voltage.
| Resting Voltage | State of Charge | What It Means |
|---|---|---|
| 12.6V to 12.8V | 100% | Fully charged, healthy |
| 12.4V | ~75% | Slightly low, fine to drive |
| 12.2V | ~50% | Recharge soon |
| 12.0V | ~25% | Deeply discharged |
| 11.9V or below | ~0% | Flat, may not recover |
These numbers assume the battery has rested and the engine is off. A quarter-volt swing matters more than it looks. The drop from 12.6V to 12.0V isn't a small dip, it's the difference between full and nearly empty.
One caveat for newer cars. Start-stop vehicles often run an AGM or EFB battery, which reads a touch higher when full, around 12.8V to 13.0V. Check your owner's manual for the exact target.
Reading the Results: Weak Battery vs Bad Alternator
Match your three readings together and the culprit becomes obvious. A battery problem and an alternator problem show up as different patterns, not different single numbers.

Here's how to read the combination:
- Low resting voltage, normal charging voltage: The battery is weak or aging. The alternator works fine.
- Good resting voltage, low charging voltage (under 13.8V running): The alternator isn't charging. The battery will slowly drain.
- Charging voltage above 15V: The alternator or voltage regulator is overcharging, which cooks the battery.
- Good on both, but the car still won't start: Look for a parasitic draw or bad connections.
A classic example: the battery reads a solid 12.6V at rest but the car dies overnight. That points away from the battery and toward the alternator or a hidden drain. Swapping the battery there just wastes money.
If your resting number looks fine but you doubt the battery can hold up under strain, a proper load reading settles it. A weak cell hides at rest and only shows itself when the starter pulls current.
Common Mistakes That Give You a False Reading
Most bad readings come from user error, not a broken meter. In our research across auto forums, the same handful of slip-ups show up again and again.
- Dial set to AC instead of DC. You'll get a jumpy or near-zero number. Switch to V⎓.
- Wrong range (2V instead of 20V). The screen shows "1" or an error. Bump up to 20V.
- Testing right after a drive. Surface charge inflates the reading. Let it rest first.
- Loose or dirty probe contact. A greasy terminal drops the number. Press to clean metal.
- Corroded terminals. White or blue crust blocks the signal. Wipe it off before testing.
One more trap. A battery can read a perfect 12.6V and still fail under load. Resting voltage shows charge level, not health.
That's why the cranking test matters as much as the resting number.
If your reading jumps around wildly, check the leads too. A cracked test lead or a probe that isn't seated in its port gives noise instead of a steady value.
Safety Rules Before You Touch the Terminals
Car batteries are safe to test, but they hold real risks worth respecting. They store enough current to spark, and they vent hydrogen gas, which is flammable.
Keep these rules in mind:
- Wear safety glasses and gloves. Battery acid is sulfuric acid.
- Never let a metal tool bridge both terminals. That's a dead short and it sparks.
- Remove rings, watches, and metal bracelets before reaching in.
- No smoking, no open flames, no sparks near the battery.
- If you see cracks, leaks, or a swollen case, stop and replace the battery.
The gas point is the big one. Hydrogen builds up around a charging battery, so a stray spark near it is genuinely dangerous. Work in a ventilated spot and keep sparks away.
When a battery finally dies, don't toss it in the trash. Lead-acid batteries are recyclable, and most auto parts stores take them back. The [U.S.
Environmental Protection Agency](https://www.epa.gov) outlines proper handling and recycling for used lead-acid batteries.
Multimeter vs Load Tester vs Conductance Tester
A multimeter measures voltage, but it doesn't measure a battery's true capacity. That's where dedicated testers come in. Each tool answers a slightly different question.
| Tool | What It Measures | Best For |
|---|---|---|
| Multimeter | Voltage (state of charge) | Quick DIY checks, alternator output |
| Load tester | Voltage under a heavy load | Confirming a battery holds up |
| Conductance tester | Internal resistance, CCA | Shop-grade health and cold-crank rating |
A multimeter is the right call for most people. It's cheap, versatile, and answers the everyday "is my battery charged?" question in seconds.
A load tester goes further by applying a real draw and watching how the voltage responds. It catches a tired battery that a plain voltage check misses. A conductance tester is the pro tool, reading cold cranking amps (CCA) and internal resistance, which is what most shops use for a warranty check.
For a home garage, the multimeter plus a manual cranking test covers most of what you need. Reach for the others only when a battery reads fine but keeps letting you down.
When It's the Battery, the Alternator, or a Parasitic Draw
Use a simple if-then check to isolate the fault. If the battery reads low at rest but charges to 13.8V or more running, the battery is aging. Replace it.
If the running voltage stays stuck near 12.6V, the alternator isn't charging. If both numbers look fine yet the car dies overnight, suspect a parasitic draw.
A parasitic draw is a circuit pulling power with the key off. Set your multimeter to DC amps, put it in line with the disconnected negative cable, and read the current. Anything above roughly 50mA (0.05A) points to a component staying awake.
Pro Tips for Accurate, Repeatable Readings
Small habits make your readings consistent. Test the same way each time and you'll trust the numbers.
- Test after the car sits overnight for a true resting figure.
- Clean the terminals first so grime doesn't skew the value.
- Press probes firmly to bare metal, not the cable clamp.
- Check your meter's battery, since a low meter battery reads oddly.
- Log the numbers monthly to spot a slow decline early.
A battery that drops a tenth of a volt each month is on its way out. Tracking beats guessing.
Frequently Asked Questions
What setting do I use on a multimeter for a car battery?
Set the dial to 20V DC on a manual meter, shown as V with a solid and dashed line. On an auto-ranging meter, just pick DC voltage. Never use the AC setting for a car battery.
Should I test the battery with the engine on or off?
Both. Test with the engine off for resting voltage (state of charge). Then test with the engine running to check the alternator's charging output, which should sit between 13.8V and 14.7V.
Is 12.4 volts a good car battery reading?
12.4V means the battery is about 75% charged. It'll still start most cars, but it's slightly low. Recharge it and retest.
A full, healthy battery rests at 12.6V or higher.
Can a multimeter tell if a battery is bad?
Partly. A multimeter shows charge level and can flag a weak battery during a cranking test. But it doesn't measure true capacity.
For that, a load tester or conductance tester gives a clearer verdict.
What Your Reading Is Telling You to Do Next
Your numbers point to a clear next step. A resting reading of 12.6V or higher with a 13.8V to 14.7V charging figure means your system is healthy. Drive on.
A low resting number means charge the battery and retest. If it won't hold that charge, replace it. A weak charging voltage sends you to the alternator instead.
And if every reading looks fine but the car still won't start, hunt for a parasitic draw or clean up loose connections. One quick voltage check turns a mystery into a plan.

Similar Posts





















