How to Load Test a Car Battery With a Multimeter
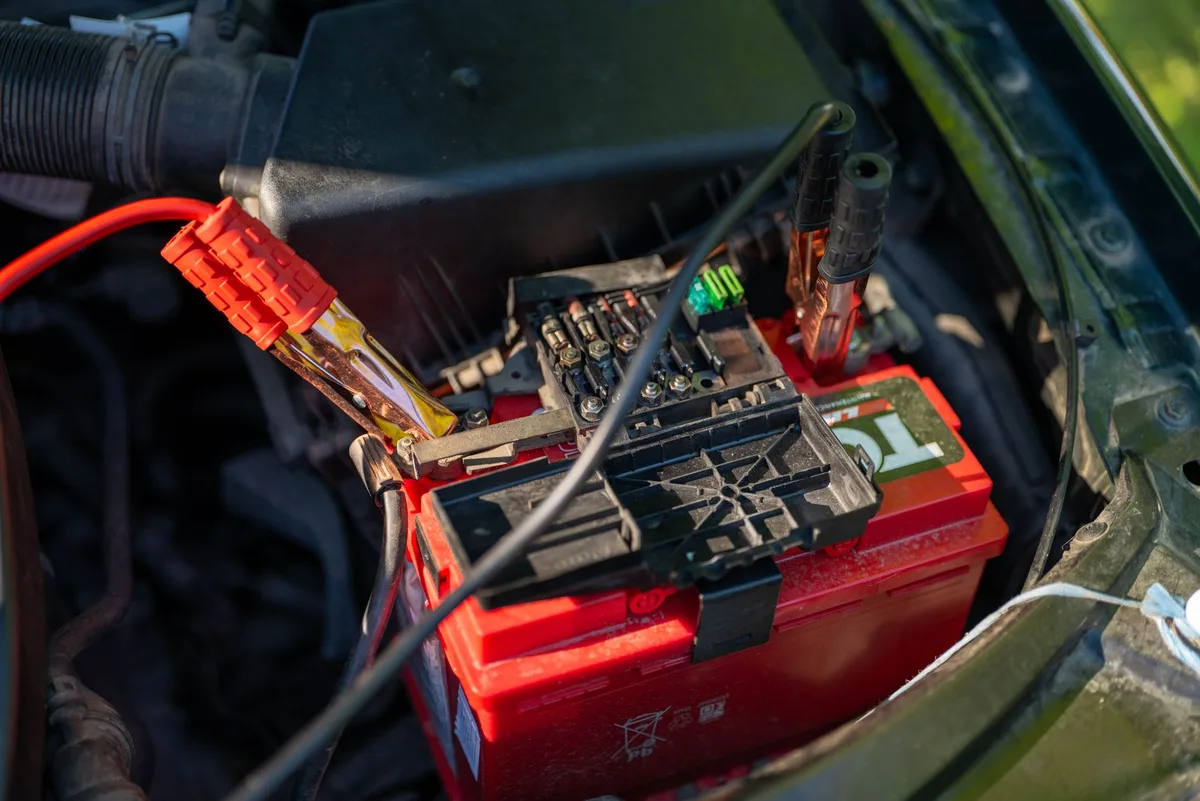
A car battery can read a healthy 12.6 volts and still leave you stranded on a cold morning. That's why knowing how to test a car battery under load with a multimeter matters far more than a quick voltage reading. A resting number only shows the charge sitting on the plates.
It tells you nothing about whether the battery can push real current when the starter spins.
Under load is where weak batteries get caught out. Per SAE International testing standards, a good 12V battery should hold above 9.6 volts while cranking at around 70°F (21°C). As of 2026, a decent digital multimeter costs under $30, so this is a cheap check anyone can run.
Let's start with why that resting number fools so many people.
Why a Weak Battery Fools You Until You Test It Under Load
A battery has two jobs. It stores charge, and it delivers current on demand. A basic voltage reading only checks the first job.
Here's the catch. A tired battery with a failing cell can still show 12.4 or 12.5 volts at rest. Everything looks fine.
Then you turn the key and the voltage collapses, because the plates can't sustain a heavy draw.
That collapse is what a load test reveals. When the starter motor pulls 100 to 200 amps, a weak battery sags hard and fast. A strong one barely flinches.
If you've ever had a car that starts fine one day and clicks the next, this is usually why.
The good news is you don't need a shop to see it. A plain multimeter and the starter motor itself give you a real-world load. For a straight charge reading first, our guide on reading battery voltage the simple way covers the baseline step.
The Quick Answer: What "Under Load" Really Means With a Multimeter
Testing under load means checking voltage while the battery works hard. Set your multimeter to 20V DC. Connect the red probe to positive, black to negative.
Crank the engine and watch the voltage. A healthy 12V battery stays above 9.6 volts at 70°F.
That's the whole test in five moves. The number you care about is the lowest point the voltage hits during cranking. Anything above 9.6 volts means the battery holds up under demand.
Drop below that, and the battery is likely weak or has a bad cell.
Resting Voltage vs Cranking Voltage: Two Different Tests
These two tests answer two different questions. Resting voltage tells you how charged the battery is. Cranking voltage tells you how strong it is under load.
You need both to judge a battery fairly. A fully charged battery that sags under load is failing. A weak reading that's simply low on charge might just need a recharge.
Here's how they compare:
| Test | What it measures | When to read it | Good result |
|---|---|---|---|
| Resting (open-circuit) voltage | State of charge | Engine off, after rest | 12.6 to 12.7V |
| Cranking voltage (load) | Battery strength under demand | While starting the engine | Stays above 9.6V |
Run the resting test first. If the battery is badly discharged, charge it before load testing, or you'll get a false fail. For the full step-by-step on the resting side, this complete multimeter walkthrough lays out each reading in order.
What You Need Before You Start
You don't need much gear for this. Most of it is probably in your garage already.
- A digital multimeter (auto-ranging or manual, both work)
- Safety glasses and gloves
- A wire brush or terminal cleaner
- A battery charger, in case the battery needs topping up first
- A helper to turn the key, or a way to crank the engine yourself
Park on level ground. Turn off the ignition, lights, and climate control. Pop the hood and find the battery terminals.
Clean off any corrosion so your probes get solid metal contact.
Setting Your Multimeter to 20V DC
Turn the dial to the 20V DC setting. A car battery runs at roughly 12.6 volts, so the 20V range gives you accurate resolution without overloading the scale. Look for the "V" with a straight line above it, not the wavy AC symbol.
Plug the black probe into the COM port. Plug the red probe into the port marked V or VΩ. That's it, your meter is ready to read.
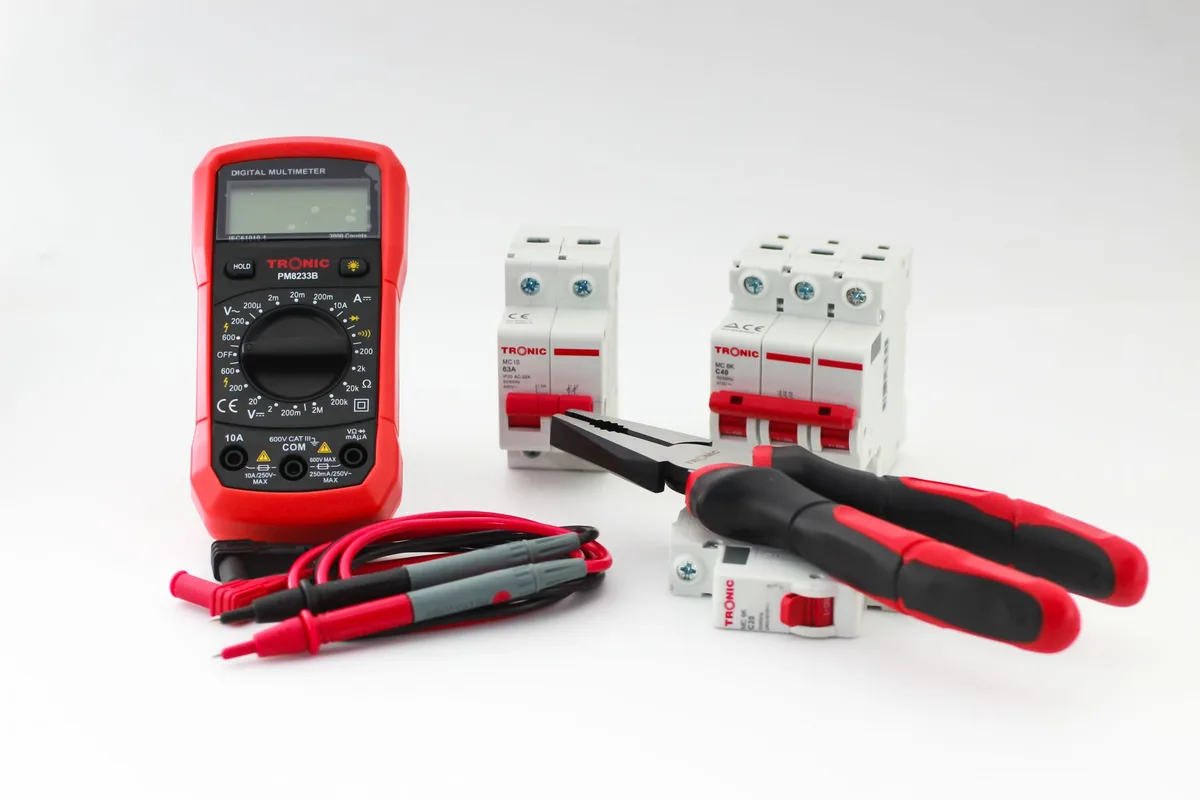
If your meter is auto-ranging, just select DC volts and it picks the range for you. Either way, the reading should settle within a second of touching the posts.
Reading the State-of-Charge Chart
Before you load test, check the resting voltage against this chart. It tells you whether the battery is charged enough to test fairly.
| Resting voltage | State of charge |
|---|---|
| 12.6 to 12.7V | 100% |
| 12.4V | ~75% |
| 12.2V | ~50% |
| 12.0V | ~25% |
| Below 12.0V | Discharged |
If you read below 12.4 volts, charge the battery first. Load testing a half-flat battery just tells you it's flat, not whether it's bad. Once it's near full charge, you're ready to test under real demand.
Safety Checks Around Lead-Acid Batteries
Lead-acid batteries deserve respect. They hold sulfuric acid and vent hydrogen gas, which is flammable. A careless spark near a battery can cause a real hazard, so a few habits keep you safe.
- Wear eye protection and gloves every time.
- Remove rings, watches, and metal bracelets before you reach near the terminals.
- Keep sparks, cigarettes, and open flames well away.
- Never let a metal tool bridge the positive and negative posts.
- Match your probes to the right polarity, red to positive, black to negative.
Work in a ventilated space so any vented gas disperses. The U.S. Occupational Safety and Health Administration publishes clear battery-handling guidance at OSHA, and it's worth a look if you service batteries often.
One more thing. If a battery case is cracked, swollen, or leaking, stop. Don't test it, and recycle it properly instead of chancing a reading.
Step-by-Step: Load Testing With the Cranking Method
This is the real test. You'll use the starter motor as your load, then watch how far the voltage falls. Grab a helper to turn the key while you read the meter, or use a remote starter if you have one.
Here's the sequence:
- Confirm the battery is charged (above 12.4V at rest).
- Set the multimeter to 20V DC.
- Touch the red probe to the positive post, black to the negative post.
- Note the steady resting voltage.
- Have your helper crank the engine for a few seconds.
- Watch the lowest number the meter shows during cranking.
Keep your hands and the probe leads clear of belts and the fan. Hold the probes firmly so they don't slip while the engine turns.
Removing the Surface Charge First
Surface charge is a false high reading that sits on the plates after charging or driving. It can mask a weak battery. To clear it, switch on the headlights for about two minutes, then turn them off and let the battery rest for a minute.
Now your resting reading reflects the true state of charge. Skip this, and a borderline battery may look healthier than it really is.
Watching the Voltage Drop While Cranking
The moment the starter engages, voltage dips sharply, then recovers. You want the lowest point of that dip. On a healthy battery, the drop is brief and shallow.
If the number plummets past 9 volts and struggles to climb back, the battery is straining. A steep, slow sag points to worn plates or a failing cell.
The 9.6V Pass/Fail Threshold at 70°F
The pass mark is simple. At 70°F (21°C), a good 12V battery holds above 9.6 volts during a sustained crank. That figure comes from long-standing industry load-test practice, where the battery is loaded to roughly half its Cold Cranking Amps rating.
- Above 9.6V: battery passes, strong under load.
- 9.6V to 9.0V: marginal, recharge and retest.
- Below 9.0V: likely bad, especially if already charged.
How Temperature Changes Your Pass/Fail Number
The 9.6-volt mark assumes about 70°F. Colder batteries can't push as hard, so the threshold drops with the temperature. Judge a freezing battery by the warm-weather number and you'll condemn a good one.
Use this rough guide for the minimum acceptable cranking voltage:
| Battery temperature | Minimum cranking voltage |
|---|---|
| 70°F (21°C) | 9.6V |
| 50°F (10°C) | 9.4V |
| 30°F (-1°C) | 9.1V |
| 15°F (-9°C) | 8.8V |
| 0°F (-18°C) | 8.5V |
If you test outside on a cold morning, factor this in. A battery that reads 9.0 volts at 30°F is still within range, even though the same number would flag a problem in summer.
Reading Your Results: Good Battery, Dead Cell, or Something Else
Your cranking number tells a story. A steady hold above threshold means the battery is fine, and you should look elsewhere for a starting problem. A hard collapse usually means the battery itself is done.
A classic sign of a dead cell is a resting voltage stuck around 10.5 volts that won't climb with charging. Each cell adds about 2.1 volts, so a missing cell drops the total by roughly that much. If charging can't get it past 12.0 volts, one cell has likely shorted.
If the battery passes but the car still won't start, the fault is downstream. That's when you check the charging and starting systems.
When It's the Alternator, Not the Battery
A battery that keeps going flat may be starved by a weak alternator. To check, start the engine and read the voltage at the posts. A healthy charging system shows 13.7 to 14.7 volts at idle.
Below 13.5 volts, the alternator isn't keeping up, and the battery slowly drains. Above 15 volts points to a bad regulator, which cooks the battery over time. Either way, the battery may be a victim, not the culprit.
When It's the Starter or a Bad Ground
If cranking voltage stays high but the engine barely turns, suspect the starter or a bad ground. A strong battery reading with slow cranking often means current isn't reaching the starter cleanly.
Check the ground strap between the battery, engine, and body for corrosion or looseness. A voltage-drop test across each connection finds the resistance fast. Clean, tight connections fix more "dead battery" complaints than people expect.
Multimeter Crank Test vs a Dedicated Load Tester
Both tests apply a real load, but they suit different users. The multimeter crank method is free and good enough for a quick yes-or-no answer. A dedicated tester gives you cleaner, repeatable numbers.
Here's how they stack up:
| Factor | Multimeter crank test | Carbon-pile / electronic tester |
|---|---|---|
| Cost | Under $30 | $40 to $200+ |
| Load source | The starter motor | Built-in adjustable load |
| Precision | Good for pass/fail | Exact, controlled amps |
| Best for | Home DIY, quick checks | Shops, frequent testing |
| CCA reading | No | Yes (electronic models) |
A carbon-pile tester loads the battery to a set current and holds it, so you see a stable reading. Electronic conductance testers go further and estimate remaining Cold Cranking Amps without cranking at all. For most drivers, the multimeter method answers the real question at zero extra cost.
If you keep an eye on charge levels over the seasons, the meter earns its keep anyway.
Mistakes That Make a Healthy Battery Look Dead
Most false fails come from test errors, not bad batteries. Rule these out before you spend money on a replacement.
- Testing a discharged battery. Always charge to at least 75% first.
- Ignoring surface charge, which inflates the resting reading.
- Dirty or loose terminals adding resistance and noise.
- Probes touching the clamp instead of the bare post.
- Using the summer 9.6V mark on a cold battery.
- Reading the recovery voltage instead of the lowest crank dip.
Corroded posts are the sneakiest offender. A gritty film between probe and lead can knock half a volt off your reading. Scrape to bright metal, retest, and you'll often see a "bad" battery come back to life.
For the full sequence from charge check to load, our detailed testing routine keeps the steps in order.
Pro Tips for a Reliable Reading Every Time
Small habits separate a trustworthy reading from a guess. Get the contact right and the numbers stop lying to you.
- Press the probes onto the lead posts, not the clamps or bolts.
- Let a driven car sit 15 minutes before reading resting voltage.
- Retest twice and average, especially on borderline batteries.
- Load test with the battery near full charge for a fair result.
- Note the temperature so you judge against the right threshold.
If your meter reading jumps around, you've got a contact problem, not a battery problem. Wiggle the probes onto clean metal until the number holds steady.
Charge-and-Retest: When to Recharge Before Condemning the Battery
If a battery fails but reads low on charge, recharge it before you write it off. A discharged battery fails a load test for the wrong reason. Charge it fully, rest it, then run the crank test again.
Here's the simple loop. Charge to 12.6 volts. Let it rest an hour to shed surface charge.
Load test again and read the crank dip.
If it now holds above threshold, the battery was just flat, so hunt for a parasitic drain or weak alternator. If it still sags hard after a full charge, the battery is worn out. A battery that won't hold charge past 3 to 5 years of service is usually at the end of its life.
Battery Voltage and Health Reference Numbers
Keep these figures handy for quick diagnosis. They cover the readings you'll take most often.
| Reading | Value | What it means |
|---|---|---|
| Resting, full charge | 12.6 to 12.7V | Healthy state of charge |
| Resting, replace-soon | 12.2V or lower | Undercharged or aging |
| Cranking, pass (70°F) | Above 9.6V | Strong under load |
| Cranking, fail | Below 9.0V | Weak or bad cell |
| Charging, engine running | 13.7 to 14.7V | Alternator working |
| Dead cell signature | ~10.5V stuck | Internal short |
Print it, tape it inside the toolbox lid, and you won't second-guess a reading again.
Frequently Asked Questions
How many volts should a battery drop when cranking?
A healthy 12V battery shouldn't drop below 9.6 volts while cranking at 70°F. It'll dip briefly as the starter engages, then recover. A fall below 9.0 volts on a charged battery points to a weak or failing cell that needs replacing.
Can I load test a battery with just a multimeter?
Yes. The starter motor acts as the load while your multimeter reads the voltage during cranking. You won't get an exact Cold Cranking Amps number like a dedicated tester gives, but the crank-voltage drop tells you clearly whether the battery holds up.
Should I test the battery charged or discharged?
Test it charged. A discharged battery fails a load test simply because it's flat, not because it's bad. Charge to at least 75%, clear the surface charge, then load test for a result you can trust.
Why does my battery read 12.6V but still won't start the car?
A resting 12.6 volts only shows charge, not strength. The battery can look full yet collapse under the starter's heavy draw. Run a crank test and watch the dip.
If it sags below 9.6 volts, the battery is weak despite the good resting reading.
How long does the load test take?
Under five minutes once your probes are on. The crank itself lasts only a few seconds. Most of the time goes into cleaning terminals and confirming the battery is charged before you read the dip.
Your Decision Guide: Replace, Recharge, or Look Elsewhere
Here's the whole test boiled down to a few if-then calls. Use it to point money at the real problem.
- If cranking voltage stays above 9.6V at 70°F: the battery is good, look at the starter, ground, or charging system.
- If it fails but reads low on charge: recharge and retest before deciding.
- If it still sags below 9.0V after a full charge: replace the battery.
- If resting voltage sticks near 10.5V: suspect a dead cell, replace it.
- If charging voltage sits below 13.5V running: check the alternator, not the battery.
Match the fix to what the numbers show, and you'll stop replacing good batteries. A five-dollar wire brush and a cheap multimeter answer most no-start mysteries before you ever reach for your wallet.

Similar Posts





















