How to Test a Car Battery with a Multimeter: Bad or Good?
Your car hesitated this morning before it fired up, and now you're wondering if the battery's on its way out. The good news: learning how to tell if car battery is bad with multimeter testing takes about ten minutes, a $20 tool, and zero mechanical experience. You don't have to guess, and you don't have to trust whoever's trying to sell you a new battery.
A healthy 12V battery reads about 12.6 volts at rest and stays above 9.6 volts while cranking, per the SAE J537 testing standard. Fall short of either number and you've got a real clue, not a hunch. Here's the fast version first, then we'll walk through every test in order.
Quick Answer
To tell if a car battery is bad with a multimeter, set it to DC volts. Touch red to positive, black to negative, engine off. A healthy battery reads 12.4 to 12.7 volts.
Below 12.0 volts means deeply discharged. Below 9.6 volts while cranking means the battery is failing.
Why a Multimeter Beats Guessing (and When It Isn't Enough)
A multimeter turns "the car feels sluggish" into a hard number you can act on. Slow cranking, a clicking starter, and dim headlights all have overlapping causes. Voltage readings separate a tired battery from a bad alternator or a loose ground in minutes.
There's a catch worth knowing up front. Resting voltage measures state of charge, meaning how full the battery is right now. It does not directly measure state of health, meaning how much capacity the battery has left.
A five-year-old battery can sit at a lovely 12.6V and still collapse the moment the starter asks for 200 amps.
That's why this guide uses three readings instead of one:
- Resting voltage tells you how charged the battery is.
- Cranking voltage tells you how it behaves under real load. This is the money test.
- Charging voltage tells you whether the alternator is doing its job.
If you follow all three, a plain multimeter catches the vast majority of bad batteries. The one thing it can't fully replace is a dedicated load test, which we'll cover later for borderline cases. If you're fuzzy on what's actually happening inside those six cells, our breakdown of how the battery works fills in the picture.
Setting Up Your Multimeter: DC Volts, 20V Range, Red to Positive
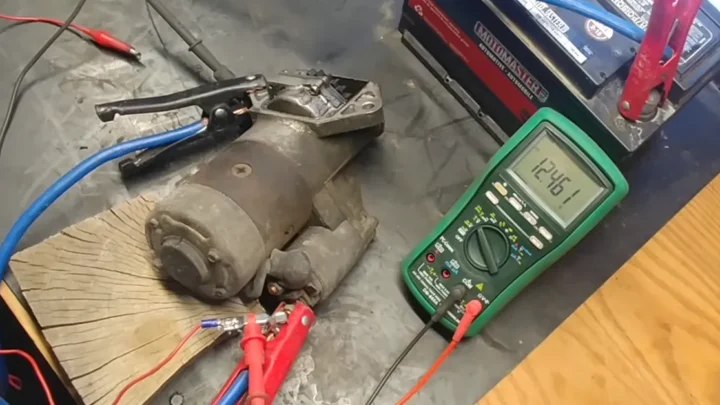
The setup takes thirty seconds, and getting it right matters more than owning a fancy meter. A $15 meter and a $150 Fluke will show you the same 12.48V on this job.
Here's the drill:
- Plug the black lead into the COM port and the red lead into the port marked V.
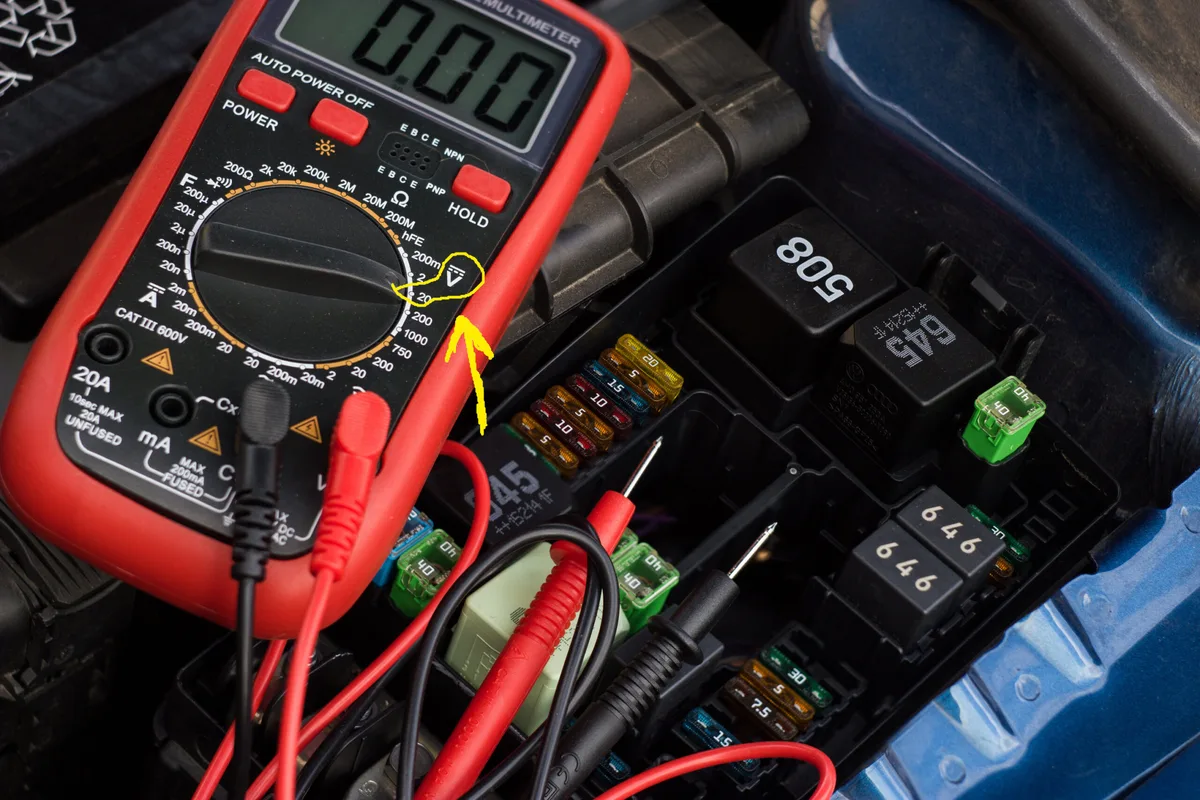
- Turn the dial to DC voltage. Look for a V with a straight line and dashes, not a wavy line.
- On a manual-ranging meter, pick the 20V range. A 12V battery falls neatly inside it.
- Touch the red probe to the positive (+) post and the black probe to the negative (-) post.
- Read the display. That's it.
If the screen shows a negative number like -12.48, you've just swapped the probes. No harm done, flip them. If the display shows something wild like 0.05 or OL, check the dial.
Reading AC volts or resistance on a battery gives nonsense, and it's the single most common setup mistake we see in aggregate user feedback. The meaning of that DCV setting trips up more beginners than anything else on the dial.
Two quick notes on meter types. An auto-ranging meter skips step 3 entirely because it picks the range itself. And if the dial markings look like hieroglyphics, a quick tour of those dial icons sorts them out in five minutes.
One warning before you start: never turn the dial to amps (A or 10A) and touch the probes to both battery posts. That creates a dead short through the meter. Best case, you blow the internal fuse.
Worst case, you melt the leads.
Before You Test: Kill the Surface Charge or Your Reading Will Lie
If you test right after driving, your battery will lie to you. A freshly charged battery holds a temporary "surface charge" on its plates that reads 12.8 to 13.2 volts even when the battery underneath is mediocre. Test it that way and a dying battery can pass with flying colors.
You have two ways to strip the surface charge:
- The patient way: let the car sit for at least four hours, ideally overnight. Test first thing in the morning before you start it. This also happens to be when a weak battery is most exposed.
- The fast way: turn the headlights on for 1 to 2 minutes with the engine off, then switch them off and wait two minutes before testing.
Either method gets you a true open-circuit voltage, which is the number every voltage chart assumes. Skip this step and the whole diagnostic chain downstream gets shakier. It's a two-minute investment that makes your reading actually mean something.
Cold weather adds one wrinkle. Voltage readings drift slightly lower in freezing temperatures, so a battery reading 12.35V on a 20°F morning isn't automatically worse than one reading 12.45V in a warm garage. Don't split hairs over a few hundredths of a volt.
The tiers below are what matter.
Test 1: Resting Voltage and What Your Number Actually Means
Engine off, surface charge removed, probes on the posts. Now match your number to a tier. Each one points to a different next step, so treat this like a fork in the road rather than a pass-fail grade.
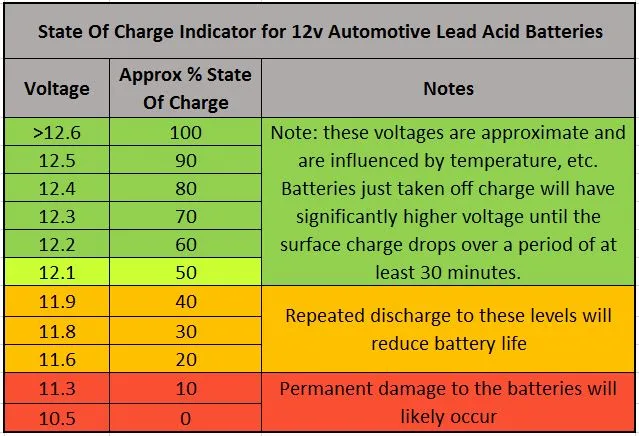
Car Battery Voltage Chart: 12.6V to Dead
| Resting Voltage | State of Charge | What to Do Next |
|---|---|---|
| 12.6V or higher | 100% charged | Battery is charged. Move to the cranking test. |
| 12.4V to 12.6V | About 75% | Healthy enough. Charge it up, then crank-test. |
| 12.2V to 12.4V | About 50% | Recharge fully, retest in 12 hours. |
| 12.0V to 12.2V | About 25% | Deeply discharged. Recharge and investigate why. |
| 11.9V or below | Effectively flat | Recharge and retest. Suspect the battery or a drain. |
| 10.5V or below | Likely dead cell | Almost always replacement time. |
Two readings deserve special attention. First, around 10.5V or lower after sitting usually means one of the six internal cells has shorted. Each cell contributes about 2.1 volts, so a battery stuck near 10.5V is running on five cells.
No charger fixes that. The number of volts a healthy battery holds is really just six cells doing math.
Second, and this is the tier people get wrong: a low reading does not automatically mean a bad battery. It means a discharged battery. Short trips, a dome light left on, or a parasitic drain can flatten a perfectly good battery.
That's why the chart keeps saying "recharge and retest." The verdict comes after charging, not before. As of 2026, the interpretation ranges above still track the state-of-charge guidance published by Battery Council International, the industry body behind BCI group sizes.
AGM vs Flooded: Why the Thresholds Shift Slightly
If your car has start-stop technology, there's a decent chance it runs an AGM battery, and AGM chemistry idles a touch higher. A fully charged AGM typically rests at 12.8 to 13.0 volts, so a 12.5V reading that looks fine for a flooded battery is actually a 75% charge on an AGM. EFB batteries, the budget cousin in many start-stop cars, sit between the two.
Check the label on top of the battery before you judge the number. If it says AGM, shift every tier in the chart up by roughly 0.2 volts. Our guides on absorbent glass mat construction and enhanced flooded designs explain why the chemistry reads differently, but for testing purposes, the label and the 0.2V shift are all you need.
A passing resting voltage earns the battery exactly one thing: the right to take the cranking test. That's where weak batteries actually get caught, and it's up next.
Test 2: Cranking Voltage, the Real Tell for a Dying Battery
This is the test that catches batteries the resting reading misses. Voltage under load exposes weak plates the same way a hill exposes a worn-out engine. A battery that holds 12.6V doing nothing can fold instantly when the starter demands hundreds of amps.
Here's how to run it:
- Clip or hold the probes on the battery posts, same polarity as before.
- Have a helper crank the engine for a few seconds while you watch the display.
- Note the lowest number the meter shows during cranking.
No helper handy? Use the Min/Max button if your meter has one. Press it before cranking and the meter memorizes the lowest dip for you.
Now read the result:
- Above 10.0V during cranking: strong battery. It's handling the load with room to spare.
- 9.6V to 10.0V: acceptable, especially in cold weather, but a battery trending near 9.6 is worth watching.
- Below 9.6V: failing. The plates can't sustain output under load. That threshold comes from SAE J537 load testing conditions at roughly 70°F.
- Voltage collapses below 7V and the starter just clicks: the battery is done, or a connection is so bad it might as well be.
One caveat keeps this test honest. Cranking demand depends on cold cranking amps, and a battery with marginal cold-start amperage capacity will sag harder on a freezing morning than a warm afternoon. If the battery only fails the cranking test at 15°F, it's still failing.
Winter is exactly when you need it most.
A battery that passes both the resting test and the cranking test is almost certainly fine. If your car still acts up, the problem lives elsewhere, which brings us to the charging system.
Test 3: Charging Voltage, Is It the Battery or the Alternator?
A good battery drained by a bad alternator looks exactly like a bad battery. This third reading takes two minutes and stops you from replacing a part that was never the problem.
Start the engine and let it idle. Put the probes back on the battery posts, same as before. The voltage should now jump noticeably above the resting number because the alternator is feeding the battery.
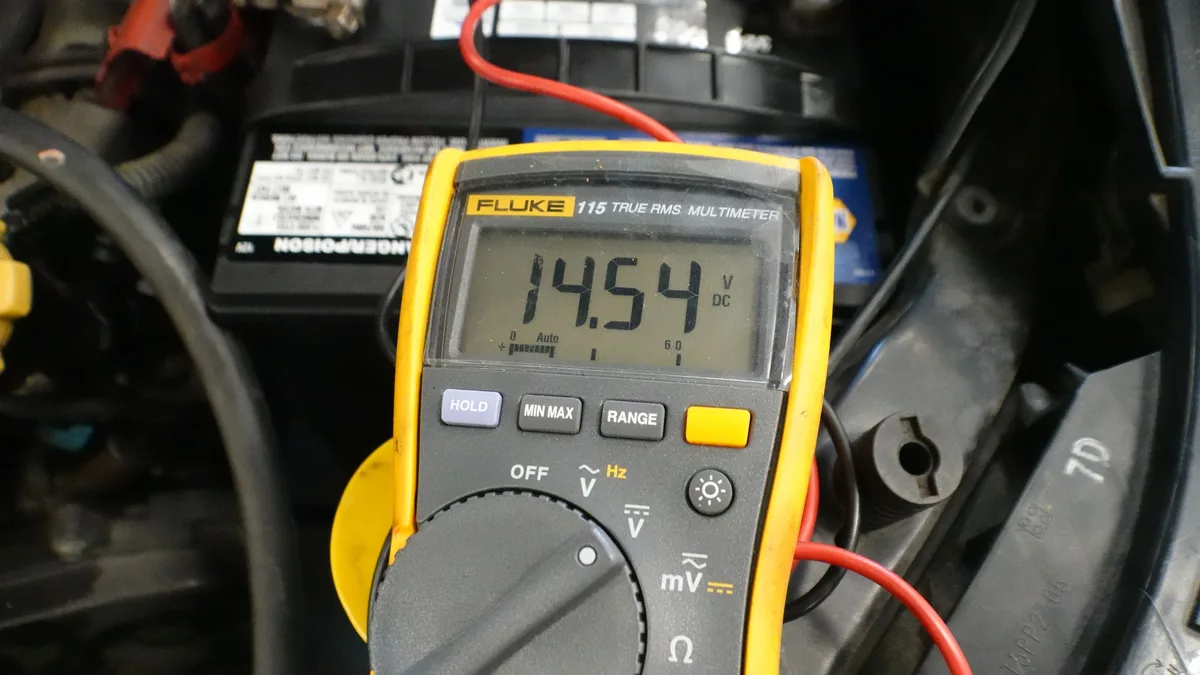
Read it against these bands:
| Reading at Idle | What It Means |
|---|---|
| 13.5V to 14.7V | Charging system is healthy. |
| 12.4V to 13.4V | Weak or no charging. Suspect the alternator, belt, or wiring. |
| Below 12.4V | Alternator isn't charging at all. The car is running off the battery. |
| Above 15.0V | Overcharging. A faulty voltage regulator can cook the battery. |
Then add one more data point. Switch on the headlights, rear defroster, and blower fan while watching the meter. The voltage may dip briefly, but a healthy system recovers and holds above roughly 13.5V under that load.
If it sags toward 12V and stays there, the alternator can't keep up.
Here's the if/then logic in plain terms. If the battery keeps failing your resting test but the charging voltage sits pretty at 14.2V, the alternator is fine and the battery likely can't hold a charge. If charging voltage is low, fix the charging system first.
Any battery will test "bad" when nothing is refilling it. Chronic undercharging also shortens plate life, which is one reason batteries rarely reach old age in cars with neglected charging systems.
Overcharging deserves its own flag. Sustained readings above 15 volts boil electrolyte out of a flooded battery and will kill an AGM even faster. If you see 15.2V at idle, stop diagnosing the battery and get the regulator checked.
The Recharge-and-Retest Loop: Discharged vs Actually Bad
Here's the step most people skip, and it's the one that actually delivers the verdict. A low reading only proves the battery is empty right now. To prove it's bad, you have to fill it up and watch what happens next.
The loop works like this:
- Charge the battery fully with a proper battery charger, not a 20-minute drive. A depleted battery can take 8 to 12 hours on a typical 4 to 10 amp smart charger.
- Disconnect the charger and let the battery rest for at least four hours to bleed off surface charge.
- Retest resting voltage.
- Retest cranking voltage.
Now the results actually mean something. If the battery charges up to 12.6V, holds it overnight, and cranks above 9.6V, the battery is fine. Something drained it, and your next job is finding what.
If it charges to 12.6V but sags back to 12.2V or lower overnight with nothing connected, it's not holding a charge. That's internal self-discharge, and it's a replacement-level fault.
Two more failure signatures show up at this stage. A battery that refuses to climb past roughly 12.4V no matter how long it charges has sulfated plates from sitting discharged too long. And a battery that charges "full" but still collapses during cranking has lost capacity, even though every resting number looks respectable.
Use an AGM-compatible charger if the label calls for it. Standard chargers push voltages that AGM chemistry doesn't like, and you can damage a healthy battery while trying to diagnose it.
Reads 12.6V but Still Won't Start? Here's What's Really Going On
If the battery tests healthy and the car still won't start, stop blaming the battery. A perfect 12.6V reading with a no-start means the electricity isn't getting where it needs to go, or something is emptying the battery faster than it fills.


Similar Posts