Skip to content

How to Test a Car Battery With a Multimeter: Easy Steps

·20 min read·by
car battery test with multimeter

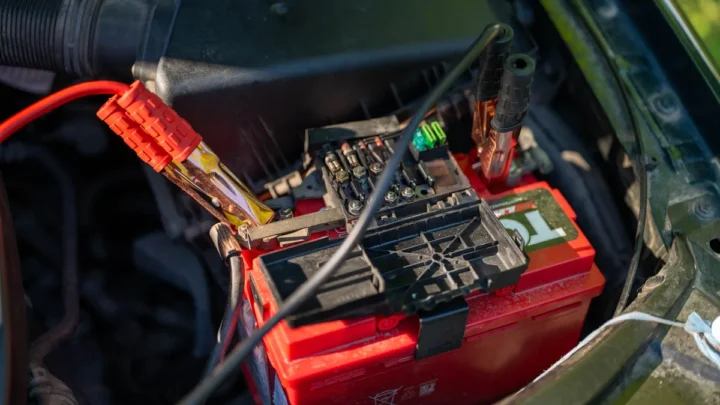
Your car battery can read a healthy 12.6 volts in the morning and still leave you stranded in a parking lot by dinner. That's why a proper car battery test with a multimeter involves more than touching two probes to the terminals and reading a number. The number only means something when you know what to do with it.

The good news: a basic digital multimeter costs $15 to $40, and the full test takes about five minutes. Compare that to $100 to $250 for a battery you might not have needed. Per SAE J537, the standard that governs battery testing, voltage is just one indicator of battery health.

So before you spend a dime, let's figure out what your battery is actually telling you.
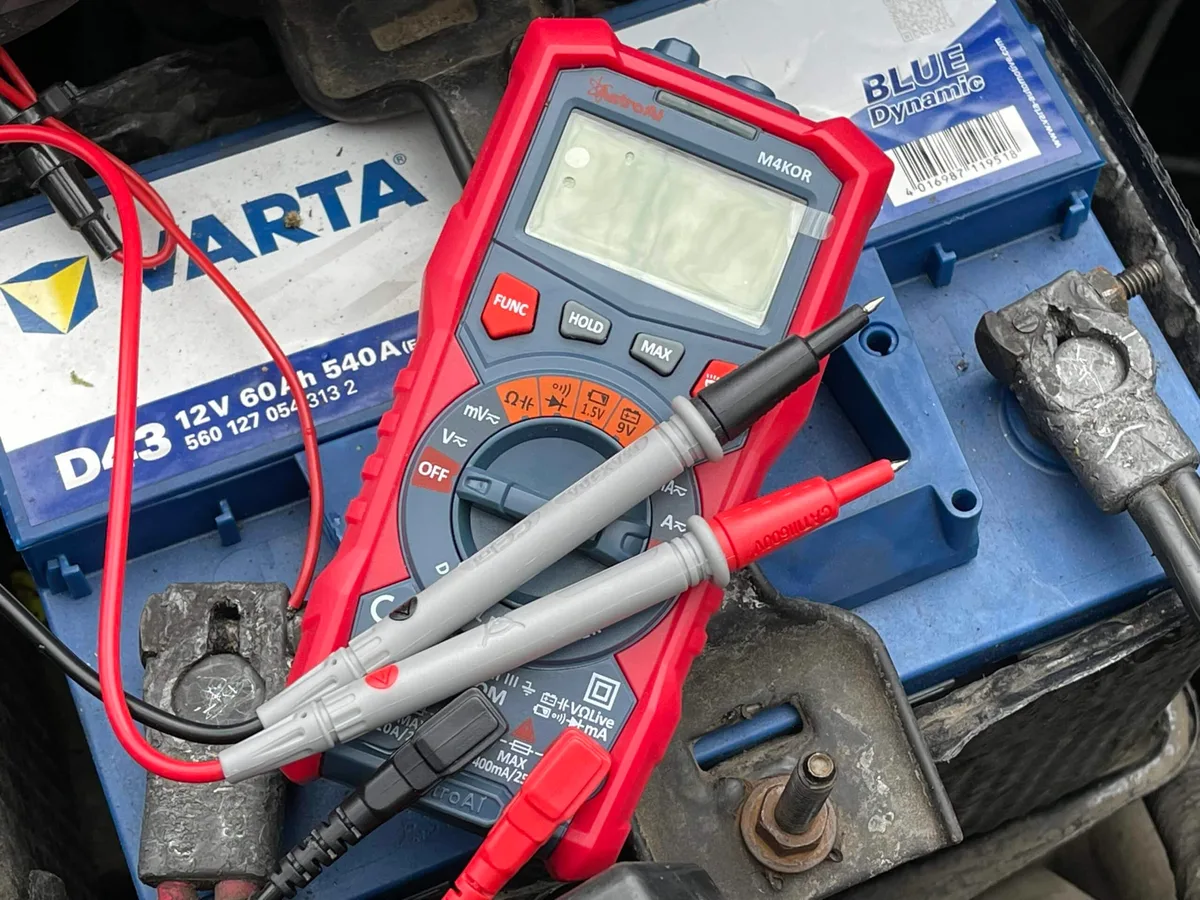
car battery test with multimeter

Why Your Car Battery Might Be Lying to You (and a $20 Multimeter Tells the Truth)

Here's the trap most people fall into. The car cranks slowly, they check the battery, it reads 12.4V, and they figure it's fine. Two weeks later it's dead in a grocery store lot.

Voltage measures state of charge, not state of health. Those are two different things. A battery near the end of its life can still hold a decent surface voltage while having almost no capacity left underneath.

It's like a fuel gauge that reads full on a tank the size of a coffee cup.

That's also why the reverse happens. People replace a perfectly good battery because the real problem was a weak alternator or a parasitic drain slowly bleeding it overnight. If you've never dug into how the whole system works, the battery gets blamed for everything.

It's the easiest part to point at.

A multimeter fixes this because it lets you test three things separately: the battery at rest, the battery under cranking load, and the charging system with the engine running. Run all three and the guilty component identifies itself. That's the workflow we're building in this guide.

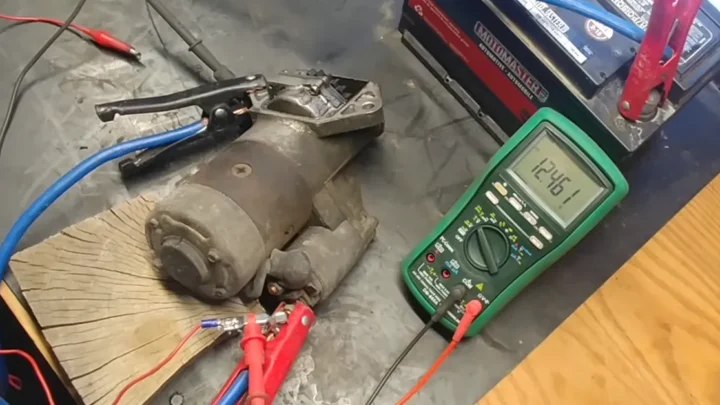
Test Your Car Battery With a Multimetervia Lowe’s Home Improvement

Quick Answer: The Voltage Numbers That Matter

A car battery test with a multimeter starts with the meter set to DC volts. Touch the red probe to the positive terminal and black to negative. A healthy resting battery reads 12.6 volts or higher.

Below 12.4 volts means the battery needs charging. During engine cranking, voltage should stay above 9.6 volts.

Here's the fast reference before we walk through each step:

Resting VoltageState of ChargeWhat It Means
12.6V or higher~100%Healthy and fully charged
12.4V~75%Acceptable, worth charging soon
12.2V~50%Charge it now, then retest
12.0V~25%Deeply discharged
Below 11.9VNear 0%Dead, possibly damaged
~10.5VN/ALikely a dead cell, replace

Memorize one thing if nothing else: the gap between "good" and "dead" is less than one volt. That's why precision matters and why your dashboard voltmeter isn't good enough.

What a Multimeter Test Can and Can't Tell You About Your Battery

A multimeter test answers three questions well. Is the battery charged? Does it hold voltage under cranking load?

And is the alternator recharging it properly? For most driveway diagnostics, that covers everything you need to make a decision.

What it can't do is measure capacity directly. It won't tell you the battery's remaining cold-start amperage the way a conductance tester at a parts store can. A battery with badly sulfated plates can pass a resting voltage test and still fail on the first cold morning of the year.

That's not a reason to skip the multimeter. It's a reason to run the full three-step workflow instead of stopping at step one. The cranking test acts as a real-world load test, because the starter motor pulls 150 to 400 amps.

If the battery holds voltage through that abuse, it has genuine capacity behind the number.

One more honest limitation: a multimeter tells you what's happening right now. It can't predict failure the way trend data can. As of 2026, the average car battery still lasts just 3 to 5 years, so if yours is in that window and testing borderline, age breaks the tie.

Before You Touch the Terminals: Setup and Safety

Two minutes of prep prevents the two most common test failures: a false reading and a blown meter fuse. Do these in order.

Setting Your Multimeter to DC Volts

Turn the dial to DC voltage, marked as a V with a straight line and dashes above it. If you've ever wondered about that straight-line marking, it separates DC from AC, and car batteries are strictly DC. Pick the AC setting by mistake and you'll get a meaningless zero.

On a manual-ranging meter, select the 20V range. That covers everything a 12V system will throw at you. An auto-ranging meter finds the range itself, so just select V with the DC symbol.

If your dial looks like hieroglyphics, a quick pass through every marking explained sorts it out fast.

Check your probe leads too. Black goes in the COM port. Red goes in the port marked V or VΩ, never the 10A port.

Testing voltage with the red lead in the amp port creates a dead short across the battery, which is how meter fuses die.

Removing the Surface Charge So You Don't Get a False Reading

If the car ran in the last few hours, the battery carries a surface charge. That's a thin layer of extra voltage sitting on the plates that makes a tired battery read healthier than it is. A battery can show 12.8V right after a drive and settle to 12.2V once that evaporates.

Two ways to clear it:

  • The patient way: let the car sit overnight, or at least 4 hours, then test.
  • The fast way: turn the headlights on for 1 to 2 minutes, turn them off, wait a minute, then test.

Skip this step and every number that follows is suspect. It's the single most common reason people misdiagnose their battery.

Battery Safety Basics: Sparks, Acid, and Jewelry

A car battery stores serious energy and vents hydrogen gas while charging. OSHA treats battery charging areas as spark-controlled zones for a reason. Your driveway deserves the same respect.

  • Take off rings, watches, and metal bracelets. A wedding ring bridging a terminal can glow red-hot in seconds.
  • Never let the two probe tips touch each other while on the terminals.
  • Keep sparks, flames, and cigarettes away, especially right after charging.
  • Wear safety glasses. The electrolyte inside is sulfuric acid.
  • If terminals are crusted with corrosion, clean them with a wire brush first. Corrosion adds resistance and drags your reading down artificially.

None of this should scare you off. Millions of people run this test safely every year. Just respect the hardware.

Step 1: The Resting Voltage Test (Engine Off)

This is your baseline. Engine off, key out, headlights off, doors closed so interior lights aren't drawing power. Surface charge already removed per the step above.

How to Place the Probes

Touch the red probe to the positive terminal, marked with a plus sign and usually capped in red. Touch the black probe to the negative terminal. Press firmly against clean metal, not against corrosion or the plastic casing.

The display settles within a second or two. If you see a negative number like -12.6, don't panic. You've just reversed the probes, and the magnitude is still accurate.

Swap them for a proper positive reading.

Hold the probes steady for five seconds and take the stable number. A reading that bounces around usually means a weak probe connection, so reseat and try again.

Car Battery Voltage Chart: What Your Reading Means

Each of the six cells in a 12V battery produces about 2.1 volts, which is why a full battery reads 12.6V rather than a flat 12 volts. The chart below is your decision point.
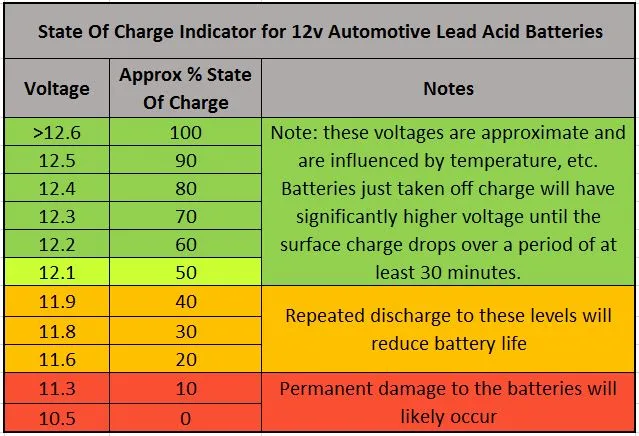
car battery voltage chart

Here's the if/then logic for a standard flooded battery:

  • If you read 12.6V or higher: state of charge is fine. If the car still starts poorly, move to the cranking test. The problem is capacity, connections, or the starter.
  • If you read 12.4V to 12.5V: about 75% charged. Not an emergency, but charge it and look for the reason it's low.
  • If you read 12.2V to 12.4V: roughly half charged. Charge fully, then retest. Don't judge the battery yet.
  • If you read 12.0V or below: deeply discharged. Recharge and retest, but know that repeated deep discharges permanently shorten lead-acid life.
  • If you read around 10.5V: that's the signature of a shorted cell. One cell has died and taken its 2.1 volts with it. No charger fixes this. Replace the battery.

One caveat: AGM batteries run slightly higher, typically 12.7V to 12.9V at full charge. If you're not sure what's under your hood, the label will say, and glass-mat construction is standard on most start-stop vehicles. Judge an AGM by flooded-battery numbers and you'll call a merely-okay battery healthy.

Whatever number you got, write it down. You'll compare it against the cranking test next, and that comparison is where the real diagnosis happens.

Step 2: The Cranking Voltage Test (The One Most People Skip)

This is the test that catches the liars. It measures how far voltage drops while the starter motor hammers the battery with a 150 to 400 amp draw. A battery with real capacity shrugs it off.

A worn one collapses.

You'll need a helper for this, or a meter with a Min/Max capture function. Here's the sequence:

  1. Leave the probes on the terminals exactly as in Step 1.
  2. If your meter has Min/Max, press it now. It'll record the lowest dip automatically.
  3. Have your helper crank the engine for a few seconds.
  4. Watch the display (or check the Min value) for the lowest number during cranking.

The pass/fail line sits at 9.6V, assuming the battery is near room temperature. Here's the if/then breakdown:

  • If voltage stays above 10V while cranking: strong battery. Whatever your starting problem is, it's not capacity.
  • If it dips to 9.6V to 10V: passing, but tired. Fine for summer. Plan a replacement before winter.
  • If it drops below 9.6V: the battery can't hold up under load. If it was fully charged going in, it's failing. Replace it.
  • If it plunges below 8V and cranking is sluggish: the battery is done, or a connection is badly corroded. Check the terminals, then condemn the battery.

Cold matters here. At freezing temperatures, a healthy battery can legitimately dip a few tenths lower, so don't fail a battery on a 20°F morning by a whisker.

Why 12.6V at Rest Can Still Mean a Dead Battery Tomorrow

Because resting voltage measures charge, not muscle. Sulfation, the crystal buildup that accumulates on plates over years of service, shrinks the active surface area. The battery still charges to full voltage, but "full" now describes a much smaller reservoir.

Picture two batteries both reading 12.6V. One delivers 600 cold cranking amps. The other, same age sticker but sulfated, manages 250.

The multimeter can't see that difference at rest. Under a cranking load, the weak one drops like a stone.

That's why the cranking test is non-negotiable in this workflow. Our research consistently shows it's the step DIYers skip, and it's the step that predicts the no-start morning. A battery that passes both tests is genuinely trustworthy, at least for the season ahead.

If yours is past year four on typical lifespan numbers, retest before the first cold snap.

Step 3: The Charging System Check (Engine Running)

Now you find out whether the battery is being fed properly. Start the engine, let it idle, and put the probes back on the terminals in the same positions. No settings change needed.

You're still on DC volts.
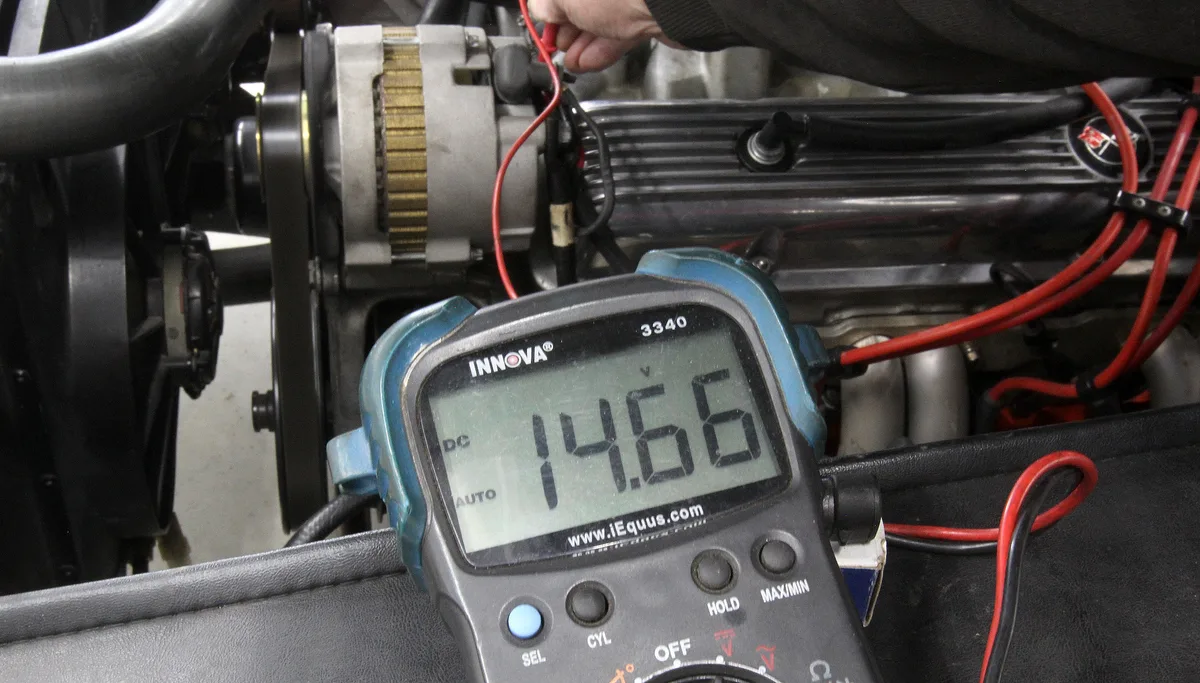
alternator charging system test

With the engine running, you're no longer reading the battery. You're reading the alternator's output as it pushes charge back in. The healthy window is 13.7V to 14.7V at idle.

Then add load. Turn on the headlights, rear defroster, and blower fan together. Voltage will sag slightly, but it should hold above roughly 13.5V.

If it collapses toward 12V with accessories on, the alternator can't keep up.

Is It the Battery or the Alternator?

The engine-running voltage answers this directly. If you see 13.7V to 14.7V, the charging system is healthy and any battery problem belongs to the battery itself. If you see under 13.5V, the alternator or its wiring is undercharging, and it may have slowly killed an innocent battery.

Use this quick matrix to combine your three readings:

Resting (Off)Cranking DipRunningVerdict
12.6VAbove 9.6V13.7 to 14.7VEverything healthy
12.6VBelow 9.6V13.7 to 14.7VBattery worn out, replace
12.2V or lowerAny13.7 to 14.7VBattery discharged, find the drain
12.2V or lowerAnyBelow 13.5VAlternator undercharging
AnyAnyAbove 15VRegulator overcharging, fix fast

That last row matters more than people think. Sustained output above 15V cooks the electrolyte and can kill a new battery in months. It usually points to a failed voltage regulator, and on most modern cars that means replacing the alternator assembly.

One diagnostic trick: if resting voltage is low but the charging voltage is perfect, drive for 30 minutes, let the car sit a few hours, and retest at rest. If it's low again, something is draining it while parked. That's your cue for the parasitic draw test below.

Reading-by-Reading Decision Guide: What to Do at Every Voltage

You've got numbers. Here's the complete decision path for every result, including the confusing ones.

12.6V or Higher, But Your Car Still Won't Start

A full battery with a no-start means the problem is downstream, not in the charge. Work through these in order:

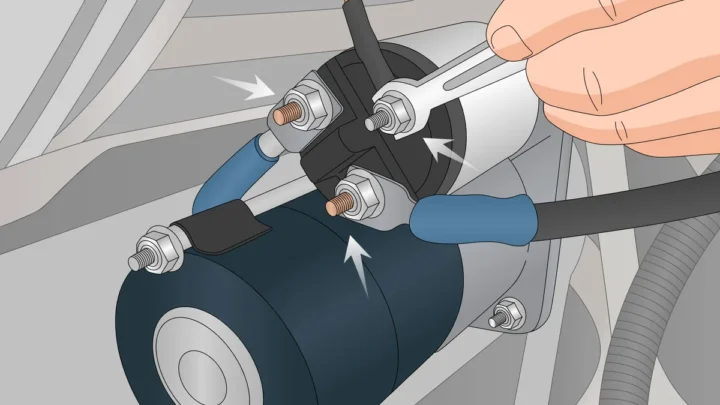
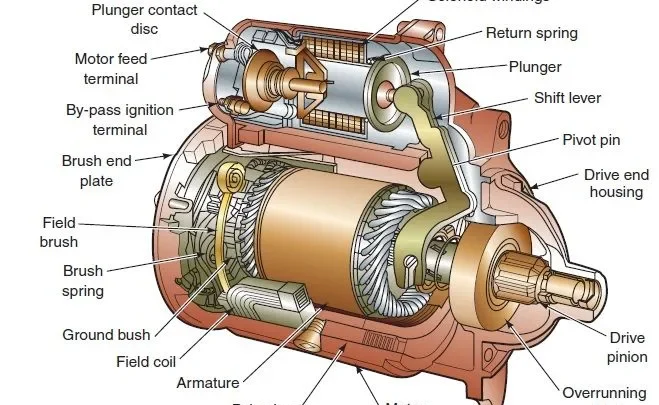
  • Clicking but no crank: usually a starter motor or starter relay fault, or a corroded cable connection dropping voltage before it reaches the starter.
  • Slow, laboring crank with a passing battery: check the cable ends and ground strap. Resistance at a corroded clamp mimics a weak battery perfectly.
  • No click, no crank, dash lights fine: ignition switch, neutral safety switch, or immobilizer territory.

Run the cranking test before condemning anything. If voltage holds above 9.6V while the engine drags, the battery is proven innocent and you've saved yourself $150.

12.2V to 12.5V: Charge First, Then Retest

Never judge a battery from a partially discharged state. A reading in this band means one of three things: a short-trip driving pattern that never fully recharges it, a small drain, or normal self-discharge from sitting.

Charge it fully with a proper battery charger, not just a long drive. Let it rest four hours, then retest. If it holds 12.6V for a couple of days, it's fine and you fix the lifestyle problem (a weekly longer drive or a maintainer).

If it sags back below 12.4V on its own, capacity is fading.

Below 12V: The Recharge-and-Retest Loop

A deeply discharged battery gets exactly one fair chance. Charge it fully on a smart charger, which may take overnight at 4 to 10 amps. Then run the full three-step test again.

If it now passes both resting and cranking tests, keep it, but find out why it drained. If it charges up but fails the cranking test, the deep discharge took its toll. Each deep discharge below 11.9V permanently damages lead-acid plates, so two strikes in a month is replacement territory.

Stuck at Around 10.5V: The Dead Cell Verdict

A battery that reads roughly 10.5V and won't climb past it has a shorted cell. Six cells produce about 2.1V each, so losing one leaves you with five, and five times 2.1 equals 10.5. The math is the diagnosis.

No charger revives a shorted cell. Some smart chargers will even refuse to start, flashing an error instead. Replace the battery, and when you do, match the group size your vehicle calls for rather than grabbing whatever's on sale.

How to Test an Automotive Battery With a Multimetervia Scott’s Building Adventures

When Your Battery Tests Fine but Keeps Dying: The Parasitic Draw Test

If the battery passes every test but dies after sitting a few days, something in the car is drinking from it overnight. That's a parasitic draw, and your multimeter can catch it. Fair warning: this is the most advanced test in this guide.

The method changes completely here. You'll measure current, not voltage, which means the meter goes in series with the circuit instead of across it.

  1. Turn everything off, remove the key, and close the doors (latch them, windows down so you don't get locked out).
  2. Move the red lead to the high-amp port and set the dial to 10A DC.
  3. Disconnect the negative battery cable.
  4. Connect one probe to the negative post and the other to the disconnected cable. All current now flows through the meter.
  5. Wait 30 to 45 minutes. Modern cars need that long for modules to go to sleep.
  6. Read the draw. Once it's under 1 amp, you can switch down to the mA range for precision.

A normal modern car draws under 50 milliamps (0.05A) while asleep. Some manufacturers spec up to 85mA. If you're seeing 200mA, 500mA, or more, something is staying awake.

To find the culprit, pull fuses one at a time while watching the meter. When the draw suddenly drops, the last fuse you pulled feeds the guilty circuit. Common offenders: aftermarket stereos, glovebox and trunk lights that never shut off, dash cams hardwired to constant power, and stuck door-lock modules.

Two warnings. Never connect the meter in amps mode across the battery terminals, because that's a dead short and will blow the fuse instantly, or worse. And don't crank the engine with the meter in series, since starter current is hundreds of amps through a 10-amp meter.

Multimeter vs. Load Tester vs. Free Parts-Store Testing

The multimeter isn't the only way to test a battery, so it's worth knowing what each option actually proves and who it suits best.

MethodCostWhat It MeasuresBest For
Multimeter$15 to $40Voltage at rest, under crank, and chargingDIYers who want full-system diagnosis
Conductance tester$30 to $100Internal resistance, estimated CCAFrequent testers, used-car shoppers
Carbon-pile load tester$50 to $150True capacity under a fixed loadShops, fleet work, older flooded batteries
Free parts-store test$0Conductance plus charging checkConfirming a diagnosis before buying

The honest comparison: a conductance tester gives you a CCA estimate the multimeter can't, and it does so in seconds without cranking. If you test batteries often, on a boat, mower, and two cars, it earns its price. For a once-a-year check, the multimeter wins because it also handles fuses, wiring, relays, and the parasitic draw test above.

A single-purpose battery tester does none of that.

The free test at AutoZone, O'Reilly, or Advance Auto is genuinely useful, with one caveat. You're getting a diagnosis from a store that sells the cure. Our advice: run your own multimeter workflow first, then use the free conductance test as a second opinion.

When both agree the battery is failing, buy with confidence. When they disagree, trust the cranking voltage test, because it's the closest thing to the real morning-start event your battery has to survive.

AGM, Start-Stop, and Cold Weather: When the Standard Numbers Shift

The voltage charts earlier assume a standard flooded battery at roughly room temperature. Three situations shift the goalposts, and misreading them leads to bad calls.

AGM batteries rest higher. Full charge is 12.7V to 12.9V, so an AGM reading 12.5V is closer to 75% than the 80-plus percent a flooded battery would be at that number. They're also fussier when deeply drained.

Many basic chargers won't recover an AGM below about 10V, so you'll need a charger with a dedicated AGM mode.

Start-stop vehicles run either AGM or enhanced flooded designs built for constant restart cycling. Their resting voltage often reads low right after a drive because the car deliberately holds charge around 80% to accept regenerative energy. Test these after an overnight sit, not after a trip, or you'll fail a healthy battery.

Cold weather drags every number down. A fully charged battery at 0°F can read a tenth or two lower at rest and dip noticeably deeper during cranking. Chemistry slows in the cold, which is exactly why batteries die on the first freezing morning rather than in July.

If you're testing in the cold, give borderline results a pass on voltage but weigh the battery's age heavily. Hot climates flip the script: heat quietly destroys plates all summer, and fall testing catches the damage.

Mistakes That Ruin the Test (or Your Multimeter)

Every one of these comes up constantly in our research on failed diagnoses. Skim the list before you test.

  • Testing right after driving. Surface charge inflates the reading by 0.2V to 0.4V. That's the difference between "healthy" and "replace soon."
  • Leaving the red lead in the amp port for a voltage test. This shorts the battery through the meter. Best case, you blow the internal fuse. Worst case, you damage the meter.
  • Selecting AC volts instead of DC. You'll get a near-zero or nonsense reading and might conclude the battery is dead when it's fine.
  • Probing corroded terminals. Crust between probe and lead adds resistance and shaves real voltage off the display. Clean first, always.
  • Judging the battery from one resting reading. As covered in Step 2, resting voltage says nothing about capacity. Crank it.
  • Pulling fuses during a draw test without waiting for sleep mode. Opening a door or cycling the ignition wakes every module and resets your 30-minute wait.
  • Cranking the engine with the meter wired in amps mode. Starter current will destroy the meter instantly.

If your meter is brand new and the display itself is confusing you, a quick primer on running your first measurement will smooth out the whole workflow.

Frequently Asked Questions

What voltage should a car battery read when off?

A healthy battery reads 12.6V or higher after sitting at least four hours with everything off. AGM types run slightly higher at 12.7V to 12.9V. Anything below 12.4V means the battery needs charging, and below 11.9V indicates a deep discharge that may have caused permanent damage.

Is 12.4 volts okay for a car battery?

It's about 75% charged, which is drivable but not ideal. Charge it fully, let it rest, and retest. If it returns to 12.6V and holds, the battery is fine.

If it keeps settling at 12.4V or lower, either something is draining it or capacity is fading.

Can a car battery read 12.6V and still be bad?

Yes, and it's common. Resting voltage shows state of charge, not capacity. A sulfated battery can hold 12.6V with almost no cranking power behind it.

The cranking test exposes this: if voltage drops below 9.6V while starting, the battery is failing despite the healthy resting number.

How do I know if it's the battery or the alternator?

Test with the engine running. A reading of 13.7V to 14.7V at the battery terminals means the alternator is charging properly, so a weak battery is the battery's fault. Below 13.5V points to the alternator or its wiring.

Above 15V means an overcharging regulator that needs immediate attention.

What setting should the multimeter be on to test a car battery?

DC voltage, shown as a V with a solid line over dashes. On a manual-ranging meter, choose the 20V range. Black lead goes in COM, red lead in the V port.

Never use the amp port or the AC setting for a battery voltage test.

How often should I test my car battery?

Twice a year covers most drivers: once in fall before cold weather and once in spring after it. Test monthly if the battery is past three years old, if the car sits for long stretches, or after any deep discharge or jump start.

Charge, Replace, or Dig Deeper: Your Final Decision Path

Here's the whole workflow compressed into one decision tree. Run the three tests, then find your row.

Replace the battery if: it reads about 10.5V and won't charge past it, it fails the cranking test after a full recharge, or it needs a second deep recharge within a month. A battery past year four that's borderline on any test belongs in this column too. Old batteries don't recover, and retailers take the core for recycling under programs the EPA tracks, usually with a core-charge refund.

Charge and retest if: resting voltage sits between 12.0V and 12.5V and the battery hasn't had its fair chance yet. A full overnight charge, a four-hour rest, and a clean pass on both tests means you keep it and fix whatever drained it.

Dig deeper if: the battery passes everything but the car still misbehaves. Charging voltage below 13.5V sends you to the alternator. A battery that dies over days of sitting sends you to the parasitic draw test.

A no-start with a strong battery sends you to the starter, cables, and grounds.

The pattern behind all of it: never replace a part on one number. Twenty minutes with a $20 meter, three readings, and the chart above will tell you more than any single glance at a voltage display ever could. Your battery might be lying, but the workflow doesn't.

Ryan Carter is the founder of AutoVerse Authority. A self-taught gearhead from just outside Kansas City, he's spent 15 years buying, fixing, and living with cars — and now shares honest, hands-on advice so everyday drivers can save money and skip the dealership traps.

Share.

Similar Posts

What Should Alternator Voltage Be…Car Battery Reads 12V but Won&#82…How to Set a Multimeter to 20V DC…How Long to Drive After a Jump St…How to Test Parasitic Draw With a…Why Your Battery Voltage Drops Wh…Multimeter Setting for Car Batter…How to Test a Car Battery Without…How to Test a Car Battery With a …How to Use Back Probe Pins on a M…
Share