Where to Put Multimeter Probes on a Car Battery: Easy Guide
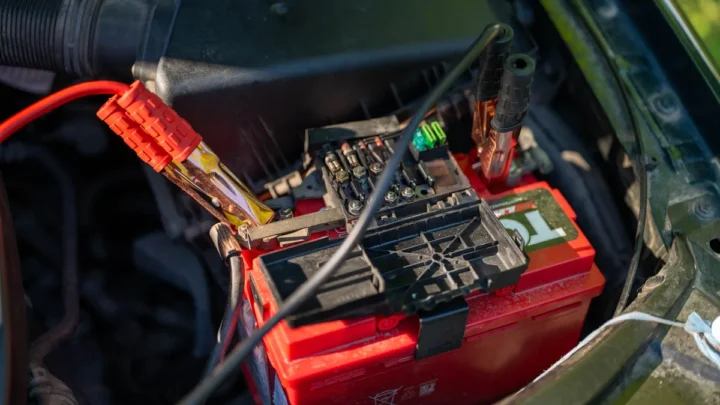
Pop the hood, look at the battery, and the question hits you: where to put multimeter probes on car battery terminals without sparks, mistakes, or a fried meter? The answer is simpler than it looks. Red probe on the positive post, black probe on the negative post, and the screen does the rest.
The tricky part is everything around that answer. Modern batteries hide the positive terminal under red plastic covers, and corrosion can block your probe from getting a true reading. Per SAE J537 testing conventions, a healthy rested battery should show 12.6 volts or higher.
Before you can trust that number, though, you need to know exactly what you're touching.
Quick Answer: Red Probe on Positive, Black Probe on Negative
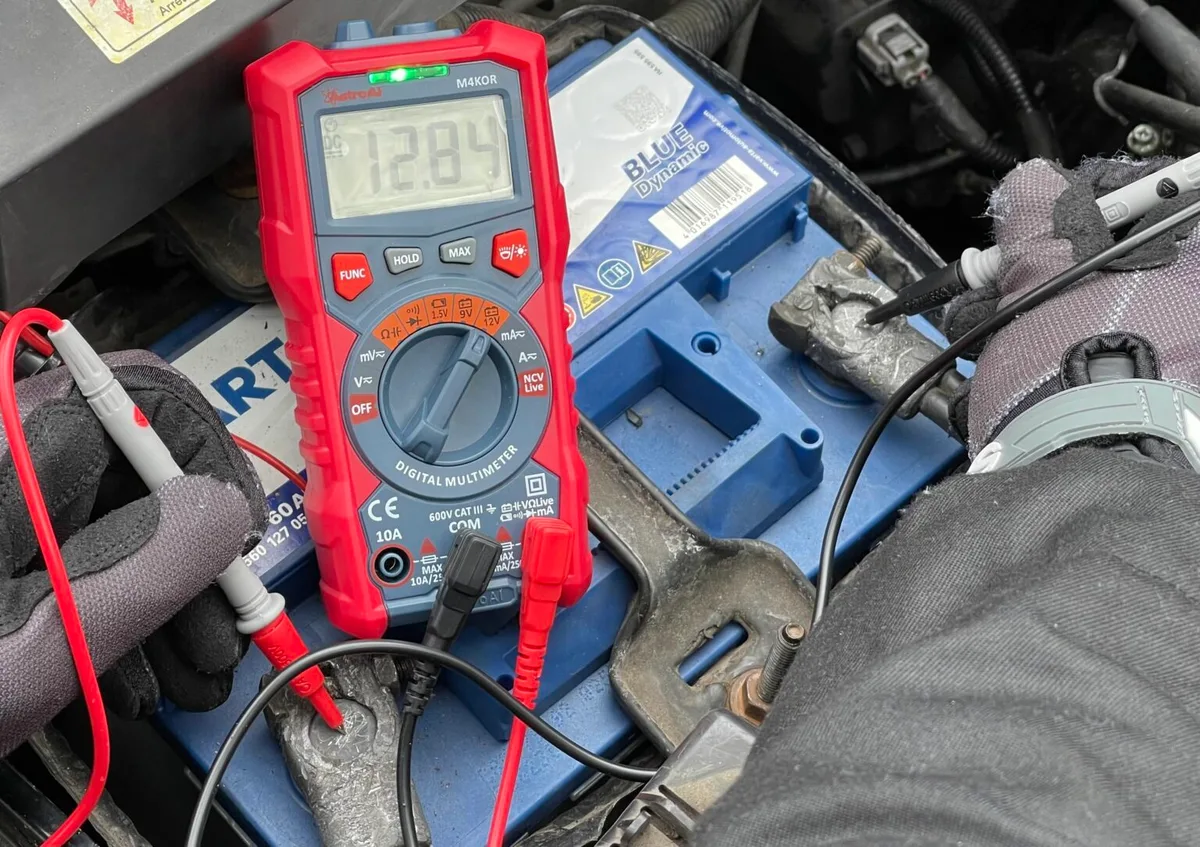
Place the red multimeter probe on the positive battery post. Place the black probe on the negative post. The positive post has a plus sign or red cover.
Set the meter to DC volts first. A healthy rested battery reads about 12.6 volts.
That's the whole move. Everything below shows you how to nail it on any battery, in any engine bay, without second-guessing yourself.
What You're Looking At: Battery Posts, Clamps, and Terminal Markings
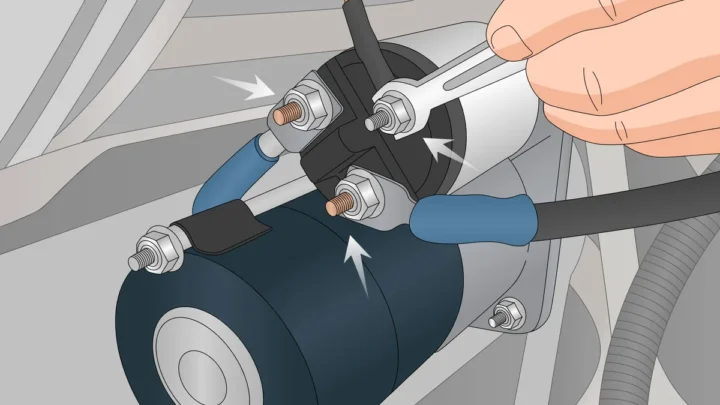
Before the probes come out, get familiar with the hardware. A standard 12V car battery has two lead posts sticking up from the case. Each post wears a metal clamp that connects it to the car's wiring.
The post is the battery's actual terminal. The clamp is just the connector bolted around it. That distinction matters more than most guides admit, and we'll come back to it when we talk probe placement.

If you want the full picture of what those posts connect to inside the case, our breakdown of the parts under the lid walks through the plates, cells, and electrolyte that produce the voltage you're about to measure.
How to Spot the Positive Terminal Every Time
The positive terminal is the one marked with a plus sign, and it usually wears red. Look for these identifiers, in order of reliability:
- A "+" symbol stamped or molded into the battery case next to the post
- A red plastic flip-up cover or red rubber boot over the terminal
- A red cable running to the clamp
- A slightly thicker post (on top-post batteries, positive is fractionally larger by design)
The negative terminal carries a "−" mark and a black cable. It's almost always bare, with no cover. Car makers cover the positive side because a dropped wrench bridging positive to the metal body can cause a serious short.
The negative side is already connected to the body, so it doesn't need protection.
One catch: cable colors can lie on older cars. If a previous owner replaced a cable with whatever was on the shelf, you might see black cable on the positive side. Trust the "+" and "−" molded into the case.
Those never change.
Top-Post vs Side-Post vs Hidden Batteries
Not every battery puts its terminals on top where you can see them. As of 2026, you'll run into three main layouts.
| Battery Layout | Where the Terminals Are | Probe Access |
|---|---|---|
| Top-post | Two lead posts on the upper case | Easy, touch the posts directly |
| Side-post (common on GM) | Threaded contacts recessed into the side | Touch the bolt head or contact face |
| Hidden (trunk or under-seat) | Battery out of sight, remote posts under hood | Use the remote jump terminals |
Side-post batteries are the fiddly ones. The terminal is a small threaded contact sunk into the battery's side wall, and your probe needs to reach the metal at the center.
Hidden batteries are common on BMW, Mercedes, and some newer SUVs. The battery lives in the trunk or under a seat, but the manufacturer gives you remote jump posts under the hood. The positive one sits under a red flip cap, and the negative is usually a bare stud bolted to the strut tower or engine.
Your owner's manual shows the exact spots. Different battery formats and chemistries tend to pair with different mounting locations, so a quick check before you start saves crawling around the engine bay.
Setting Up Your Multimeter Before You Touch the Battery
Meter setup causes more bad readings than probe placement ever will. Get these two things right and the actual test takes ten seconds.
If this is literally your first time holding a meter, our primer on getting comfortable with the tool covers the basics in more depth. Here's the short version for battery testing.
Which Jacks the Leads Plug Into
Plug the black lead into the jack marked COM. Plug the red lead into the jack marked VΩ (it often reads VΩmA). That's it for a voltage test.
Do not use the jack marked 10A or 20A. That port is for measuring high current, and it routes through the meter with almost no resistance. Touch battery terminals with the red lead in the amps port and you create a dead short.
Best case, you blow the internal fuse. We've covered what causes that popped fuse before, and this exact mistake tops the list.
Finding the DC Volts Setting on the Dial
Turn the dial to DC voltage. On most meters that's a "V" with a straight line and three dots above or beside it. The "V" with a wavy line is AC voltage, which is for wall outlets, not batteries.
If your dial looks like hieroglyphics, our guide to reading every dial marking decodes each one.
Two dial situations you'll meet:
- Manual-ranging meter: pick the 20V range. A car battery sits around 12 to 15 volts, so 20V is the smallest range that fits. Choose 2V by mistake and you'll see "1" or "OL" on the screen.
- Auto-ranging meter: just select DC volts and the meter picks the range itself. Fluke, whose meter manuals at fluke.com are worth a skim for any beginner, popularized this feature, and most sub-$50 meters now include it.
Still unsure what that straight-line V means on your specific meter? We've explained the DCV marking in detail, including how it differs between brands.
Quick pre-flight checklist before you lean over the fender:
- Black lead in COM, red lead in VΩ.
- Dial on DC volts, 20V range if manual.
- Engine off, ignition off, headlights and interior lights off.
- Meter's own battery healthy (a dim or flickering display means change it).
Exactly Where to Touch the Probes (and Where Not To)
Touch the red probe tip to the bare metal of the positive post. Touch the black probe tip to the bare metal of the negative post. Press firmly enough to feel metal on metal, hold both steady, and read the screen.
You're measuring voltage, so probe order doesn't matter for safety. Nothing sparks, nothing arcs, and 12 volts DC can't shock you through dry skin. The meter simply reports the difference between the two points you're touching.
A few placement rules make the reading trustworthy:
- Metal to metal, always. Probe tips on paint, plastic, or crust read nothing or garbage.
- Give each probe a small twist or wiggle as you press. The tip bites through invisible oxide film on the post.
- Hold for two to three seconds until the number stops moving. The first flicker isn't your reading.
- Don't bridge the probes. Keep the two tips from touching each other while both are on the battery. On the volts setting this won't hurt anything, but it ruins the measurement.
Bare Post vs Clamp Bolt: Why Placement Changes Your Reading
Put the probe on the post itself, not the clamp or its bolt. Here's why that matters. Corrosion between the post and clamp adds electrical resistance right at that joint.
Measure at the post and you get the battery's true voltage. Measure at a corroded clamp and you can read a few tenths of a volt low. That gap can trick you into replacing a healthy battery.
There's a useful flip side. Measure post-to-post, then clamp-to-clamp. If the clamp reading is noticeably lower, the connection is dirty, and cleaning the terminals might fix your slow-crank problem for free.
Mechanics call this a voltage drop check, and it's one of the oldest tricks in the trade.
Probing a Side-Post or Recessed Terminal
Side-post terminals are recessed, so the probe has to reach the metal contact at the center of each fitting. Touch the red probe to the bolt head or exposed contact face on the positive side. Do the same with the black probe on the negative side.
If the bolt heads are painted or crusty, you may need to press harder or find a clean spot on the terminal face. Some DIYers thread a short bolt into each terminal to create a clean probe point. That works, but do one terminal at a time and never let a loose bolt roll across the battery top.
For trunk-mounted batteries, use the under-hood jump posts exactly as you would normal terminals. Red probe under the red flip cap, black probe on the ground stud. The reading may run about 0.1V lower than at the battery itself because of cable length, which is normal.
How to Read What the Screen Tells You
A healthy, rested 12V battery reads 12.6 volts or a little higher. That single number tells you the battery's state of charge, which is how full its tank is right now.
"Rested" is the key word. Test at least 30 minutes after the engine was last running, and ideally after the car has sat overnight. A freshly driven battery holds a surface charge that can read 13.0V or more and fool you.
To burn it off quickly, turn the headlights on for 30 seconds, switch them off, wait two minutes, then test.
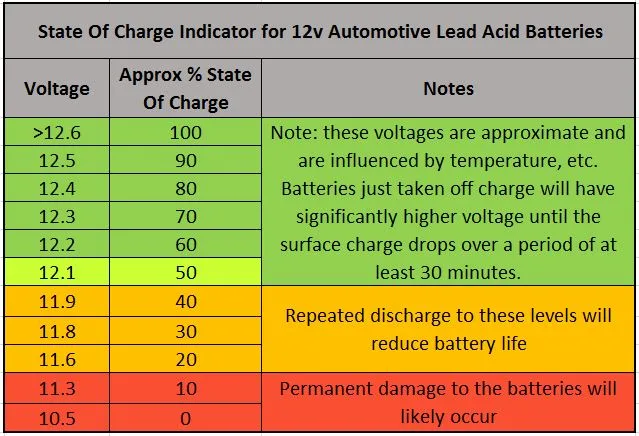
Car Battery Voltage Chart: 12.6V to Dead
| Rested Voltage | State of Charge | What It Means |
|---|---|---|
| 12.6V or higher | 100% | Healthy and fully charged |
| 12.4V | ~75% | Fine, but worth charging soon |
| 12.2V | ~50% | Undercharged, charge it now |
| 12.0V | ~25% | Deeply discharged, may not crank |
| Below 11.9V | Near empty | Discharged or failing |
| ~10.5V | Dead cell likely | One of six cells has shorted |
That 10.5V number has a neat explanation. A 12V battery is really six 2.1-volt cells wired in series. Lose one cell to an internal short and you lose 2.1 volts, landing you near 10.5V no matter how long you charge.
Two caveats on the chart. AGM and EFB batteries in stop-start cars rest slightly higher, closer to 12.8V when full. And temperature shifts readings a bit, so a battery tested in a freezing garage reads a touch lower than the same battery at room temperature.
Why a Negative Reading Isn't a Broken Meter
See something like −12.6V on the screen? Your probes are swapped. The red probe is on the negative post and the black is on the positive.
Nothing is damaged. Digital multimeters simply show a minus sign when polarity is reversed. Swap the probes and the same number appears without the minus.
Old analog needle meters were a different story, since reverse polarity slammed the needle backward, but digital meters shrug it off completely.
The reading's magnitude is still valid, too. A −12.6V display means the battery holds 12.6 volts. If the screen shows a wandering number like 0.4V instead, one probe isn't making real contact, so reset both tips on bare metal and hold steadier.
Testing With the Engine Running: Checking Your Alternator
Same probe placement, different engine state. Start the car, let it idle, then touch the red probe to the positive post and the black probe to the negative post again. You should see between 13.7V and 14.7V.
That jump from 12.6V to the mid-14s is the alternator doing its job. It pushes charging voltage back into the battery while the engine spins. If the number climbs into that window, your charging system is healthy.
Here's how to read the running numbers:
| Running Voltage | What It Tells You |
|---|---|
| 13.7V to 14.7V | Charging system working normally |
| 12.4V to 13.3V | Alternator weak or belt slipping |
| Below 12.4V | Alternator not charging, battery running the car |
| Above 15.0V | Overcharging, faulty voltage regulator |
The under-12.4V case is the sneaky one. The car runs fine for now because the battery is feeding everything. Then it dies at a stoplight twenty minutes later, and the tow truck driver blames the battery.
The battery was innocent.

Similar Posts