What Multimeter Setting to Use for a 12V Battery

Grab your meter, and the question is always the same: what multimeter setting for a 12v battery actually gives you a reading you can trust? The short answer is DC voltage. On most meters, that's the V with a straight line and little dashes above it.
Pick the wrong mode and your numbers mean nothing.
Here's the useful part. A healthy 12V battery at rest reads right around 12.6 volts, matching Battery Council International charge figures. On a manual meter, you'll set the dial to the 20V DC range to capture that cleanly.
Get the setting right and everything after it is easy. Let's dial it in.
The Quick Answer: What Setting to Use for a 12V Battery
The multimeter setting for a 12V battery is DC voltage. Look for the V with a solid line and dashes. On a manual meter, choose the 20V DC range.
Auto-ranging meters only need DCV selected. A healthy battery reads about 12.6 volts at rest.
That's the whole setting decision in five lines. Everything else here is about reading the number correctly and knowing what it's telling you. As of 2026, that basic DC voltage check is still the fastest way to judge a battery in under a minute.
Reading the Dial: DC Volts vs. AC Volts (and Why the Symbol Matters)
A car battery makes direct current, so you want the DC voltage setting, not AC. This is the single most common mix-up we see in beginner questions. Get it wrong and the meter shows garbage or near-zero.

Here's how to tell the two apart at a glance:
- DC voltage: marked with a V followed by a solid line over a dashed line (looks like V⎓). Some meters just print DCV or V=.
- AC voltage: marked with a V and a wavy line (V~), or ACV. This is for wall outlets. Skip it for batteries.
If your dial has numbers grouped under the DC voltage symbol, those are ranges. For a 12V battery you want the 20 setting, which means "up to 20 volts." That range comfortably covers a battery reading anywhere from 11 to 15 volts. Meter makers like Fluke use this same DC voltage symbol across their lineup, so once you learn it, it carries over to almost any meter.
Still not sure your dial is on the right spot? Our breakdown on dialing in that range walks through the 20V DC position step by step. And if you're testing a starter battery specifically, this guide on picking the right mode covers the same choice in car terms.
Auto-Ranging vs. Manual-Ranging: Do You Even Need to Pick 20V?
It depends on which meter you own. That one detail changes the whole setup, so let's split it cleanly.
If you have an auto-ranging meter:
- Turn the dial to DCV (or the V⎓ symbol).
- That's it. The meter picks the range for you.
- The display might read 12.65 without you choosing anything.
If you have a manual-ranging meter:
- Turn the dial to the DC voltage section.
- Pick the 20 setting (the first range above 12).
- Never pick a range below 12, like the 2V or 200mV settings.
Why does the range matter on a manual meter? If you select a range lower than the voltage you're measuring, the meter over-ranges. You'll see "OL" or a lone "1" on the left of the screen.
That's not a dead battery. It just means you asked the meter to measure something bigger than the range allows.
So the if/then is simple. If auto-ranging, select DCV and read. If manual, select 20V DC and read.
Either way you land on the same DC voltage measurement, whether you're testing a battery on the bench or clipped into a car.
How to Test a 12V Battery Step by Step
Once the setting is right, the actual test takes about 30 seconds. Follow these steps in order.
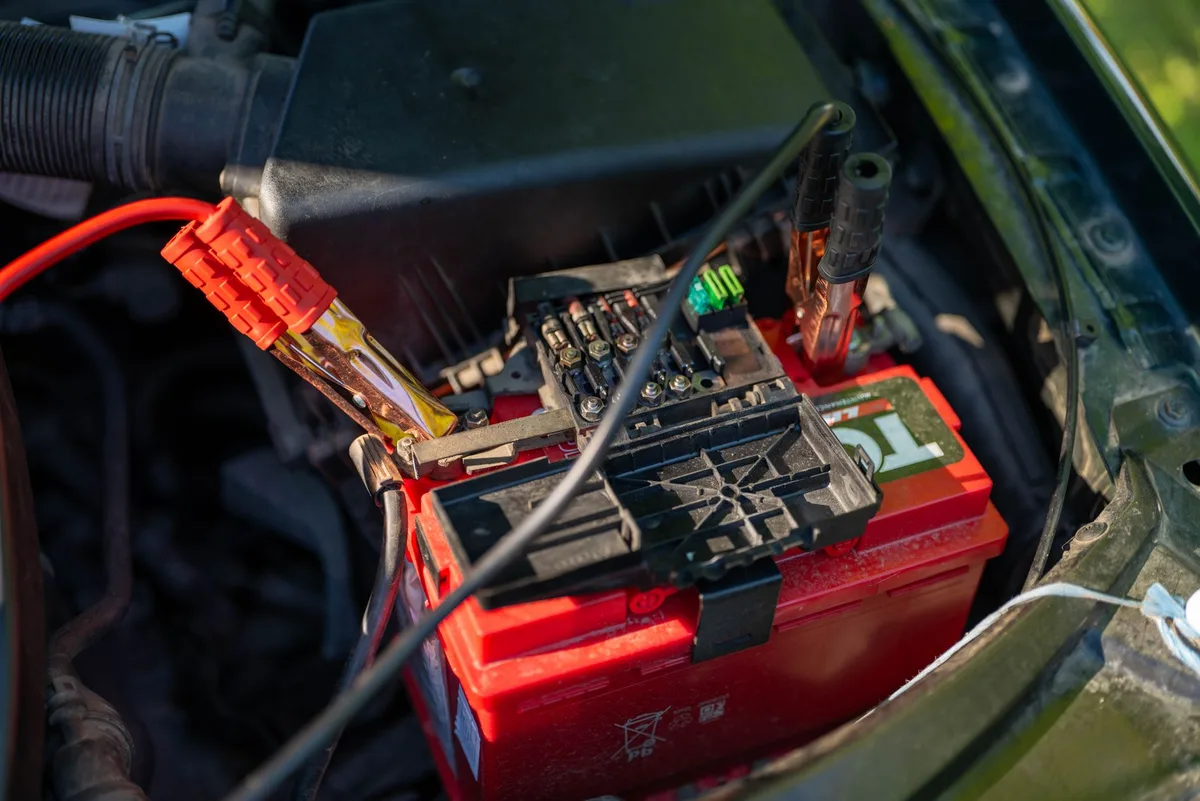
Setting Up the Probes and Jacks Correctly
Before you touch the battery, make sure the leads are in the right holes on the meter.
- Plug the black probe into the COM jack.
- Plug the red probe into the jack marked VΩmA (the voltage jack).
- Keep the red lead out of the 10A jack. That jack is for current, not voltage.
- Turn the engine and all accessories off.
- Set the meter to DC voltage (20V range if manual).
That's the setup. Leads in the correct jacks, meter on DC volts, car switched off.
Where the Red and Black Leads Go
Now touch the probes to the battery. Red goes to positive, black goes to negative.
- Red probe → positive (+) terminal, usually the one with a red cover or a "+" mark.
- Black probe → negative (−) terminal, marked "−".
- Press firmly against clean metal, not corroded buildup.
- Read the number on the display.
If you reverse the probes, nothing breaks. The meter just shows a minus sign in front of the number, like -12.6. That's a harmless reminder to swap them.
For the full routine, our step-by-step on checking a battery's health covers each move with the same probe placement.
One tip that saves confusion: read the battery after it's rested. A battery that's just been driven or charged holds a "surface charge" that reads high for a while. Let it sit an hour or so for a truer number.
What the Numbers Actually Mean: 12V Battery State-of-Charge Chart
A reading only helps if you know what it stands for. For a standard lead-acid battery at rest, near room temperature, here's the state-of-charge scale.
| Resting Voltage | Approx. State of Charge | What It Tells You |
|---|---|---|
| 12.6–12.8V | 100% | Fully charged, healthy |
| 12.4V | ~75% | Good, slight top-up helps |
| 12.2V | ~50% | Half charged, recharge soon |
| 12.0V | ~25% | Nearly flat |
| 11.9V or lower | Discharged | Suspect, may not start the car |
A couple of things worth knowing as you read that chart. The gap between "full" and "flat" is tiny in voltage terms. Just 0.7 volts separates a strong battery from a nearly dead one.
That's why a precise DC reading matters so much.
If your meter lands mid-scale, it's not automatically bad. A 12.4-volt result usually means the battery is fine but could use a charge. Drop to a 50% reading around 12.2 volts and it's time to recharge before the next cold morning.
Slide toward the dead-battery range and the battery may leave you stranded.
Lead-Acid, AGM, and LiFePO4 Read Differently
Battery chemistry shifts these numbers, so don't judge every 12V battery by the same chart.
- Flooded lead-acid: full at about 12.6, 12.7V.
- AGM (Absorbent Glass Mat): reads a touch higher, roughly 12.8, 13.0V when full.
- LiFePO4 (lithium): full sits near 13.3, 13.4V, and the voltage stays flat across most of its charge, so a small drop can mean a big change in charge level.
The setting on your meter stays the same for all three. It's always DC voltage. Only your reading of the number changes with the battery type.
Resting Voltage vs. Cranking Test vs. Charging Test
One reading rarely tells the whole story. There are three separate checks, and each uses the same DC voltage setting. What changes is when you take the reading.
- Resting voltage: engine off, battery settled. Tells you state of charge (that 12.6V scale).
- Cranking test: watch the display while someone starts the engine. Tells you if the battery holds up under load.
- Charging test: engine running at idle. Tells you if the alternator is topping the battery back up.
During cranking, a strong 12V battery should stay above about 9.6 volts. If it plunges to 6 or 7 volts and the engine barely turns, the battery is weak even if it rested at 12.5. Our look at how far voltage should fall on startup puts real numbers to that dip.
With the engine running, expect roughly 13.7 to 14.7 volts at the terminals. That's the alternator doing its job. If it reads flat at 12.4 with the engine on, the charging system may be the real problem, and this guide on spotting a charging fault helps you tell which part is failing.
Common Multimeter Mistakes That Give You the Wrong Reading
Most bad readings come down to a handful of slip-ups. Here's what trips people up and how to fix each one.
- Meter set to AC, not DC. You'll get a jumpy or near-zero number. Switch to DC voltage.
- Range too low on a manual meter. The screen shows "OL" or "1". Move up to the 20V range.
- Reading right after charging. Surface charge inflates the number. Let it rest first.
- Dirty or loose terminals. Corrosion adds resistance and drops the reading. Clean the posts.
- Probes barely touching. A loose contact gives a bouncing figure. Press firmly on bare metal.
There's also the alarming one: a reading of 0.00 volts. That usually isn't a truly dead battery. It often points to a blown meter fuse, a bad probe, or a broken connection, and our fix-it walkthrough for a zero-volt reading runs through the causes in order.
If your meter shows a negative number, relax. You've just got the probes swapped. Flip red and black and the value goes positive.
When a "Good" Voltage Still Means a Bad Battery
Yes, a battery can read 12.6 volts and still fail. Voltage shows charge level, not health. A battery with a weak or dead cell can rest at a healthy number, then collapse the moment you ask it to crank the engine.
This is the classic "reads 12V but won't start" trap. The fix is the cranking test from earlier. Watch the meter while the key turns.
A battery that nosedives under load is done, no matter how good it looked at rest. We break down that exact case in why a full-looking battery won't turn over.
Age and capacity matter too. A multimeter can't measure cold cranking amps (CCA), the raw punch a battery delivers on a cold start. An old battery loses CCA long before its resting voltage drops.
So if yours is five or six years old and struggles on cold mornings, trust the behavior over the number, especially since cold weather alone lowers readings.
Multimeter vs. Dedicated Battery Tester and Load Tester
A multimeter tells you voltage. A dedicated tester tells you strength. That's the core difference, and each tool fits a different job.

| Tool | What It Measures | Best For |
|---|---|---|
| Multimeter | DC voltage (charge level) | Quick checks, alternator output, parasitic draw |
| Load tester | Voltage under a heavy load | Confirming a battery holds up when cranking |
| Conductance tester | CCA and internal health | Estimating true battery condition and age |
For most drivers, a multimeter covers the bulk of what you need. It's cheap, versatile, and reads charging voltage and slow drains a load tester can't. If you're chasing a battery that keeps dying overnight, the multimeter wins, and our parasitic drain walkthrough shows how.
A load tester earns its place when voltage looks fine but the car cranks slowly. It stresses the battery the way the starter does. If you don't own one, you can still get useful clues, and there are ways to gauge a battery without a meter at all in a pinch.
Safety Rules Before You Touch the Terminals
Lead-acid batteries hold acid and vent hydrogen gas, so a few precautions matter. None of this is complicated, but skipping it can cause burns or a spark near flammable gas.
- Wear eye protection. Batteries contain sulfuric acid.
- No sparks or flames near a battery, especially while it's charging.
- Keep the red lead out of the 10A jack when reading voltage. Probing terminals in current mode can blow the fuse or cause a short.
- Don't let the probe tips touch each other across the posts.
- Work in a ventilated spot when the engine's running or the battery's on a charger.
One more habit worth keeping. Set your meter before the probes touch metal, not after. Choosing the mode with the leads already on the terminals is how people accidentally land on current mode.
Lock in the DC voltage setting first, then make contact. It keeps the reading clean and the meter safe.
Pro Tips for a More Accurate 12V Reading
Small habits sharpen your numbers. These are the ones that separate a rough guess from a reading you can act on.
- Kill the surface charge. After charging, turn the headlights on for two minutes, then let the battery rest. You'll get a truer resting voltage.
- Test at a stable temperature. Cold drops readings. A battery at 12.4V in freezing weather may sit higher once warm.
- Clean the posts first. A wire brush on corroded terminals can swing the number by a tenth of a volt or more.
- Use fresh probes. Cracked leads and worn tips cause bouncing figures.
Want the alternator side too? Rev the engine to about 2,000 rpm and watch the reading climb slightly. A steady figure in the 13.7 to 14.7 range means the charging system is healthy, matching what we cover on normal running voltage.
FAQs: Testing a 12V Battery With a Multimeter
What setting do I use for a 12V battery?
Use the DC voltage setting, marked with a V over a solid and dashed line. On an auto-ranging meter, just select DCV. On a manual meter, turn the dial to the 20V DC range.
That range covers any healthy 12V reading between 11 and 15 volts.
Is 20V DC the right range?
Yes, 20V DC is the correct manual range for a 12V battery. It's the first setting above 12 volts, so it captures the full reading without over-ranging. Pick anything lower, like 2V, and the meter shows "OL" or a lone "1" instead of a number.
Why does my battery read 12V but won't start the car?
A 12V reading shows charge, not cranking power. A battery with a weak cell can rest near 12 volts, then collapse under the starter's load. Run a cranking test and watch the voltage.
If it dives below about 9.6 volts, the battery is failing.
Should the meter be on AC or DC?
Always DC for a car battery. Batteries produce direct current, so the AC setting (marked with a wavy line) gives useless or near-zero readings. Look for the DC symbol, the V with a straight line and dashes above it, before you touch the terminals.
What voltage means my 12V battery is dead?
A resting reading at or below 11.9 volts points to a discharged or failing battery. At that level, the car may not crank. A truly flat battery can read under 11 volts, while a reading of exactly 0.00 usually signals a blown fuse or bad connection, not the battery itself.
Your 30-Second Decision Guide
Here's the whole process boiled down to quick if/then calls.
- If your meter is auto-ranging: set it to DCV and read.
- If it's manual: set it to 20V DC and read.
- If you see "OL" or "1": your range is too low, move up to 20V.
- If the number is negative: swap the red and black probes.
- If it reads 0.00: check the meter fuse and connections before blaming the battery.
Then judge the number. 12.6V and up means fully charged. Around 12.4V is fine but could use a top-up. Slip to 12.2V and it's time to recharge.
Below 12.0V, the battery is nearly flat.
And remember the golden rule. A good resting voltage doesn't guarantee a good battery. When in doubt, crank the engine and watch the meter hold its ground.
That single check tells you more than any resting number alone.

Similar Posts