Multimeter Setting for Car Battery: What to Use

Your car won't start, and you're staring at a multimeter wondering which way to turn the dial. The setting you want to test a car battery is DC voltage, usually the 20V range on a manual meter. That's it for a basic health check.
Pick the wrong mode and you'll get a junk reading or pop a fuse.
A healthy 12V battery reads about 12.6 volts at rest, per most battery manufacturer specs as of 2026. Drop below that number and the battery's low on charge. The tricky part is that the "best" setting shifts based on what you're actually checking.
Let's start with the short version.
Quick Answer
Set your multimeter to DC voltage. On a manual-ranging meter, choose the 20V range. Auto-ranging meters pick the range for you, so just select DC volts.
Look for the V with a solid line above a dashed line. A resting car battery should read 12.4 to 12.7 volts.
DC Volts, Not AC: The One Setting Detail People Get Wrong
The single mistake we see most often is turning the dial to AC volts instead of DC. Car batteries store direct current. Your wall outlet uses alternating current.
Those are two different modes on the dial.
Here's how to tell them apart at a glance:
- DC volts: marked V with a straight line over a dashed line, or V⎓
- AC volts: marked V with a wavy line, or V~
Set the meter to AC and touch the terminals, and the reading jumps around or shows near zero. That freaks people out. They think the battery's dead when it's fine.
The meter's just listening for the wrong kind of signal.

So before anything else, confirm you're on DC. Meter makers like Fluke print these symbols right on the dial for this reason. Once you're locked onto DC volts, the rest is easy.
If you want a deeper walkthrough of the reading itself, our guide on reading battery voltage the right way breaks it down step by step.
Why the "Right" Setting Depends on What You're Actually Testing
There isn't one magic setting for every job. The dial position changes based on the question you're trying to answer. Think of it as four different tests, not one.
Here's the quick map:
| What you're checking | Setting to use | What it tells you |
|---|---|---|
| State of charge (engine off) | DC volts / 20V | Is the battery charged? |
| Cranking strength | DC volts / 20V | Can it hold up while starting? |
| Alternator output (engine on) | DC volts / 20V | Is the charging system working? |
| Parasitic draw (drain) | DC amps / 10A | What's killing the battery overnight? |
Notice that three of the four tests use the same DC volts setting. Only the parasitic draw test moves you over to the amps side of the dial. That one also means moving a probe to a different jack, which we'll get to.
So if someone tells you "just use 20V DC," they're right for most checks. They're simply skipping the drain test. Testing current is a different animal, and we cover it fully in our breakdown of measuring battery amps safely.
Auto-Ranging vs Manual: Do You Even Need to Pick 20V?
Only manual-ranging meters need you to choose 20V. If your multimeter is auto-ranging, it figures out the range on its own. You just set it to DC volts and probe the battery.
Here's the difference in plain terms:
- Manual-ranging: You pick both the mode (DC volts) and the range (20V). Choose a range higher than the voltage you expect. For a 12V battery, 20V is the smallest range that fits.
- Auto-ranging: You pick the mode only. The meter scans and lands on the right range in a second or two.
Why 20V and not 2V or 200V on a manual meter? The range has to sit above the reading. A 12.6V battery won't fit inside a 2V range.
Set it too low and you'll see "OL" or a flashing "1," which just means over-range.
Set it too high, like 200V, and you lose precision. You might read 12V instead of 12.63V. For battery work, that second decimal matters.
A tenth of a volt is the gap between a healthy battery and one that's slipping.
Setting Up Your Multimeter Before You Touch the Battery
Get the meter ready before the probes ever hit metal. Rushing this part is how fuses blow. Two things matter: the probes go in the correct jacks, and the dial sits on the correct symbol.
Getting the Probes in the Right Jacks (COM and VΩ)
For a voltage test, your probes belong in two specific jacks. The black probe goes into the port labeled COM, which stands for common. The red probe goes into the port marked VΩ, sometimes written as VΩmA.
Do not put the red probe in the 10A or A jack for a voltage test. That jack is for measuring current. Touch it to a battery in that setup and you create a dead short across the terminals.
That's how you blow the internal fuse, or worse.
Quick checklist before you probe:
- Black probe in COM
- Red probe in VΩ
- Dial on DC volts (20V if manual)
- Probe tips clean and not touching each other
Reading the DC Volts Symbol on the Dial
Find the V with a solid line sitting above a short dashed line. That's DC voltage. It's the same symbol regardless of brand, since it follows the standard electrical notation used across the industry.
Some dials group all the DC volt ranges together in one arc. On those, you'll see numbers like 2, 20, 200, and 600 next to the DC symbol. Land the pointer on 20 for a car battery.
If your meter shows only a single "V⎓" position, it's auto-ranging, and you're already done. From here, you're ready to run the actual tests, starting with resting voltage.
Test 1: Resting Voltage (Battery State of Charge)
Resting voltage tells you how charged the battery is right now. This is the baseline test, and it's the one most people mean when they ask about multimeter settings. Keep the meter on DC volts, 20V range if it's manual.
For a true reading, the battery needs to rest first. Turn the car off and wait at least a few hours, or ideally overnight. A battery that just ran holds a surface charge that reads high and fools you.
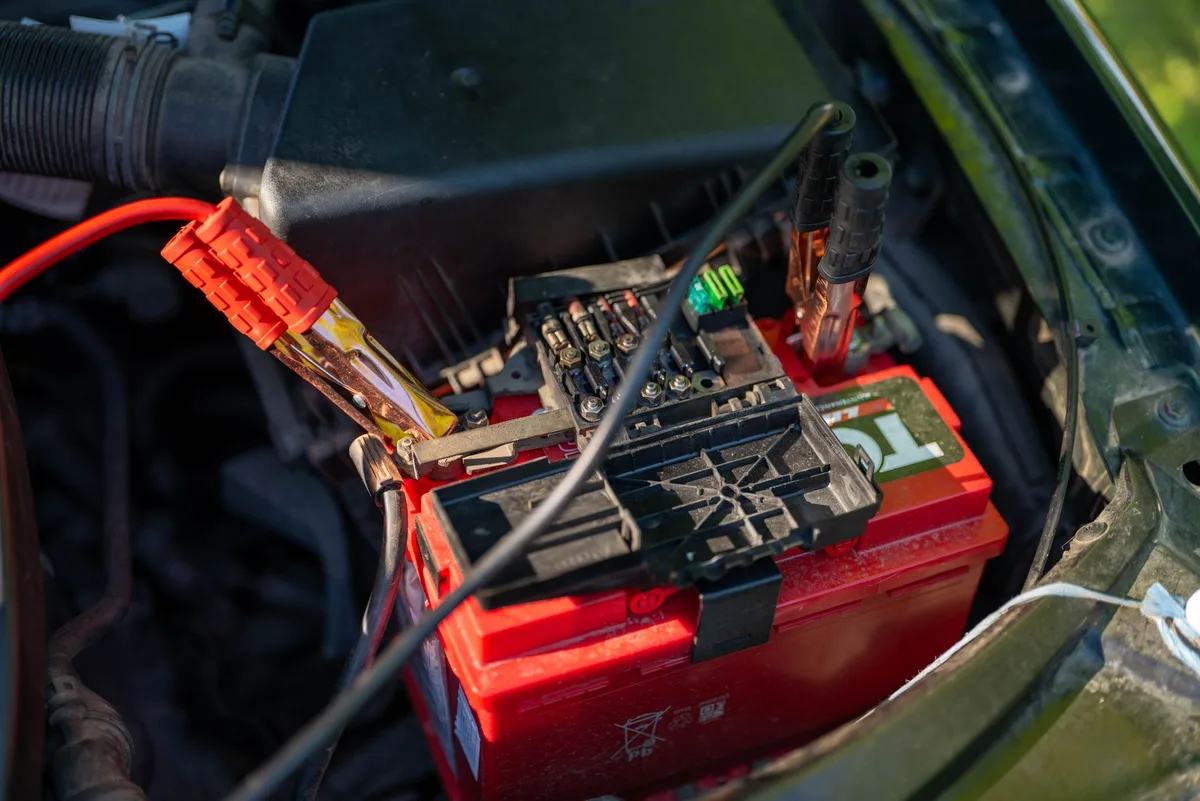
Touch the red probe to the positive terminal, marked with a plus sign. Touch the black probe to the negative terminal, marked with a minus. If you get a negative number, your probes are just reversed.
Swap them and the reading flips positive.
Here's what a resting reading means:
- 12.6V to 12.8V: fully charged
- 12.4V: around 75% charged
- 12.2V: roughly half charged
- 12.0V or lower: discharged, needs a charge
A battery sitting at 12.0V isn't dead, but it's hurting. Charge it, then retest. If it won't hold a charge after that, the battery's likely on its way out.
For the full routine start to finish, our walkthrough on checking a battery from scratch covers each move.
Test 2: Cranking Voltage (While You Start the Car)
Cranking voltage shows whether the battery can hold up under the heavy load of starting. Same setting, DC volts on 20V. The difference is you read the meter while the engine turns over.
You'll need a helper for this one. Keep your probes clamped to the terminals. Have someone turn the key to start while you watch the display.
Watch how far the number drops. A healthy battery dips but stays above 9.6 volts during cranking. Some specs put the floor closer to 10 volts.
If the voltage crashes below 9.6V, the battery can't deliver enough current under load. That points to a weak or aging battery, even if the resting voltage looked fine. This gap between a good resting number and a poor cranking number is exactly why a proper load check on the battery matters so much.
Test 3: Charging Voltage (Engine Running, Alternator Check)
Charging voltage tells you if the alternator is actually feeding the battery. Leave the meter on DC volts, 20V. Now start the engine and let it idle before you read.
With the engine running, a healthy charging system pushes 13.7 to 14.7 volts. That higher number is the alternator doing its job. It's replacing the charge the battery lost while starting.
Use this quick logic:
- Reads 13.7V to 14.7V: charging system is working
- Reads below 13.7V: alternator may be undercharging
- Reads above 14.8V: possible overcharging or bad regulator
- Reads same as engine off (around 12.6V): alternator isn't charging at all
If the number barely moves once the engine starts, suspect the alternator or a loose belt. Overcharging above 15 volts is just as bad. It boils off electrolyte and cooks the battery early.
Test 4: Parasitic Draw (Switching to the Amps Setting)
This is the one test that leaves the voltage side of the dial. To find a battery drain, you measure current, so you switch to DC amps. Move the dial to the A⎓ setting and start on the 10A range.
You also have to move a probe. Pull the red probe out of the VΩ jack and plug it into the 10A jack. Leave black in COM.
Skip this jack swap and the reading won't work.

Here's the safe sequence:
- Turn off the car and everything in it. Close the doors.
- Disconnect the negative battery cable.
- Put the meter in series: one probe to the negative terminal, one to the disconnected cable.
- Wait for modules to sleep, often 20 to 40 minutes.
- Read the current.
A normal parasitic draw sits under 50 milliamps, or 0.05A, once everything powers down. Anything higher means something's staying awake and draining the battery overnight. Pull fuses one at a time to find the guilty circuit.
Never start the car or turn on a big load while the meter reads amps in the 10A jack. The starter pulls hundreds of amps. That will instantly blow the meter's fuse.
What the Numbers Mean: Voltage Readings Decoded
Numbers only help if you know what's healthy. Here's the full picture across all three voltage tests in one place.
| Condition | Reading | Verdict |
|---|---|---|
| Resting, charged | 12.6V to 12.8V | Healthy |
| Resting, low | 12.0V to 12.3V | Needs charging |
| Resting, flat | Below 12.0V | Suspect battery |
| Cranking | Above 9.6V | Battery holds load |
| Cranking | Below 9.6V | Weak battery |
| Engine running | 13.7V to 14.7V | Alternator good |
| Engine running | Below 13.7V | Charging fault |
One thing to remember: voltage is a snapshot, not the whole story. A battery can show 12.6V at rest and still fail under load. That's why the cranking test matters as much as the resting number.
The 12.6V figure comes from the battery's chemistry. Six cells sit inside a standard lead-acid battery. Each fully charged cell holds about 2.1 volts, and six of them add up to roughly 12.6.
Common Multimeter Mistakes That Ruin Your Reading
Most bad readings come from a handful of repeat errors. Knowing them saves you from replacing a battery that's actually fine.
- Set to AC instead of DC. The reading jumps or shows zero.
- Testing right after driving. Surface charge inflates the number.
- Probes in the amps jack for a voltage test. That shorts the battery.
- Range set too low on a manual meter. You get "OL" or a flashing 1.
- Corroded or loose terminals. Dirty contact drops the reading.
- Weak probe contact. Press firmly onto clean metal.
If a reading looks strange, check the setting before you blame the battery. Nine times out of ten, it's the dial or the probes, not the car.
Safety Checks Before You Probe a Live Battery
Car batteries look harmless, but they deserve respect. They give off hydrogen gas, which is flammable, and they hold enough current to burn you.
Run through these before you start:
- Wear safety glasses. Battery acid and gas are no joke.
- Skip metal rings, watches, and bracelets.
- Never let the two probe tips touch each other on a live battery.
- Don't lean a wrench or tool across both terminals.
- Keep sparks and flames well away from the battery.
The U.S. Occupational Safety and Health Administration (OSHA) flags hydrogen buildup and acid contact as real hazards around lead-acid batteries. A little caution goes a long way here.
Multimeter vs Load Tester: When Voltage Isn't Enough
A multimeter measures voltage. A load tester measures how the battery behaves under a heavy pull. They answer different questions.
| Tool | Best for | Limitation |
|---|---|---|
| Multimeter | State of charge, alternator, drain | Won't fully judge health under load |
| Load tester | Real cranking strength | Costs more, single purpose |
Use a multimeter first. It's cheap, quick, and catches most problems. If the voltage looks fine but the car still cranks slowly, a dedicated load tester or a shop's conductance tester gives the deeper answer.
For most DIY checks, the multimeter wins on value. The load tester earns its place when you suspect a battery that reads good but performs bad.
Pro Tips for More Accurate Battery Readings
Small habits sharpen your results. These are the ones that matter most.
- Test in the morning after the car's sat overnight. That's your truest resting voltage.
- Clean the terminals first. Corrosion adds resistance and fakes a low reading.
- Read to two decimals. The gap between 12.4V and 12.6V is real.
- Cold weather drops readings. A battery at 32°F shows less than the same battery when warm.
- Retest after charging to confirm the battery actually holds it.
One more: check your meter's own battery. A weak 9V inside the multimeter can throw off the display and send you chasing a problem that isn't there.
Frequently Asked Questions
Is it 20V or 200V for a car battery?
Use 20V on a manual-ranging multimeter. A 12V battery reads around 12.6 volts, which fits inside the 20V range with room to spare. The 200V range works too, but you lose accuracy in the decimals.
Auto-ranging meters skip this choice entirely.
Do I set the multimeter to AC or DC for a car battery?
Always DC. Car batteries supply direct current, marked V with a solid line over a dashed line. AC is for household outlets and shows a wavy symbol.
Set to AC by mistake and your reading will bounce around or read near zero.
What should a car battery read on a multimeter?
A healthy resting battery reads 12.6 to 12.8 volts with the engine off. Around 12.4V means roughly 75% charged. Below 12.0V means it needs charging.
With the engine running, expect 13.7 to 14.7 volts from a working alternator.
Can testing a car battery with a multimeter damage it?
No, a voltage test is completely safe for the battery. You're only reading voltage, not drawing current. The risk comes from wrong setup, like leaving probes in the amps jack, which can short the battery or blow the meter's fuse.
Why does my multimeter show a negative number?
Your probes are reversed. Red is on the negative terminal and black is on the positive. Just swap them.
The reading flips positive with the same value. A negative sign never means the battery is bad, only that the leads are backwards.
Your Quick Decision Guide: Setting-by-Test Cheat Sheet
When you're standing at the car, here's the fast logic to follow.
- Want to know if it's charged? DC volts, 20V, engine off. Look for 12.6V.
- Want to know if it starts strong? DC volts, 20V, read while cranking. Stay above 9.6V.
- Want to check the alternator? DC volts, 20V, engine running. Look for 13.7 to 14.7V.
- Chasing an overnight drain? DC amps, 10A jack, meter in series. Stay under 0.05A.
Three of the four tests never leave DC volts. Only the drain test moves you to amps and a different jack. Get that one habit down, and you can diagnose a battery in minutes with nothing but a basic meter.
Similar Posts