How to Test a Car Battery Ground With a Multimeter
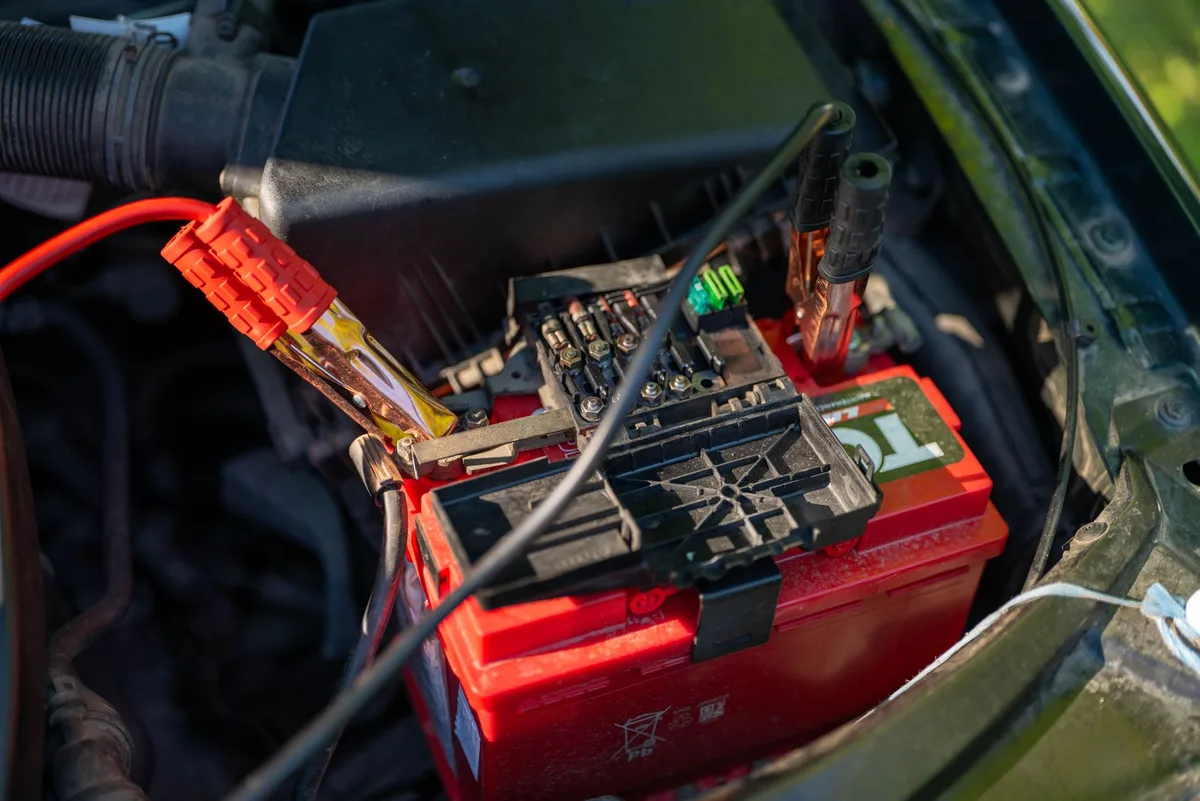
Your car cranks slow, the dash lights flicker, and yet the battery keeps testing fine. Learning how to test a car battery ground with a multimeter is usually the step people skip. A weak ground fools you into swapping good parts.
The real fault hides in the connection, not the battery itself.
A healthy ground shows almost no voltage drop, ideally under 0.2 volts while the system is under load. Anything higher points to corrosion or a loose strap. As of 2026, a basic digital multimeter runs about $15 to $60.
That's all the gear you need to catch the problem, so let's start with the fast answer.
Quick Answer
Set your multimeter to DC volts to test a car battery ground. Put the black probe on the negative battery post. Touch the red probe to a clean, bare chassis point.
Crank the engine or switch on the headlights to add load. A good ground reads under 0.2 volts. Higher means a bad connection.
Why a Bad Ground Fools You (and Why the Right Test Matters)
A bad ground rarely announces itself. The battery can show a healthy 12.6 volts at rest and still crank weak. That's because voltage on the meter and current under load are two different stories.
Here's the trap. Electricity has to make a full loop, out the positive side and back through the ground. If the return path is corroded or loose, the whole circuit chokes.
The starter starves, sensors get confused, and the ECU throws odd codes.
Most people react by throwing money at it. New battery. New starter.
New alternator. The car still acts up, because none of those were the problem.
The right test measures the ground path while it's actually working. A static reading with the engine off can look perfect and still hide a fault. You need load on the system to expose the weak link.
If you've already checked the basics with a full battery health check, the ground test is the natural next move.
How Car Battery Grounds Actually Work
Your car's ground is just the return road for electricity. Current leaves the positive terminal, runs the accessory or motor, then travels back to the negative terminal through metal. That metal path is the ground.
The Ground Path: Battery to Chassis to Engine
The ground isn't one wire. It's a chain of connections, and every link matters.
- The negative battery cable bolts to the chassis or body.
- A separate ground strap bonds the engine block to the body or frame.
- Smaller ground wires branch off for lights, sensors, and modules.
If any single link corrodes, resistance climbs. The starter draws the most current in the whole car, so it feels a bad ground first. That's why slow cranking is such a common clue.
Why Testing Under Load Is the Whole Game
Resistance only shows its true colors when current flows. A loose bolt might read fine with no load, then drop half a volt the second the starter kicks in.
Think of a kinked garden hose. With the tap barely open, water still trickles out fine. Crank the tap wide open and the kink chokes the flow.
A weak ground behaves the same way, which is why the voltage drop test always beats a quiet, engine-off resistance check.
What You Need Before You Start
You don't need a shop full of tools. A single meter and a few minutes will do it.
| Item | What it does | Rough cost (2026) |
|---|---|---|
| Digital multimeter | Reads DC voltage drop | $15 to $60 |
| Test leads with alligator clips | Frees your hands during cranking | $5 to $15 |
| Wire brush or sandpaper | Cleans bare metal contact points | $3 to $10 |
| Safety glasses and gloves | Protects against acid and sparks | $5 to $20 |
A helper is handy too, since one person can crank while the other watches the meter. If you want a second opinion on overall battery condition, pairing this with a proper load test gives you the full picture.
Setting Your Multimeter to the Right Mode
Turn the dial to DC voltage, marked V with a straight line and dashes (V⎓). This is the same setting you'd use to read resting battery voltage.

If your meter is manual-ranging, pick the 2-volt or 200-millivolt range. You're hunting for tiny numbers, so a low range shows 0.05 or 0.15 volts clearly. Auto-ranging meters handle this for you.
Manufacturer guides like Fluke's voltage drop reference back the same low-range approach.
Where the Ground Points Live on Your Car
Pop the hood and follow the negative cable from the battery. It leads straight to your first ground point.
- Negative battery post and its clamp.
- The bolt where the negative cable meets the body or chassis.
- The braided strap between the engine and the firewall or frame.
- Bare, unpainted metal spots that make solid probe contacts.
Paint, rust, and undercoating all block a clean reading. When you touch a probe down, aim for shiny bare metal or a bolt head, not a painted panel.
Step-by-Step: The Voltage Drop Ground Test
This is the heart of it. You're measuring how much voltage gets lost across each ground connection while the system works. Less loss is better.
Testing Battery Negative to Chassis
Start at the most common trouble spot, the negative cable to the body.
- Set the meter to DC volts, low range.
- Clip the black probe to the negative battery post.
- Touch the red probe to a bare chassis ground point.
- Have a helper crank the engine for a few seconds, or switch the headlights on high.
- Read the number while the load is applied.
Under 0.2 volts means a solid connection. Between 0.2 and 0.3 is borderline. Above 0.3 volts, you've found a bad ground worth cleaning.
Testing Chassis to Engine Block
The engine-to-body strap carries the starter's full current, so it fails often. Test it the same way.

Put the black probe on the engine block or a bolt on the block. Put the red probe on the body or frame near the strap. Crank the engine and watch the meter.
A good strap holds under 0.1 volts. A frayed or rusty strap will spike well past 0.3, and that's your smoking gun.
Walking the Probe to Pinpoint the Bad Link
If a reading looks high, don't guess which part is bad. Move the probes closer together to isolate it.
Keep one probe fixed and step the other along the path, joint by joint. The section where the voltage suddenly jumps is your culprit. Test right across a single bolt or clamp, and a high number there means that exact connection is the weak spot.
This same probe-walking trick works when you're chasing current draw problems too.
Reading Your Numbers: What's Good, What's Bad
Numbers only help if you know where the lines fall. Here's the cheat sheet for a voltage drop ground test under load.
| Reading (under load) | What it means | Action |
|---|---|---|
| 0.00 to 0.10 V | Excellent ground | Nothing needed |
| 0.11 to 0.20 V | Good, still healthy | Monitor over time |
| 0.21 to 0.30 V | Borderline | Clean the connection |
| Above 0.30 V | Bad ground | Clean or replace now |
Those thresholds hold for a standard 12-volt system. Diesel trucks and dual-battery setups draw harder, so even a 0.25-volt drop can matter more there.
One more habit worth building. Always test with the same load each time. Cranking pulls more current than headlights, so a crank reading will always look a touch higher.
Compare like with like, and your numbers stay honest.
The Backup Check: Static Resistance Test
The resistance test is your engine-off double-check, not your main test. Turn the meter to ohms (Ω) or the continuity setting, and make sure the key is out.
Touch one probe to the negative post and the other to the ground point. A solid ground reads near zero ohms, usually under 0.5 Ω. A high number or an open reading flags a broken path.
Why isn't this the main method? Resistance mode sends a tiny test current, nowhere near what a starter pulls. A connection can read fine at rest, then fail the second real load hits it.
Trust the loaded voltage drop for the verdict.
Never run a resistance test on a live circuit either. Voltage at the probes can damage the meter's ohm function. Kill the load first, every time.
Voltage Drop vs. Ohms vs. a Test Light
Voltage drop wins for accuracy, but each tool has a place. Here's how they stack up for ground testing.
| Method | Best for | Weakness |
|---|---|---|
| Voltage drop (DC volts) | Finding real faults under load | Needs a helper to crank |
| Resistance (ohms) | Quick engine-off check | Misses load-only faults |
| 12V test light | Confirming a ground exists | No numbers, poor precision |
A test light tells you a ground is present, and that's about it. It'll glow on a lazy connection that still can't carry starter current. For a real diagnosis, the meter beats the light every time.
Who should reach for what? If you just want to confirm a wire is grounded, the test light is fast. If you're chasing slow cranks or flicker, the voltage drop method is the only one that gives you a number you can trust.
Common Mistakes That Give False Readings
Most bad ground tests come down to a handful of slip-ups. Dodge these and your readings get sharp.
- Testing with no load. An engine-off ground almost always looks perfect. Add crank or headlight load first.
- Probing painted or rusty metal. Paint acts like an insulator and inflates your reading. Find bare metal or a clean bolt.
- Dirty probe tips. Grease and grime add fake resistance. Wipe the probes before you touch down.
- Wrong meter range. On a manual meter, a high range hides tiny voltages. Drop to 2 V or 200 mV.
- Loose clip contact. A probe that isn't biting metal jumps around. Use alligator clips for a steady grip.
One sneaky error trips up a lot of folks. They test the positive side and blame the ground, or the other way around. If a voltage drop looks high, confirm which side of the circuit your probes actually span before you condemn a part.
Safety Steps You Don't Want to Skip
A car battery holds enough punch to burn you, so respect it. Lead-acid batteries also vent hydrogen gas, which is flammable.
- Wear safety glasses and gloves near the battery.
- Take off rings, watches, and metal bracelets first. A ring across a terminal can weld itself and cause a serious burn.
- Keep sparks, cigarettes, and open flames well away.
- Chock the wheels and set the transmission to park before any crank test.
- Watch for the belt, fan, and pulleys once the engine turns.
For deeper guidance on safe battery handling, the U.S. Department of Energy publishes solid consumer resources at energy.gov. When in doubt, slow down.
A careful two-minute test beats a trip to the ER.
Fixing a Bad Ground and Confirming the Repair
Found a high reading? The fix is usually simple and cheap. Most bad grounds come down to corrosion or a loose bolt.

Start by disconnecting the negative cable for safety. Scrub the terminal, the cable end, and the mounting point down to bright metal. A wire brush handles the post, and sandpaper cleans the flat contact spots.
That white or green crust you see is the resistance you measured.
If the ground strap is frayed, cracked, or rusted through, replace it. A new braided strap runs about $10 to $25. Bolt it down snug, and add a thin coat of dielectric grease to slow future corrosion.
Now confirm the repair. Reconnect everything and run the exact same voltage drop test. A reading that dropped from 0.4 volts to under 0.1 means you nailed it.
If the number barely moved, the real fault sits at another connection along the path.
Pro Tips for Chasing Stubborn Ground Gremlins
Some ground faults play hide-and-seek. These tricks flush them out.
- Wiggle test the cables while watching the meter. A jumping reading points to a broken wire strand inside the insulation.
- Test grounds when the engine is hot. Metal expands, and some connections only fail at operating temperature.
- Check the small module and sensor grounds too, not just the big ones. A bad ECU ground throws weird, unrelated codes.
- Add a supplemental ground wire as a test. If symptoms vanish, you've confirmed the factory ground is weak.
Aggregate mechanic feedback points to one repeat offender: the engine-to-body strap on high-mileage cars. Road salt and heat cycles kill it slowly. If your car is over ten years old, check that strap first.
Keep a log of your readings, too. Numbers that creep up over months warn you before a no-start leaves you stranded.
Frequently Asked Questions
What should a good ground read on a multimeter?
A good ground reads under 0.2 volts on a voltage drop test while the system is under load. Ideal is close to 0.00 volts. On a resistance check with the engine off, expect near zero ohms, usually below 0.5 Ω.
Higher numbers mean a poor connection.
Can I test a car ground without starting the engine?
Yes, but the results are less reliable. An engine-off resistance test confirms a ground path exists, though it won't reveal faults that only appear under load. Switching on the headlights adds enough draw for a basic loaded check.
For a true verdict, crank the engine during the test.
Why does my battery test fine but the car still cranks slow?
A weak ground is the usual culprit. The battery can hold a healthy 12.6 volts yet still starve the starter if the return path has high resistance. Voltage sits fine at rest, then collapses under the starter's heavy current draw.
Run a voltage drop test to catch it.
What does a high voltage drop across the ground mean?
A high voltage drop, anything over 0.3 volts under load, means electricity is losing energy at a bad connection. The likely causes are corrosion, a loose bolt, or a failing ground strap. That lost energy turns into heat instead of powering the starter.
Clean or replace the weak link.
Do I use volts or ohms to test a ground?
Use volts for the real test and ohms as a quick backup. The DC voltage drop method measures the ground under actual load, so it catches faults that hide at rest. Resistance mode only sends a tiny current and can miss load-only problems.
Never run ohms on a live circuit.
When It's Time to Stop and Call a Pro
Most ground issues are DIY-friendly, but some warrant a shop. Know where the line sits.
Call a pro if you've cleaned every connection and the drop still reads high. That points to a hidden break inside a harness or a failing main cable. Tracing those needs a lift and time.
Persistent electrical gremlins after a good ground check are another flag. Flickering dashes, random module faults, or repeat dead batteries can signal a deeper wiring or charging problem. A tech with a scope and a proper wiring diagram will find it faster.
There's no shame in tapping out. You've already saved money by ruling out a bad ground yourself. Hand the pro your readings, and you've cut their diagnostic time in half.

Similar Posts





















