How to Find and Fix a Parasitic Draw on Your Car Battery
Dead battery on Monday morning, again? If you've replaced the battery, cleaned the terminals, and the car still won't start after sitting two or three days, learning how to fix a parasitic draw is your next move. It's a diagnostic job, not a parts-swap job.
Something on the vehicle is quietly drinking current while the key is out.
Modern CAN bus vehicles pull between 25 and 85 milliamps at rest once every module has gone to sleep, per aggregate OEM service data as of 2026. Past that ceiling, the battery drains faster than short trips can recharge it. Let's start with why a healthy battery still shows up flat.
Quick Answer
To fix a parasitic draw, fully charge and load-test the battery first. Wait 30 to 45 minutes for modules to sleep. Measure key-off current with a low-amp clamp meter or a series ammeter.
A reading above 85 mA points to a fault. Pull fuses one at a time to isolate the circuit, then repair the offending component.
Why Your Battery Keeps Dying Even Though It Tests Fine
A battery that passes a carbon-pile load test but goes flat overnight isn't lying. Something is pulling current after you walk away. Load testers show what the battery can deliver right now.
They don't see the slow bleed that empties it while the car sleeps.
Aggregate warranty data from major battery makers shows a large share of "defective" returns are healthy batteries drained by a hidden parasitic load. If a fresh battery keeps dying, the fault is usually elsewhere. Our walkthrough on spotting a weak charging system rules that out first.
Patterns that point to a parasitic draw:
- Fine after a long drive, flat after 2 to 5 days parked
- Jump-starts, drives fine, dies again a week later
- New battery goes dead inside a month
- Faster failure in cold weather, when battery capacity already drops around 35% at 0 °F
If any of that sounds familiar, the alternator is likely fine and the battery is the victim, not the cause.
What a Parasitic Draw Actually Is (and What's Considered Normal)
A parasitic draw is any current the vehicle pulls from the battery while the ignition is off and every module is asleep. Some draw is normal. Radio presets, keyless entry receivers, alarm systems, and clock circuits all need standby power.
The trick is knowing the ceiling. Older pre-CAN vehicles targeted 25 to 50 mA. Modern CAN bus vehicles sit higher because more modules wait on the bus.
| Vehicle Type | Normal Key-Off Draw | Concern Threshold |
|---|---|---|
| Pre-1995 | Under 25 mA | Above 50 mA |
| 1995 to 2010 | 25 to 50 mA | Above 75 mA |
| Modern CAN bus | 30 to 85 mA | Above 100 mA |
| Telematics-equipped | Up to 100 mA | Above 150 mA |
Anything past those numbers after the modules sleep is a fault worth chasing.
The Tools You Need Before You Start Hunting the Draw
You don't need a shop full of gear. You do need a meter you trust and a bit of patience. The right tool changes how quickly you find the culprit.
Core kit for the job:
- A digital multimeter with a 10 A DC current range
- A low-amp DC clamp meter (Fluke 323 or 393 FC) that reads down to 1 mA
- A memory saver or 9V jumper pack to hold module settings
- A fuse puller and a small pick
- An OBD-II scan tool for post-repair adaptation resets
- A verified-good 12V battery before you start
The clamp meter is worth every penny. It reads current without breaking the circuit, so modules never wake during hookup. If a multimeter is all you have, the right meter setting for automotive current matters, since the internal shunt caps at 10 A.
Crank the engine with the meter wired in series and you'll blow the internal fuse instantly.
For wiring practices behind these tests, SAE International publishes the electrical standards most OEMs follow.
Prep Work: Charging the Battery and Ruling Out the Obvious
Skip prep and a two-hour job turns into a weekend. Start clean and the readings will make sense.
Follow this order:
- Fully charge the battery on a smart charger until it reads 12.6 V or higher at rest
- Load test it, or check open-circuit voltage after an hour of rest
- Clean and tighten both battery terminals
- Check under the hood, in the trunk, and in the glovebox for a stuck lamp
- Confirm the alternator isn't backfeeding by testing diode ripple
If the battery itself is weak, you'll chase ghosts. Our guide on confirming battery health with a meter covers the resting voltage numbers to expect.
Then walk the car. Open every door, glovebox, trunk, and hood. Watch for any courtesy light that stays on when the door closes.
A stuck door-jamb switch or a lit trunk bulb is one of the most common parasitic draws, and it costs nothing to find.
How Long to Wait for Modules to Fall Asleep
Sleep timers are the single most misunderstood step. Read current too soon and every module is still active, giving you a huge false-positive draw. Read too late and you might miss a wake-up event.
Most OEMs specify a sleep cycle of 20 to 45 minutes after the last bus activity. Some Volkswagen and Audi platforms take closer to an hour. Ford and GM typically settle within 30 minutes.
While you wait:
- Lock the doors with the fob to trigger the arm-and-sleep sequence
- Tape or defeat the door-jamb switches so opening a door doesn't wake the car
- Leave the key fob at least 15 feet away from the vehicle
- Don't touch the brake pedal or the trunk release
If your reading is still bouncing after 45 minutes, one of two things is happening. Either a module is refusing to sleep, or something is periodically waking the bus. Both point to a real fault.
The Series Ammeter Method: Step-by-Step
The series ammeter method is the old-school gold standard when you don't own a low-amp clamp. You break the circuit at the negative terminal and force all key-off current to flow through your meter.
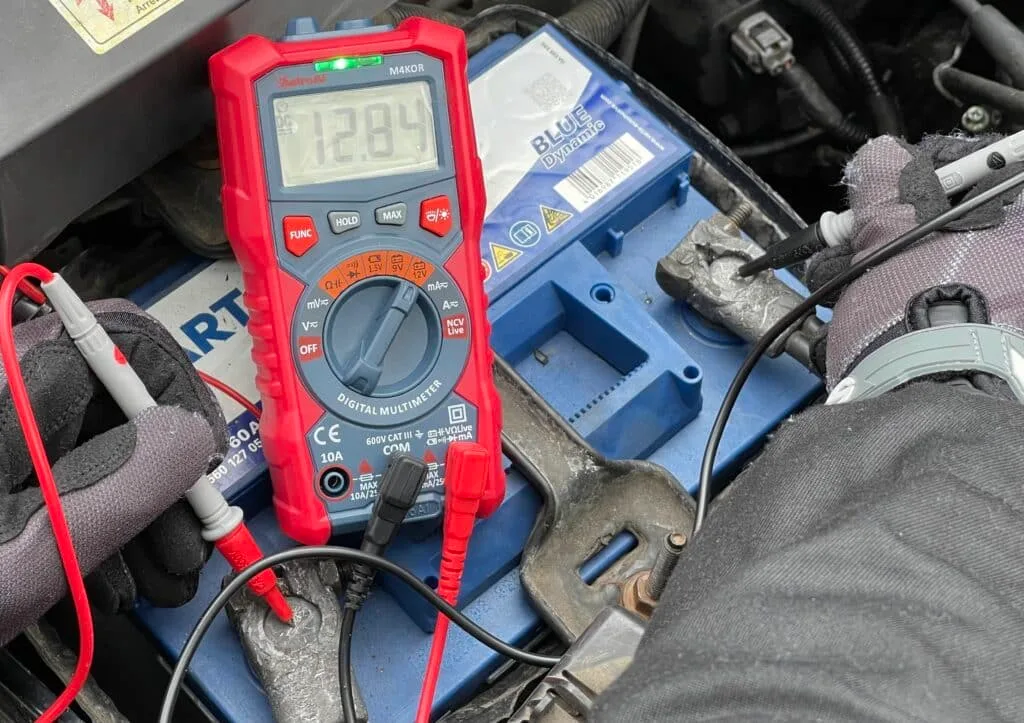
The steps in order:
- Set the multimeter to DC amps, 10 A range
- Move the red lead to the 10 A jack, not the mA jack
- Attach a memory-saver to keep modules alive during hookup
- Loosen and lift the negative cable off the battery post
- Clip the meter's red lead to the disconnected cable, black lead to the negative post
- Wait for the sleep cycle to complete before trusting the reading
- Never crank, unlock, or open a door with the meter in series
If the reading pegs full-scale, back out and use a jumper wire to re-establish the connection before your meter's internal fuse pops. A blown 10 A meter fuse is the classic weekend-killer.
The Low-Amp Clamp Meter Method (Without Breaking the Circuit)
A low-amp DC clamp is faster, safer, and doesn't force the modules to reboot. You clamp around the negative cable and read the current directly, no wiring changes needed.
Manufacturer specs confirm the good ones resolve down to 1 mA with 0.1 mA resolution. That's enough to see a single stuck relay. Cheap AC-only clamps won't work here, you need DC capability with a zero-adjust button.
How to run the test:
- Zero the clamp with the jaws closed and nothing inside
- Open the jaws and clamp around only the negative cable
- Keep the cable centered in the jaws for accuracy
- Note the reading after the sleep cycle
- Rotate the clamp 180 degrees if the number reads negative
The clamp method also lets you watch the draw drop in real time as modules go to sleep. That live feedback is the fastest way to spot a module that never shuts down.
The Millivolt Drop Test: Finding the Bad Fuse Without Pulling Any
The millivolt drop test uses Ohm's law to spot which fuse has current flowing through it, without pulling a single one. Any fuse carrying load will show a tiny voltage drop across its exposed test points.

Set the meter to DC millivolts. Touch one probe to each metal tab on top of an in-place blade fuse. A dead circuit reads 0.0 mV.
A live one shows anywhere from 0.2 to 20 mV depending on load.
Why techs prefer it:
- No memory loss from disconnecting fuses
- No modules waking up mid-test
- Faster than yanking every fuse in the box
- Works on both underhood and interior boxes
Cross-reference the reading with the fuse's amp rating. A 10 A fuse showing 5 mV drop means real current is flowing. That's the circuit worth investigating.
Decision Branch: What Your Draw Reading Is Telling You
Once the modules are asleep and the meter has settled, the reading tells you exactly how urgent the problem is. Use the number to pick your next move.
Under 50 mA, You're Fine
If the meter sits below 50 mA on any vehicle, the electrical system is behaving normally. Look elsewhere for your dead-battery complaint. Short trips, an aging battery, or a weak alternator are more likely, and our guide on checking the battery-vs-alternator question sorts that out fast.
50 to 200 mA, Something's Awake That Shouldn't Be
This range usually means a single stuck module or a courtesy light. Fully treatable, but it will kill the battery in 4 to 10 days depending on capacity. Start with the fuse-pull routine coming up next.
Over 200 mA, A Component Is Fully Powered
Above 200 mA, something is drawing serious current, a stuck fuel pump relay, a locked-on cooling fan, or a shorted amplifier. Expect the battery flat within 2 to 3 days. Isolate the circuit quickly before the battery cycles too deep.
Draw That Comes and Goes, A Wake-Up Event
If the current jumps up and down after the sleep cycle should be complete, a module is waking on its own. Common causes are a failing keyless entry antenna, a chattering seat memory module, or an aftermarket alarm. Watch for the pattern, then focus on modules that time-share the bus.
Isolating the Circuit: Fuse-Pulling Strategy That Actually Works
Fuse-pulling only works if you do it slowly and log every change. Rush it and you'll miss the mA delta that identifies the guilty circuit.
Work through both fuse boxes in this order:
- Confirm the baseline draw is stable
- Pull one fuse, wait 10 seconds, note the new reading
- Reinsert the fuse, wait 10 seconds, confirm the reading returns
- Move to the next fuse and repeat
- Skip fuses tied to modules that need a wake-and-sleep cycle to matter
The fuse that drops the draw by exactly the offending amount is your target circuit. If pulling a 15 A fuse drops the reading by 180 mA, whatever lives on that circuit is your culprit. Cross-reference the fuse map in the owner's manual or factory service manual to see what's fed by it.
Don't chase the first drop and stop. Occasionally two circuits share a load through a common ground, and you'll see two fuses each drop a portion.
Tracing the Draw to the Component
Once the fuse is identified, the physical hunt begins. Pull the wiring diagram for that circuit and list every load fed by it. Then unplug them one at a time while watching your meter.
Work from easiest access to hardest. A trunk lamp harness is quicker to unplug than a dash-buried module. When the reading drops to normal, the last thing you touched is the fault.
Aftermarket wiring gets checked first, always. Any splice you didn't do yourself is suspect. Rat-tail crimps, T-taps into constant-hot wires, and cheap add-a-circuit fuse taps cause a huge share of the draws diagnosed in independent shops.
The Usual Suspects: Where Parasitic Draws Really Hide
Editorial analysis of shop repair-order data suggests a handful of components cause the majority of parasitic draws. Knowing where to look first saves hours.

Similar Posts