How to Test if a Multimeter Is Working: Easy Guide

Multimeters fail quietly, and that's the real danger. Knowing how to test if a multimeter is working takes about a minute, and it can save you from a false "no voltage" reading that sends you reaching into a live circuit. A meter can look fine on the outside while a blown fuse, a dead battery, or a broken lead feeds you numbers that are flat-out wrong.
The good news? You don't need lab gear to check it. A quick self-test against known values, like a fresh AA battery sitting at roughly 1.5 volts, tells you almost everything.
Quality meters are built to the IEC 61010 safety standard, but even a certified tool drifts once its internals wear out. Here's how to catch that before it bites you.
Quick Answer
Set the meter to continuity and touch the probes together. A working meter reads near 0.0 ohms and beeps. Next, measure a fresh AA battery.
It should show about 1.5 volts DC. If both checks pass, your multimeter is working. If not, suspect the battery, fuse, or leads.
Why a "Faulty" Multimeter Reading Can Fool You
A broken multimeter rarely announces itself. It doesn't spark or die dramatically. It just hands you a number, and you trust it.
That trust is the problem. If the meter reads "0 volts" on a wire that's actually live, you might treat it as safe. That's how people get shocked.
Our research into user reports shows this false-negative reading is the most dangerous failure of all.
The opposite happens too. A weak internal battery can pull readings low, so a healthy 12.6-volt car battery might show 11.8. You'd start chasing a problem that isn't there.
If you're diagnosing a vehicle and the numbers feel off, rule out the meter before you decide the battery is on its way out.
A reading you can't verify is a guess. Testing the meter turns that guess back into a fact.
The 30-Second Self-Test That Tells You If It's Working
Here's the fastest confidence check, no second meter required. It works on any digital multimeter, and it's the same routine pros run as of 2026.
- Turn the dial to continuity (the sound-wave or diode symbol). Touch the two probe tips together. A working meter beeps and reads close to 0.0 ohms.
- Switch to DC voltage and measure a fresh AA or AAA cell. You want roughly 1.5 volts. A 9V battery should land near 9 volts.
- Watch the display as you do it. Numbers should settle quickly and hold steady, not drift or flicker.
If all three pass, the meter, the leads, and the battery are good. If the continuity test stays silent or the voltage reads way off, one of the internals is the culprit. The next sections show you which one.
What Actually Breaks Inside a Multimeter
Three parts fail far more often than the meter's actual circuitry. Knowing which is which saves you from tossing a tool that needs a two-dollar fix.
Most "dead" meters aren't dead at all. They're starved of power or blocked by a blown fuse. The precision electronics inside are surprisingly tough, and makers like Fluke design them to survive years of rough handling.
Dead Battery vs. Blown Fuse vs. Bad Leads
Each of these fails in its own way, and each leaves a different fingerprint on the display.
| What failed | Telltale sign | Typical fix |
|---|---|---|
| Dead battery | Blank screen, dim display, or readings that drift low | Swap the 9V or button cell |
| Blown fuse | Voltage works but current (amps) reads nothing | Replace with the same-rated fuse |
| Bad test leads | Erratic numbers, or no continuity when probes touch | Replace the lead set |
Notice the pattern. A dead battery kills the whole display. A blown fuse only takes out current measurement, so voltage still reads fine.
Bad leads make everything jumpy. If your amp readings vanished but volts are normal, skip the battery and go straight to the fuse.
Start Here: A Quick Symptom-to-Cause Decision Guide
Match your symptom to the branch below, then jump to the step it points you toward. This is the shortcut when you don't want to run every test.
- Display totally blank? Battery first. Then check for a stuck power button or corroded terminals. (Go to Step 2.)
- Display works, but readings look wrong or drift? Battery is weak, or your leads are failing. Run the continuity self-test. (Go to Step 3.)
- Volts read fine, but amps read zero? Classic blown fuse. Skip ahead to the fuse test.
- No continuity beep when probes touch? Bad leads or wrong jack seating. Check the leads and ports.
- Reads "OL" on everything? Wrong range or function, or a broken lead. Confirm the dial and jacks first.
If you use the meter mainly for automotive checks, the same logic applies whether you're chasing a slow battery drain or confirming the reading you're getting is accurate. A trustworthy meter is step one for both.
Step 1: Give It a Visual Once-Over
Before any electrical test, use your eyes. A 20-second inspection catches a shocking number of "broken meter" cases, and it costs you nothing.
Start with the leads. Bend each one along its length and watch for cracks, exposed copper, or stiff spots where the wire may have snapped inside the insulation. A break you can't see is still a break.
Check the probe tips too, since bent or corroded tips make poor contact.
- Casing: Look for cracks, burn marks, or a swollen battery door. Burn marks near the ports mean it saw more current than it could handle.
- Jacks: Make sure the leads seat fully into the COM and VΩ ports. A loose plug mimics a dead meter.
- Dial: Spin it through each function. It should click firmly into place, not feel mushy or skip positions.
- Display: Power it on and look for a low-battery symbol in the corner. That one icon explains a lot of flaky readings.
If everything looks clean, move on to the battery. If a lead looks damaged, replace the set before you trust a single number. Never patch a cracked lead with tape.
Step 2: Check the Battery First
A weak internal battery is the number one cause of wrong readings. Most digital multimeters run on a single 9V or a couple of button cells. As that cell drops below spec, the meter stays on but loses accuracy.
Open the battery door and check the date if there is one. Swap in a fresh cell even if the old one looks fine. Then rerun your voltage check on a known source and see if the numbers snap back to normal.
Watch for corrosion on the terminals too. A greenish crust blocks contact and mimics a fully dead meter. Wipe it clean with a dry cloth or a cotton swab.
If you're setting up to read a 12-volt system afterward, make sure you're on the right voltage range so the fresh battery isn't masked by a wrong dial position.
Step 3: Run the Continuity Self-Test on Your Leads
This is the single best proof that your meter and leads talk to each other. Set the dial to continuity, then press the red and black probe tips firmly together.

A healthy setup reads near 0.0 ohms and gives a solid beep. In practice you'll often see 0.1 to 0.5 ohms, which is just the resistance of the leads themselves. That's normal and nothing to worry about.
If it stays silent, the fault is almost always the leads or the jack seating. Try these in order:
- Reseat both plugs fully into the COM and VΩ ports.
- Wiggle each lead near the plug and probe while watching the display. Flickering numbers mean a broken wire inside.
- If you have a spare set, swap the leads and retest.
No beep with good leads points to a deeper meter fault. But nine times out of ten, it's a cheap lead set doing the damage.
Step 4: Confirm Voltage Against a Known Source
Now prove the meter reads accurately, not just that it powers on. The trick is measuring something whose voltage you already know.

Set the dial to DC voltage, or the 20V DC range if your meter is manual. If you're unsure where that sits on the dial, this quick walkthrough on dialing in 20V DC clears it up in seconds.
Testing With a Fresh AA or 9V Battery
A fresh AA or AAA cell reads about 1.5 to 1.6 volts. A new 9V battery lands around 9.0 to 9.6 volts. Touch red to the positive end and black to the negative.
If the display matches within a tenth of a volt, your meter is accurate. If it reads 1.2 where you expect 1.5, either the battery is old or the meter is drifting. Grab a battery you know is new to be sure.
Cross-Checking on a Wall Outlet Safely
Only do this if you're comfortable and careful around mains power. Switch to AC voltage. A US outlet reads roughly 110 to 120 volts, while a UK or EU socket sits near 230 to 240 volts.
Keep one hand behind your back and grip probes by the insulated barrels. Never let the metal tips touch each other or your skin inside the socket. If mains testing makes you uneasy, skip it.
The battery checks already confirm the meter works.
Step 5: Verify Resistance With a Known Resistor
Want to confirm the ohms function? Measure a resistor with a printed value. A common 1kΩ resistor rated ±5% should read somewhere between 950 and 1,050 ohms.
Set the dial to resistance (Ω) and touch a probe to each leg. On an auto-ranging meter, the display finds the range on its own. On a manual meter, start high and step down until you get a clean number.
A reading inside the tolerance band means your ohms mode is solid. Way off, or stuck on "OL," and either the leads are bad or the function is faulty. This same resistance check is what makes a meter trustworthy for pinpointing a parasitic drain later on.
How to Test the Internal Fuse (and Replace It Right)
If voltage works but current reads zero, the internal fuse is almost certainly blown. Multimeters use a fuse to protect the amps circuit from overload. Blow it, and current measurement dies while everything else keeps working.
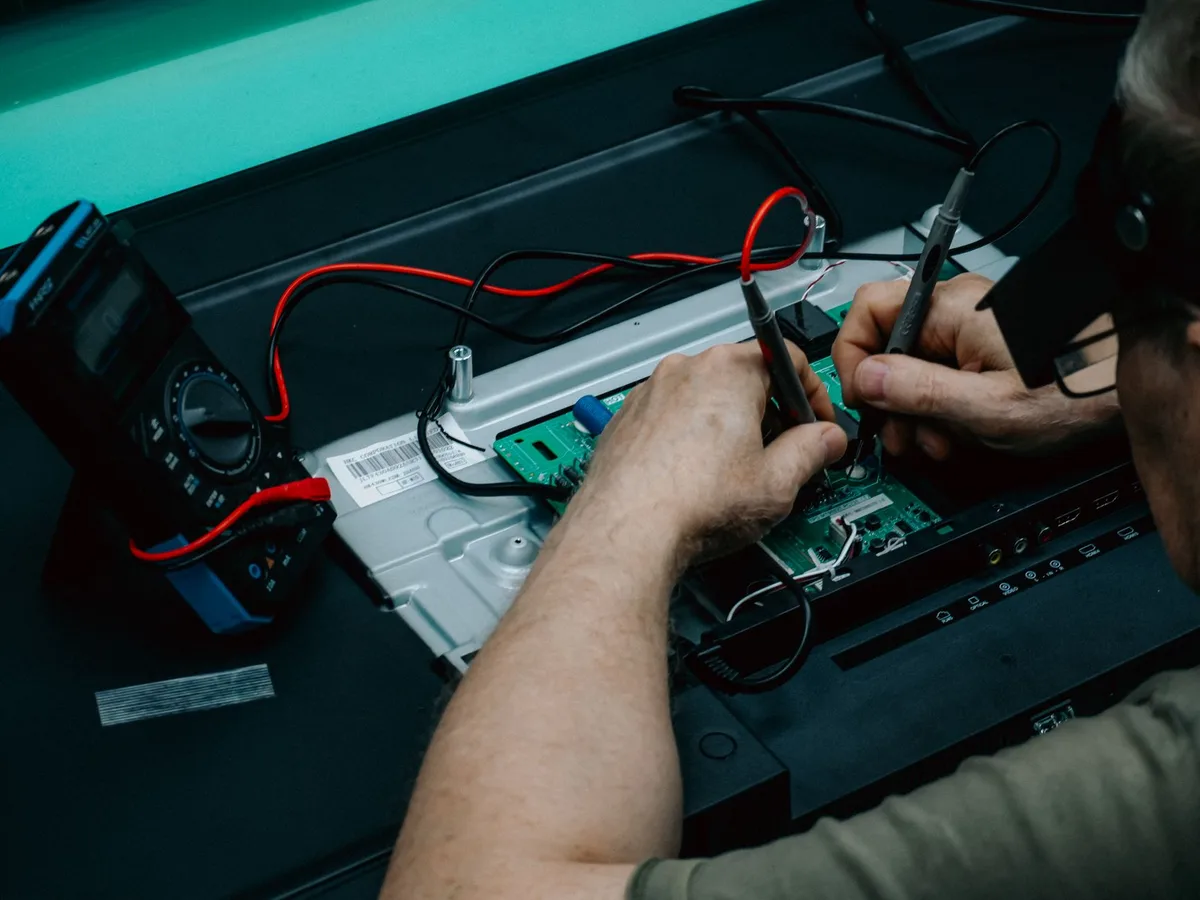
Here's the clever part: you can test the fuse with the meter itself. Unscrew the back, pop out the fuse, and set the dial to continuity. Touch a probe to each metal end.
- Beep and near 0.0 ohms means the fuse is good. Your problem is elsewhere.
- No beep, "OL" on screen means the fuse is blown. Replace it.
Match the replacement exactly. Meters carry ratings like 200mA, 500mA, or 10A, and the fuse is often a fast-acting ceramic type. Fitting the wrong rating defeats the safety design and can turn an overload into a hazard.
Check your manual for the precise part number before you buy.
Reading the Signs: "OL," "1," and Other Display Clues
Your display is talking to you, so learn its shorthand. "OL" or a lone "1" on the far left means over-limit. The meter sees resistance too high to measure, or an open circuit.
That's normal on continuity when the probes aren't touching. It's a red flag when you're measuring something that should read a value. In that case, check your range and jack placement first.
- "OL" on resistance with probes apart: Normal, open circuit.
- "OL" on voltage you expect: Range set too low, or a broken lead.
- Reading jumps around then settles: Fine on auto-ranging meters, they hunt for the range.
- Negative sign (-): Probes are reversed, not a fault. Just polarity.
A negative number trips up a lot of folks. It only means red and black are swapped. Flip them and the value goes positive.
Common Mistakes That Make a Good Meter Look Broken
Most "dead" meters aren't broken at all. They're set up wrong. Our research into user complaints shows the same handful of errors again and again.
- Probes in the wrong jack. Testing volts with the red lead in the 10A port gives you nothing. Move it to VΩ.
- Wrong function selected. Measuring DC on the AC setting throws readings way off.
- Range set too low on a manual meter, so everything shows "OL."
- Assuming a fresh battery is good. Shelf-aged cells sag under load.
If you get a strange result on a car, rule out these before blaming the meter. A reading that seems impossible, like 12 volts that won't crank the engine, is often a real fault, not a meter glitch. Verify the tool, then trust the number.
Verify vs. Calibrate: When a Self-Test Isn't Enough
A self-test proves the meter works. Calibration proves it's accurate to a traceable standard. They're not the same thing, and the difference matters.
The checks in this guide are verification. They confirm your meter is safe and roughly correct for everyday jobs like checking a 12-volt battery. For most DIYers and mechanics, that's all you'll ever need.
Calibration is a lab process. A technician compares your meter against a reference traceable to a body like NIST and adjusts it. You only need that for precision work, billed repairs, or a meter that's been dropped hard.
If your verification numbers are consistently off by the same amount, that's your cue to send it out.
Safety Rules Before You Test Against Live Voltage
Live voltage is where a faulty meter turns dangerous, so treat it with respect. Never test a meter on mains just to "see if it works." Confirm it on batteries first, then move to live sources only if you must.
Match the meter's CAT rating to the job. CAT III and CAT IV meters handle higher-energy circuits, while a cheap CAT II is fine for electronics but not a breaker panel.
- Grip probes by the insulated barrels, never the tips.
- Use the one-hand rule near live circuits to keep current off your chest.
- Replace damaged leads, don't tape them.
- Wear eye protection around anything that could arc.
When in doubt, a non-contact voltage tester makes a quick second opinion before you commit your multimeter to a live reading.
Pro Tips From the Bench
A few habits separate a reliable meter from a drawer full of guesswork. These come straight from how working electricians keep their tools honest.
- Store leads loosely coiled. Tight wraps stress the wire and cause hidden breaks.
- Pull the battery if you won't use the meter for months. Leaks ruin the contacts.
- Zero an analog meter before ohms readings using the adjustment knob.
- Keep a known-good reference handy, like a fresh 1.5V cell, for a five-second sanity check.
One more: retest after any drop. A fall can crack a solder joint or shift calibration without leaving a mark. Thirty seconds of verification beats trusting a number you shouldn't.
The same discipline helps whether you're chasing an alternator's output or a simple household fault.
Frequently Asked Questions
Can I test a multimeter without a second meter?
Yes, and you don't need one. Touch the probes together on continuity for a beep, then measure a fresh AA battery for about 1.5 volts. If both check out, your meter is working fine.
Why does my multimeter read voltage but not amps?
That's a blown internal fuse almost every time. The amps circuit runs through a protective fuse, and voltage isn't affected when it blows. Open the back, test the fuse on continuity, and replace it with the same rating.
What does "OL" mean on my multimeter?
"OL" means over-limit, or an open circuit. It's normal when probes aren't touching on continuity. It's a problem when you expect a real reading, which usually points to too low a range or a broken lead.
How often should I check my multimeter?
Run the 30-second self-test before any job that involves live voltage or safety. Also retest after any drop. For occasional home use, a quick check every few months keeps you honest.
Your Quick Decision Checklist
Run these in order and you'll know exactly where the fault sits.
- Leads and casing look clean? If no, replace before testing.
- Probes beep near 0.0Ω when touched? If no, suspect leads or jacks.
- Fresh AA reads about 1.5V? If no, swap the meter battery.
- Known resistor reads within tolerance? If no, check range and function.
- Amps read zero but volts are fine? If yes, replace the fuse.
Pass every line and your meter is safe to trust. Fail one, and you've found your fix before it cost you a bad diagnosis or a shock.

Similar Posts