How to Change Your Oil Without Ramps or a Jack
Changing your car's oil in a driveway shouldn't require lifting the whole car off the ground. If you've been searching how to change oil without ramps or a jack, the good news is that three legitimate methods exist, and mechanics use them every day. Marine shops, motorcycle techs, and many European car workshops rely on them almost exclusively.
Your driveway can do the same.
The catch is that not every method fits every car. A center-sump 2018 Toyota Camry drains differently than a low-clearance Miata or a truck with 22 inches of ground clearance. As of 2026, the SAE J300 viscosity standard and API service categories still govern which oil you refill with, but the drain method itself is your call.
Here's how to pick the right one.
Quick Answer
You can change oil without ramps or a jack in three ways. Use a topside oil extractor through the dipstick tube. Drive up onto stacked 2×10 wood planks for extra clearance.
Or park with one wheel on a curb to lift a single side. Which method fits depends on your oil pan design and filter location.
Why Changing Oil Without Ramps or a Jack Is Even Possible
Modern engines weren't designed with the bottom drain plug as the only option. Boat engines, most BMWs, many Audis, and newer Volvos are engineered around topside oil evacuation. The dipstick tube runs almost straight down into the sump on these designs.
That's why a thin plastic pickup tube can reach the oil.
For everything else, gravity still does the work. You don't actually need much height, just enough clearance to slide a drain pan under the plug and reach a wrench. A few inches often makes the difference between "impossible" and "twenty minutes flat." Wood planks and curbs give you those inches without a hydraulic jack ever entering the picture.
There's a safety angle too. The EPA's used oil management guidance covers spill containment but says nothing about needing a lift. Working at driveway level, without a car balanced on stands, removes the biggest injury risk in home mechanic work.
The Three No-Lift Methods That Actually Work
Every no-lift approach falls into one of three buckets. Each has a sweet spot, and none of them cover every vehicle on the road.
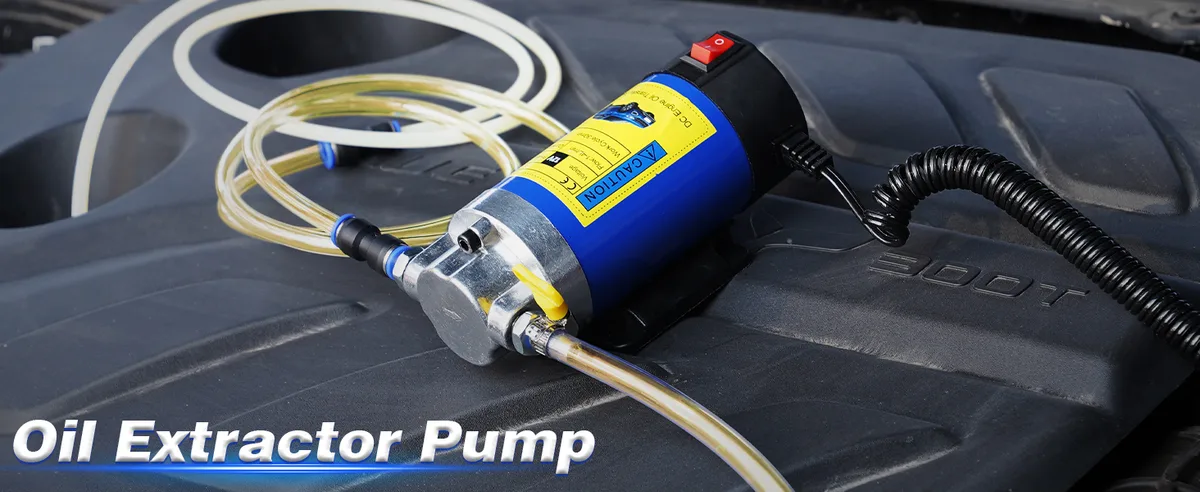
- Topside extraction: A hand-pump or electric vacuum pump pulls oil up through the dipstick tube into a sealed reservoir. Best for European cars and any engine with a straight dipstick path to the sump.
- Wood plank ramps: Stacked 2×10 or 2×12 lumber becomes a DIY ramp. You drive the front wheels up 3 to 6 inches, then work under the car with a low-profile creeper. Best for trucks, SUVs, and cars with reasonable existing clearance.
- Curb elevation: One front tire on a driveway curb tilts the vehicle sideways. Useful when the drain plug sits on the passenger side of a side-sump pan.
If you're brand new to DIY oil work, our walkthrough for first-time oil changers covers the tools and torque values before you commit to a method.
Check These Conditions Before You Pick a Method
Skip this step and you'll pick wrong. The right method depends on three physical variables on your specific car.
Ground Clearance Under Your Oil Pan
Grab a tape measure and check the distance from the ground to the lowest point of the oil pan. Then measure your drain pan's height (most sit 3.5 to 5 inches tall). If those two numbers don't leave room to work, plank ramps or curb elevation become required.
- Under 5 inches of pan clearance: extraction only, or plank ramps required.
- 5 to 8 inches: any method works, extraction is fastest.
- Over 8 inches: standard drain plug method, no lift needed.
Filter Location, Top-Mounted vs. Underneath
Look at your filter before you commit. Top-mounted cartridge filters (common on BMW, Mercedes, newer Ford EcoBoost, and most Volvos) make no-lift changes trivial. Underneath spin-on filters force you to get low regardless.
If the filter lives underneath and you've got under 6 inches of clearance, plan for plank ramps. There's no way around it.
Dipstick Tube Access and Diameter
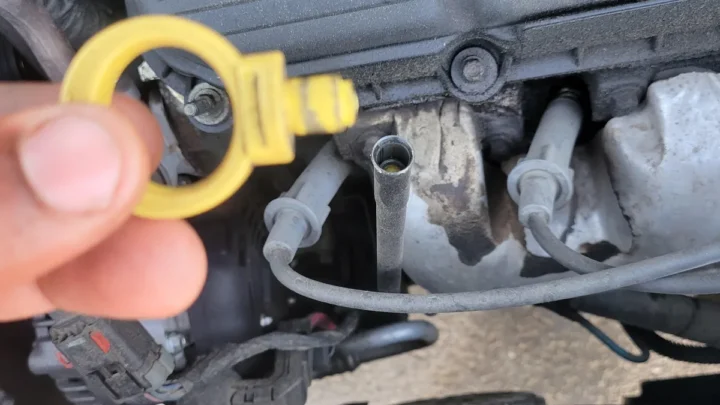
Topside extraction needs a dipstick tube that runs deep and straight into the sump. Pull your dipstick, measure its length, then check extractor tube diameters (typically 5mm, 6mm, or 8mm). The extractor tube must be thinner than your dipstick tube.
Test-fit before you start.
Some GM V6 engines, older Hondas, and certain Subarus have angled or narrow dipstick paths that block extractor tubes. Confirm compatibility on an owner forum for your engine code before buying.
Method 1: Topside Oil Extraction Through the Dipstick
Topside extraction is the fastest no-lift method, full stop. Aggregate reviews from marine forums and DIY communities show a full change takes 15 to 25 minutes on compatible engines. No jack, no ramps, no crawling.
What You Need
- A topside fluid extractor (6 to 10 liter capacity covers most crankcases)
- The correct tube diameter for your dipstick
- A rag for the fill cap and dipstick
- Fresh oil to your manufacturer's spec (check the owner's manual)
- A new oil filter and, if reachable from above, a filter wrench
Step-by-Step Extraction Process
- Drive the car until the engine reaches operating temperature. Warm oil (100°F to 120°F) flows out cleanly.
- Park on level ground. Engage the parking brake. Chock the rear wheels.
- Pull the dipstick, wipe it, and note its total length. Insert the extractor tube to the same depth.
- Remove the oil fill cap. This breaks the vacuum seal and lets oil flow.
- Feed the extractor tube down the dipstick tube slowly until it bottoms out.
- Pump the extractor 20 to 40 strokes to build vacuum. Electric units simply switch on.
- Wait. Oil takes 10 to 20 minutes to fully evacuate. Don't rush it.
- When flow stops, withdraw the tube, replace the filter if reachable, then refill through the fill cap.
- Run the engine 30 seconds, shut off, wait 5 minutes, then check the dipstick.
When This Method Falls Short
Extraction pulls oil from wherever the tube bottoms out. On high-mileage engines with sludge buildup, a thin layer of gunk can stay behind. Pan-drain scrapes the actual bottom via gravity.
Extraction doesn't.
It also fails when the dipstick tube is angled, blocked, or too narrow. And it does nothing for a bottom-mounted filter. If your filter is underneath and unreachable from above, extraction only solves half your problem.
Method 2: Wood Plank Ramps (The DIY Elevation Trick)
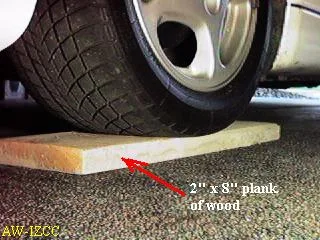
Wood plank ramps are the oldest trick in the driveway-mechanic playbook. Done right, they're stable, cheap, and lift the front of most cars 3 to 6 inches. Done wrong, they split under load.
Building a Safe Plank Ramp
Use pressure-treated 2×10 or 2×12 lumber cut to roughly 30 inches per plank. You'll need six pieces per side for a two-tier ramp.
- Lay two planks flat on the ground per wheel, side by side.
- Stack two more planks on top, offset by 4 to 6 inches to create the first step.
- Add the top two planks, offset again to form the second step. That taper is what lets the tire climb.
- Have a helper spot you while the driver eases the front wheels up until both tires sit centered on the top plank.
- Set the parking brake. Chock both rear wheels front and back. Rock the car by hand before crawling under it.
Load Ratings and Wood Selection
Southern yellow pine and Douglas fir are the standard picks. A 2×10 in Douglas fir handles roughly 1,500 to 2,000 pounds of point load when supported flat, well within the front-axle weight of most passenger cars. Avoid whitewood, cedar, and any board with visible knots at the load point.
Wet or rotted wood is disqualified on sight.
Run the same pre-lift checks you'd use when vetting a used car's underside: rocker panels, subframe rust, and suspect welds near your jacking points. Structural weakness above the tire is just as dangerous as a bad ramp below it.
Method 3: The Curb-Parking Hack for Tight Spaces
Parking one front tire on a driveway curb tilts the car sideways by 3 to 4 inches on that side. If your drain plug sits on the passenger side of a side-sump pan, that tilt is often all you need to get a wrench in.
The trick works best with a rolled curb or a low retaining wall (roughly 4 to 6 inches tall). Anything taller stresses the sidewall and CV joint. Anything shorter doesn't buy meaningful room.
- Verify the curb material can handle the tire load (concrete yes, brick edging no).
- Chock the wheel that stays on the ground and the two rear wheels.
- Never work under the tilted side without a jack stand as a backup.
- Skip this method entirely on lowered cars or anything with rocker skirts.
Which Method Fits Your Car: A Quick Decision Guide
Match your situation to the row below. Where two methods overlap, pick the one your driveway and tools already support.
| Situation | Best Method | Backup |
|---|---|---|
| BMW, Audi, Volvo with dipstick access | Topside extraction | Wood planks if filter is underneath |
| Truck or SUV with 8+ inches clearance | Standard drain, no lift | Wood planks for filter access |
| Sedan with 5 to 7 inches clearance | Wood plank ramps | Extraction if dipstick allows |
| Low sports car or lowered vehicle | Topside extraction only | Move to a shop for the filter |
| Side-sump pan with plug near edge | Curb elevation | Wood planks |
If your car falls outside every row, the honest answer is that no-lift isn't safe for you. Book a shop visit and revisit next oil change.
Choosing the Right Topside Extractor
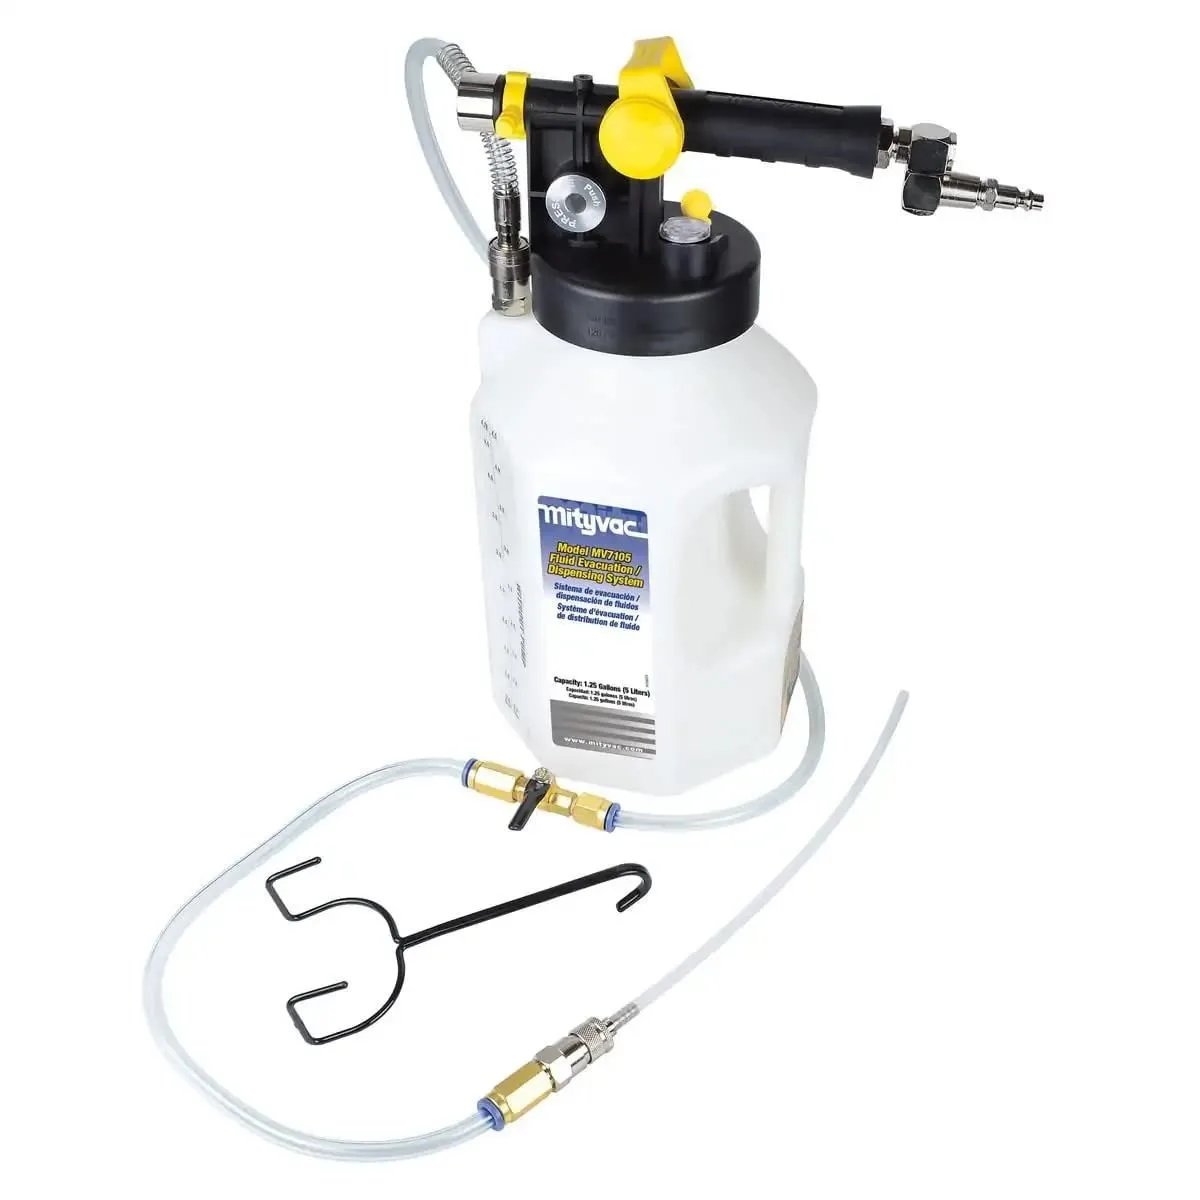
Extractor design matters more than brand loyalty. Four features separate a good unit from a frustrating one.
- Reservoir capacity: 6.5 to 9 liters covers 99% of passenger cars. Undersized units force mid-job dumps.
- Tube diameter options: Kits with 5mm, 6mm, and 8mm tubes fit more dipsticks.
- Pump type: Hand pumps work everywhere. Pneumatic units need a shop compressor. Electric units run off 12V from the battery.
- Reservoir material: Clear plastic lets you see oil color and volume as it fills.
Popular units include the Mityvac 7201, the Airpower America 5060, and various EWK pneumatic extractors. As of 2026, pricing runs $40 for basic hand pumps to $250 for shop-grade pneumatic models. For a single-car household, a mid-range hand pump around $60 to $90 pays for itself in two changes.
Mistakes That Ruin a No-Lift Oil Change
Most no-lift failures trace back to five recurring mistakes. All of them are avoidable.
- Cold oil. Oil below 80°F is thick, slow, and leaves residue behind. Warm the engine first.
- Not cracking the fill cap. Vacuum pressure inside the crankcase slows drain and extraction. Break the seal every time.
- Extractor tube stops short. If the tube kinks or hits a bend, it may sit above the oil surface. Measure dipstick depth and mark the extractor tube with tape.
- Cross-threading the drain plug. Working blind under a wood-ramp setup, it's easy to start the plug crooked. Always start it by hand, never with a wrench.
- Skipping the crush washer. Reusing a flattened washer causes slow leaks that show up as driveway spots a week later.
Overfilling is the other silent problem. Refill in stages, check the dipstick, and stop just below the max line. Overfilled crankcases foam the oil and starve bearings.
Safety Rules You Can't Skip
No-lift methods remove the biggest risk (a car falling off a jack), but they don't eliminate every hazard. These rules are non-negotiable.
- Chock the wheels. Both sides, both directions. Parking brake alone isn't enough on any incline.
- Never work under a wood-ramped car without a backup jack stand. Planks can shift.
- Wear nitrile gloves and safety glasses. Warm oil splashes, and used oil is a known skin irritant per OSHA hazard communication guidance.
- Contain spills. Cardboard under the drain pan protects concrete and satisfies most local stormwater rules.
- Keep a fire extinguisher within reach. Oil dripping onto a hot exhaust manifold can ignite. It's rare, but it happens.
Cold-climate driveways add one more variable. Below 40°F, extractor tubes stiffen and drain oil flows like molasses. Warm the engine longer in winter, or move the job indoors if you have a heated space.
Handling the Oil Filter Without Getting Under the Car
Top-mounted cartridge filters are a gift. Unscrew the plastic cap with a cap-style filter wrench, lift out the paper element, drop in the replacement, seat the new O-ring in fresh oil, and torque to spec. Ten minutes, dry hands.
Spin-on filters mounted on top of the block work the same way, just with a canister instead of a cartridge. Wipe the mating surface clean before installing. Hand-tighten three-quarters of a turn past gasket contact.
Never crank a spin-on filter with a wrench beyond that.
If the filter is underneath and you have zero clearance, you have two choices. Skip the filter this cycle and change it next time with the correct setup, or move the whole job to a shop. Running an unchanged filter for one interval on fresh oil won't hurt a healthy engine.
Disposing of Used Oil the Right Way
Used oil is regulated waste. Pouring it on gravel, into a storm drain, or in the trash violates federal law under the Resource Conservation and Recovery Act. It also poisons groundwater for decades.
The easy path is your local auto parts store. AutoZone, O'Reilly, Advance Auto, and NAPA all accept up to 5 gallons of used motor oil per visit at no charge. Bring it in the original bottles or in the extractor reservoir.
Municipal household hazardous waste sites take it too.
Old filters count as hazardous waste in some states. Drain them upside down for 24 hours over your drain pan, then drop them at the same recycling counter as the oil.
Making Future Oil Changes Easier (Fumoto and Quick-Drain Valves)
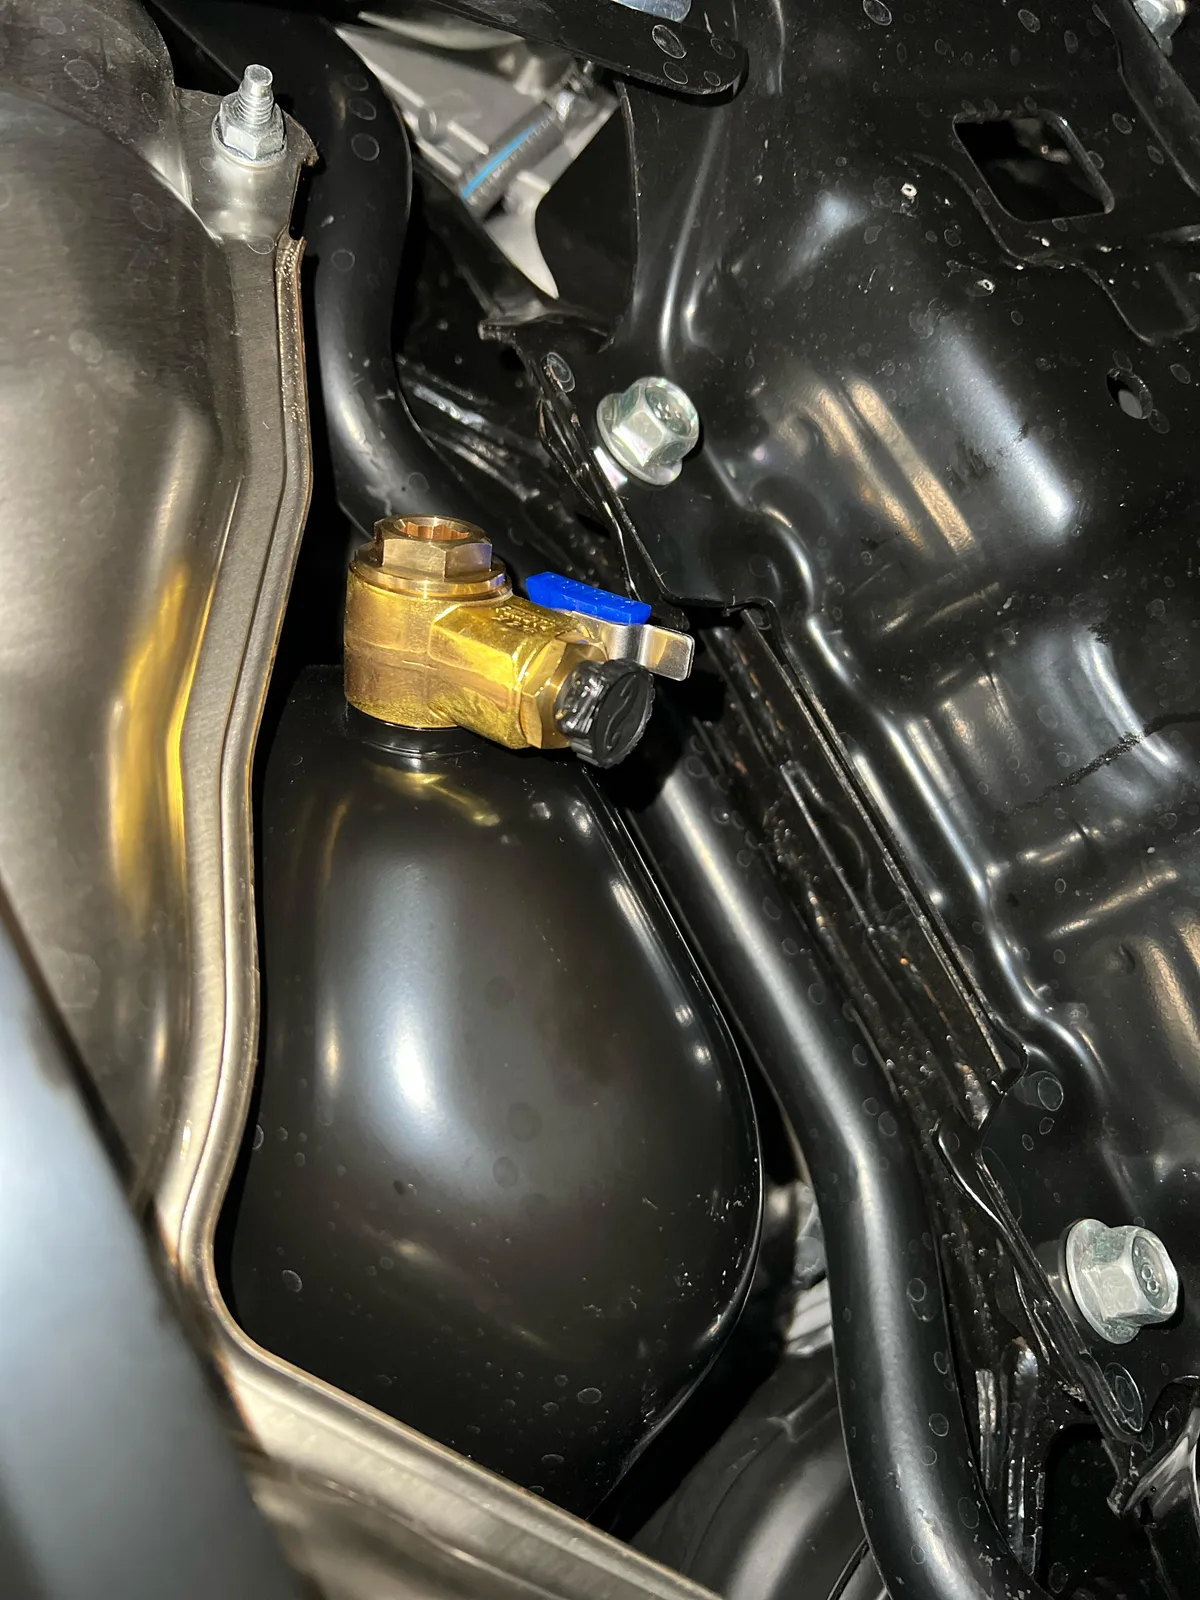
Once you've done a couple no-lift changes, install a quick-drain valve. It replaces the stock drain plug with a lever-operated valve. Next time, flip the lever and oil pours out.
No wrench, no hot bolt, no cross-threading risk.
The two dominant brands are Fumoto (Japanese-made, brass body) and EZ Oil Drain Valve. Both run $30 to $50, take five minutes to install, and last the life of the engine. Fumoto's F-series adds a nipple for a hose attachment so you can direct oil straight into a jug.
Combined with a wood-plank ramp setup, a quick-drain valve turns oil changes into a 15-minute job with zero tools past the filter wrench.
Frequently Asked Questions
Can you change oil without lifting the car at all?
Yes, on many vehicles. A topside oil extractor pulls oil up through the dipstick tube with no lifting required. It works on most European cars and any engine with a straight dipstick path to the sump.
Cars with narrow or angled dipstick tubes still need some elevation.
Is a topside oil extractor as good as draining from the plug?
For low-mileage engines with clean oil, results are nearly identical. On high-mileage engines with sludge, gravity drainage removes slightly more contaminants because it scrapes the pan bottom. Alternating extraction and pan drainage every other change is a common compromise in marine and European car communities.
How much clearance do you need to change oil without ramps?
You need enough clearance to fit a 3.5 to 5 inch drain pan under the plug plus your hand and a wrench. Roughly 8 inches of ground-to-pan clearance covers most people. Below that, wood plank ramps or curb elevation add the 3 to 6 inches needed to work comfortably.
Are wood planks safe to drive a car up on?
Yes, when built correctly from pressure-treated 2×10 or 2×12 Douglas fir or southern yellow pine with proper offset stacking. Avoid whitewood, cedar, cracked boards, and any wet lumber. Always chock the rear wheels, set the parking brake, and rock the car by hand before crawling underneath.
Do you still need a filter wrench for a no-lift oil change?
Usually yes. Top-mounted cartridge filters need a cap-style wrench that matches the housing size (32mm, 36mm, and 74mm are common). Spin-on filters need a strap or cup wrench for removal.
Only hand-tightened filters from a previous change come off without a tool.
The Bottom Line on No-Lift Oil Changes
No-lift oil changes are legitimate, safe, and faster than crawling under a jacked car when the method matches the vehicle. Extraction wins on European cars and anything with a top-mounted filter. Wood planks cover trucks, SUVs, and mid-clearance sedans.
Curbs handle the edge cases.
Pick the method based on your pan clearance, filter location, and dipstick geometry. Add a Fumoto valve after your first successful change. Then never fight a hot drain plug again.

Similar Posts